
Make Your Own DIY CNC. This instructable outlines the assembly process of my 2nd generation CNC machine which I designed to be simple to build and quiet enough to be apartment friendly.
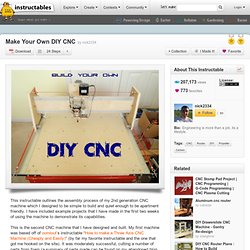
I have included example projects that I have made in the first two weeks of using the machine to demonstrate its capabilities. This is the second CNC machine that I have designed and built. My first machine was based off of oomlout’s instructable “How to make a Three Axis CNC Machine (Cheaply and Easily)” (by far my favorite instructable and the one that got me hooked on the site). It was moderately successful, cutting a number of parts from foam (a summary of parts made can be found on my abandoned blog here along with some build photos). The lack of overall stiffness and play in the linear mechanisms meant that plywood and plastics could not be cut effectively. 1) All of the drive mechanics are exposed. 2) The design has a low number of fabricated components and allows for low build tolerances. 3) Low operational noise.
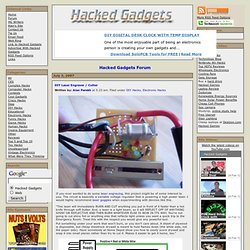
Pocket laser engraver. For the Arduino I started out writing my own software.
But while searching for a good way to control movement from the serial port I stumbled upon something called "Grbl ". This is a g-code interpreter with lots of nifty functions. As I already had everything connected to the Arduino I had to ether change my connections or change the software. Luckily it is easy to change control pins in the software. I did however have to download Winavr and then the code from github.com . I have however changed the pin-out since then and here in the instructable I use the default pin-out of Grbl.
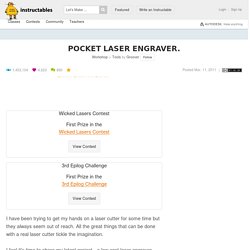
Important: The current version of Grbl (0.6b) has a bug in the queue system. Any way you choose to do it you will end up with a .hex file that you must get into the Arduino. The Arduino needs to be set up for the job. Grbl 0.6b '$' to dump current settings" If you enter $ followed by return you will get a list of options. You must change the steps/mm for X and Y axis to 53.333 on both. DIY Laser Engraver / Cutter. If you ever wanted to do some laser engraving, this project might be of some interest to you.
The circuit is basically a variable voltage regulator that is powering a high power laser. I would highly recommend laser goggles when experimenting with devices like this. “This laser will immediately BURN AND CUT anything you put in front of it faster than a hot knife through soft butter. And, a laser is a light beam, so it will REFLECT OFF OF ANYTHING SHINY OR REFLECTIVE AND THEN BURN WHATEVER ELSE IS NOW IN ITS WAY. You’re not going to cut shiny foil or anything else that reflects light unless you want a quick trip to the Emergency Room.
Put something under your work that won’t burn, or you don’t care about.
Laser-Cut Wooden 4 Axis Positioning System. Cnc. EasyDriver Stepper Motor Driver. Description: The EasyDriver is a simple to use stepper motor driver, compatible with anything that can output a digital 0 to 5V pulse (or 0 to 3.3V pulse if you solder SJ2 closed on the EasyDriver).
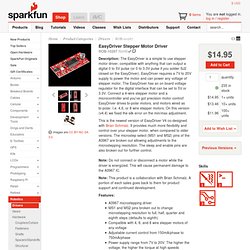
EasyDriver requires a 7V to 20V supply to power the motor and can power any voltage of stepper motor. The EasyDriver has an on board voltage regulator for the digital interface that can be set to 5V or 3.3V. Connect a 4-wire stepper motor and a microcontroller and you've got precision motor control! EasyDriver drives bi-polar motors, and motors wired as bi-polar. I.e. 4,6, or 8 wire stepper motors. This is the newest version of EasyDriver V4 co-designed with Brian Schmalz. Note: Do not connect or disconnect a motor while the driver is energized. Note: This product is a collaboration with Brian Schmalz. Features: Documents: Replaces: ROB-09402.