
Hard disk motor on arduino. Code, circuits, & construction. A stepper motor is a motor controlled by a series of electromagnetic coils.
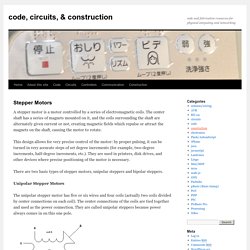
The center shaft has a series of magnets mounted on it, and the coils surrounding the shaft are alternately given current or not, creating magnetic fields which repulse or attract the magnets on the shaft, causing the motor to rotate. This design allows for very precise control of the motor: by proper pulsing, it can be turned in very accurate steps of set degree increments (for example, two-degree increments, half-degree increments, etc.). They are used in printers, disk drives, and other devices where precise positioning of the motor is necessary.
There are two basic types of stepper motors, unipolar steppers and bipolar steppers. Raspberry Pi Python Adventures: PyHacking step by step. Steppers Steppers, or stepping motors, are brushless DC motors.
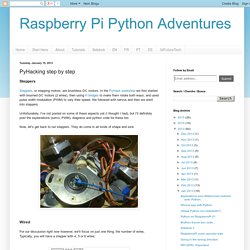
In the PyHack workshop we first started with brushed DC motors (2 wires), then using H bridges to make them rotate both ways, and used pulse width modulation (PWM) to vary their speed. We followed with servos and then we went into steppers. Unfortunately, I've not posted on some of these aspects yet (I thought I had), but I'll definitely post the explanations (servo, PWM), diagrams and python code for these too. Now, let's get back to our steppers. Wired For our discussion right now however, we'll focus on just one thing, the number of wires. Unipolar We are focusing today on the unipolar kind. The neat thing with them is they have a built-in gearhead with a 64:1 ratio, allowing for some torque and precision, and allowing for instant on full speed sequencing (no need to ramp up):
Stepper Motor Control In Python. Having played with LEDs, switches and buzzers I felt the natural next step was playing with a stepper motor or two.
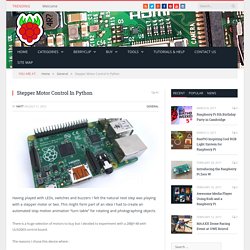
This might form part of an idea I had to create an automated stop motion animation “turn table” for rotating and photographing objects. There is a huge selection of motors to buy but I decided to experiment with a 28BJY-48 with ULN2003 control board. The reasons I chose this device where : It is cheapWidely available from both overseas and UK sellersEasy to obtain with a controller boardSmall but relatively powerfulRuns on 5VEasy to interface I ordered two from “4tronix_uk” on eBay and they arrived the next day. Adafruit Learning System - FrontMotion Firefox. Stepper motors fall somewhere in between a regular DC motor (Lesson 9) and a servo motor (Lesson 8]).
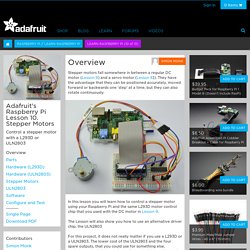
They have the advantage that they can be positioned accurately, moved forward or backwards one 'step' at a time, but they can also rotate continuously. In this lesson you will learn how to control a stepper motor using your Raspberry Pi and the same L293D motor control chip that you used with the DC motor in Lesson 9. The Lesson will also show you how to use an alternative driver chip, the ULN2803 For this project, it does not really matter if you use a L293D or a ULN2803. The lower cost of the ULN2803 and the four spare outputs, that you could use for something else, probably make it the best choice if you don't have either chip. The motor is quite low power and suffers less from the surges in current than DC motors and servos (which use DC motors).
Pi Stepper Motor. Code, circuits, & construction - FrontMotion Firefox. How to Wire Your Stepper. You have a stepper motor and you are wondering how to wire it to your driver board.

If you have a four lead motor, then that is plenty easy. But what if the motor has five, six or even eight wires? What can you do with them? RPi.GPIO 0.5.2a now has software PWM – How to use it » RasPi.TV. Over the last couple of weeks the pace of development for Python programmers who like to dabble in GPIO has gone up a gear.

Both main GPIO systems for Python on the Raspberry Pi have been getting some enhancements. RPi.GPIO, now at version 0.5.2a, has interrupts and threaded callback capability. You will probably have seen my three recent posts showing how to use those. WiringPi for Python version 2 is in Beta testing. I discovered two bugs while I was trying it out. RPi.GPIO PWM slipped in almost under the radar As well as breaking my interrupt examples – now fixed :-P adding further enhancements to the interrupt facility, e.g. incorporating debounce code, Ben Croston has also added software PWM to RPi.GPIO (0.5.2a onwards). So what?
It’s kind of useful. Do you remember when you were a kid, how you sometimes flicked the light switch on and off repeatedly, really quickly, to see what would happen? It’s a “square” waveform (on or off most of the time) and looks something like this… Frequency. How to use soft PWM in RPi.GPIO 0.5.2a pt 2 – led dimming and motor speed control » RasPi.TV. In part 1 of this series, we looked at the basic commands for using software pulse-width modulation (PWM) in RPi.GPIO 0.5.2a and higher.

In this article we’ll get a bit more hands-on and into some practical applications for it. It’s all very well being able to make nice square-wave pulses on an oscilloscope, but what’s it actually useful for? Our servo said? EEEEH AAAAH I tried using RPi.GPIO soft PWM with servos in response to a query after the last article, but, although it did change the servo positions, it was jittery. Leds The idea here is that you can switch an led on and off very fast and trick the eye into thinking it’s on all the time. Dimming leds using duty cycle. S Raspberry Pi Lesson 10. Stepper Motors. Motor shield with M35SP-7N. OK, so I got my motor shield in today and got it assembled (great documentation btw!)
Stephen C Phillips - FrontMotion Firefox. To properly control the stepper motor from the Raspberry Pi we need a class to represent it.

This is one of the most direct ways of understanding object oriented programming (OOP): from the class you make an “object” and the object represents and controls an object in the real world (the stepper motor). The class lets us remember (and control) all the information we need: the pins the motor is connected on;the speed of the motor;the angle the motor is currently pointing to. The motor seems to have 4096 positions (steps) it can point to. These don’t correspond exactly to degrees. Actually, it doesn’t move to the step position that is closest to the angle, it chooses step positions that are divisible by 8 because the control sequence has 8 steps in it and I didn’t want to bother starting or stopping in the middle of the sequence.
How Can I Determine My Stepper Motor Wiring Without the Stepper Motor Pinout? - National Instruments. Hardware: Motion Control Problem:I have a stepper motor but do not have the pinouts for the motor.

How can I determine how to wire my stepper motor without the pinouts? Solution: In general, 2-phase stepper motors can have 4, 6 or 8-wire leads (not including any optional encoder lines). Controlling Stepper Motor with a Parallel Port. Arduino/Junk pile stepper motor survey - Wikiversity - FrontMotion Firefox. The purpose of this page is to record the wiring of junked stepper motors to arduino motor shields. Stepper motors have 4 or more wires going into them.
Not all motors with 4 or more wires are stepper motors. Typically these motors do not settle down and display a constant ohm value.