
How To Build a Home Automation System with Raspberry Pi and Arduino. We’ve talked about the relative merits of Arduino and Raspberry Pi before – they each have their strengths.
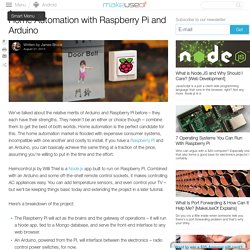
They needn’t be an either or choice though – combine them to get the best of both worlds. Home automation is the perfect candidate for this. The home automation market is flooded with expensive consumer systems, incompatible with one another and costly to install. If you have a Raspberry Pi and an Arduino, you can basically achieve the same thing at a fraction of the price, assuming you’re willing to put in the time and the effort. Heimcontrol.js by Willi Thiel is a Node.js app built to run on Raspberry Pi. Here’s a breakdown of the project: The Raspberry Pi will act as the brains and the gateway of operations – it will run a Node app, tied to a Mongo database, and serve the front-end interface to any web browser.An Arduino, powered from the Pi, will interface between the electronics – radio control power switches, for now. Tempest (codename) TEMPEST is a National Security Agency codename referring to spying on information systems through leaking emanations, including unintentional radio or electrical signals, sounds, and vibrations.[1] TEMPEST covers both methods to spy upon others and also how to shield equipment against such spying.
The protection efforts are also known as emission security (EMSEC), which is a subset of communications security (COMSEC).[2] The NSA methods for spying upon computer emissions are classified, but some of the protection standards have been released by either the NSA or the Department of Defense.[3] Protecting equipment from spying is done with distance, shielding, filtering and masking.[4] The TEMPEST standards mandate elements such as equipment distance from walls, amount of shielding in buildings and equipment, and distance separating wires carrying classified vs. unclassified materials,[3] filters on cables, and even distance and shielding between wires/equipment and building pipes.
System & hardware benchmark, monitoring, reporting. Install and Remove Since version 1.51, CPU-Z includes an installer.

The installation offers several advantages in comparison to the stand-alone version : The installation creates program entries in the start menu and on the desktop. It installs the right binary (x32 or x64) depending on your system. Installation Run the setup executable file, and let it guide you for the installation process. Removal You can remove the program either from the Add or Remove Programs window (from Settings, Control Panel), or choose Uninstall CPU-Z from Start menu, Programs, CPUID, CPU-Z. Configuration file CPU-Z uses a configuration file, cpuz.ini, that allows to set several parameters for the program. Application parameters Special Keys The F5 key allows to save a screenshot as a bmp file in the application directory. Cache Latency Computation. Project web – sourceforge.
Philips unveils poleless street lighting system. FreeStreet is a suspended street lighting system, that doesn't require streetlight poles Image Gallery (4 images)

IBF-Wiki. Lav din egen nas - Alt om DATA - Download, test, antivirus, netværk. 09. maj 2012 - kl. 13:05 I løbet af det seneste års tid har vi draget fordel af det utrolige prisfald inden for traditionelle roterende harddiske.
Indtil de tragiske oversvømmelser i Thailand var priserne faldet til 400 kroner pr. terabyte. Det havde fået mange af os til at opgradere vores systemer med nye drev, og det flød rundtomkring med gamle drev på 160GB til 500GB. Det oplagte spørgsmål er: Hvad skal vi gøre med disse drev? Projektets mål Opret en filserver Lav en netværksforbundet lagerenhed, der bruger gamle sata-harddiske, og som er konfigureret i et sikkert system med dataredundans og hurtig adgang. Det skal du bruge: Arduino. Hassock Hog motor controller description. The micro-controller was the "brain" of the robot controller, and as such it had to do a lot of tasks to do.
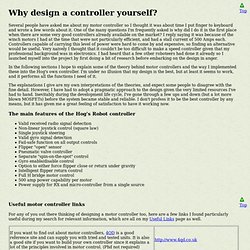
Some were going to be extremely time critical such as accurately measuring the width of the receiver pulses and sending pulses to the motor drive MOSFETs, while others could be fitted in as and when time allowed. I was hopeful that my choice of micro-controller was a good one, but it was only because of a few pertinent feature that the micro proved that it could handle all the tasks I needed it to. The critical features of the micro-controller were: Playground - GPS. Connecting a Parallax GPS module to the Arduino (Adapted from Igor Gonzalez Martin's Spanish language tutorial here.)
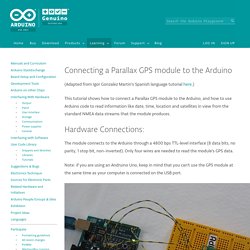
This tutorial shows how to connect a Parallax GPS module to the Arduino, and how to use Arduino code to read information like date, time, location and satellites in view from the standard NMEA data streams that the module produces. Hardware Connections:
Range finder. Arduino – Sonic range finder with SRF05. A guide to using the SRF05 Distance Sensor with Arduino in order to calculate distances from objects.
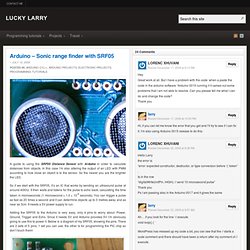
In this case I’m also altering the output of an LED with PWM according to how close an object is to the sensor.