
(16) Create a Snowy Mountain landscape in Blender 2.8. Simple low poly character design blender (Standard material) How to Create Realistic Rain - Blender Guru. Blender: Creating convincing terrains using height maps - PMG - Advertising Agency. If you have used 3d software in the past 10 years a program called Bryce3d may have passed through your toolkit.
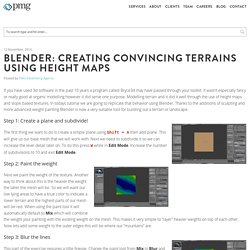
It wasn’t especially fancy or really good at organic modelling however it did serve one purpose. Modelling terrain and it did it well through the use of height maps and slope based textures. In todays tutorial we are going to replicate that behavior using Blender. Thanks to the additions of sculpting and more advanced weight painting Blender is now a very suitable tool for building out a terrain or landscape. Step 1: Create a plane and subdivide! The first thing we want to do is create a simple plane using Shift + A then add plane. Step 2: Paint the weight Next we paint the weight of the texture. Step 3: Blur the lines This part of the exercise requires a little finesse. Step 4: Apply displacement Now that we have painted our weights on to the mesh we need to apply displacement modifiers so the weights will transform our mesh. Step 5: Sculpt and refine the geometry.
Detailed Head Modeling. Detailed Head Modelingby Carlos R.
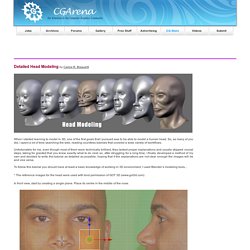
Bisquertt When I started learning to model in 3D, one of the first goals that I pursued was to be able to model a human head. So, as many of you did, I spent a lot of time searching the web, reading countless tutorials that covered a wide variety of workflows. Unfortunately for me, even though most of them were technically brilliant, they lacked proper explanations and usually skipped crucial steps, taking for granted that you knew exactly what to do next; so, after struggling for a long time, I finally developed a method of my own and decided to write this tutorial as detailed as possible, hoping that if the explanations are not clear enough the images will be and vice versa.
To follow this tutorial you should have at least a basic knowledge of working in 3D environment, I used Blender’s modeling tools... * The reference images for the head were used with kind permission of GOT 3D (www.got3d.com) In front view, start by creating a single plane. 45 Epic Blender Tutorials. Blender Character Modeling 1 of 10. Blender Character Modeling 4 of 10. Blender-Tutorial - Große Landschaften texturieren (Cycles) Create a High Rise Building - Part 1 of 2. Greetings Blender heads!
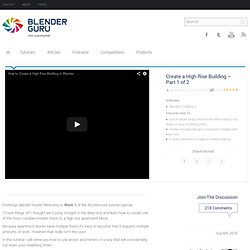
Welcome to Week 1 of the Architecture tutorial special. To kick things off I thought we’d jump straight in the deep end and learn how to create one of the most complex models there is, a high rise apartment block. Because apartment blocks have multiple floors it’s easy to assume that it requires multiple amounts of work. However that really isn’t the case. In this tutorial I will show you how to use arrays and mirrors in a way that will considerably cut down your modelling times. Here is a link to the reference image I used: Flickr (taken by Irene Kane). Click here to watch Part 2. Blender 3D: Noob to Pro/Multiple Materials Per Object - Wikibooks, open books... The finished render.
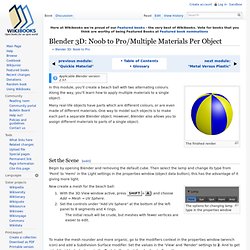
In this module, you'll create a beach ball with two alternating colours. Along the way, you'll learn how to apply multiple materials to a single object. Many real-life objects have parts which are different colours, or are even made of different materials. One way to model such objects is to make each part a separate Blender object. However, Blender also allows you to assign different materials to parts of a single object. Set the Scene[edit] Begin by opening Blender and removing the default cube. The options for changing lamp type in the properties window. Blender 3D: Noob to Pro/Modeling a Human Character - Modeling. As with many models done in box modeling, let's start with a cube.
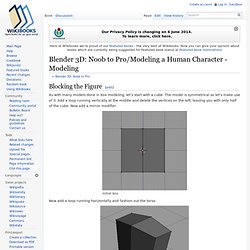
The model is symmetrical so let's make use of it. Add a loop running vertically at the middle and delete the vertices on the left, leaving you with only half of the cube. Now add a mirror modifier. Now add a loop running horizontally and fashion out the torso. Add a vertical loop on the torso so that we will have more geometry to work on. Extrude the head and the legs. Now add a loop around the torso and extrude out the arms. Blender 2.64 character modeling tutorial part 1.