
Raspberry Pi - run program at start-up. Anyway, I wanted to get my Raspberry Pi to start no-ip dynamic dns service when it started-up, so I wouldn't have to remember to start it every time it was powered up.
For details on how to install no-ip on the Pi, see this post. There are loads of ways of running a command at start-up in Linux but my favoured approach is to create an initialisation script in /etc/init.d and register it using update-rc.d. This way the application is started and stopped automatically when the system boots / shutdowns. Create script in /etc/init.d sudo nano /etc/init.d/NameOfYourScript The following is an example based on starting up the no-ip service [/usr/local/bin/noip], but change the name of the script and the command to start and stop it and it would work for any command. #! Make script executable. Adding commands to login sequence. Startup script (/etc/init.d) help. By sim_tcr » Tue Jan 01, 2013 7:13 am Hello,I use noip2 (version 2.1.9) agent on raspbian wheezy.
Coder Is a Simple Way to Code on the Raspberry Pi. Pimoroni - Raspberry Pi Cases and Accessories for kids, hackers, makers, educators and learners.
PiPlanter: a plant growth monitor. Building an Open-Source Home Automation System. Short Summary Hey folks!
I am Marco Schwartz, entrepreneur & electrical engineer, and founder of Open Home Automation where I teach people how to build their own home automation systems using open-source hardware. Simple timelapse camera using Raspberry Pi and a coffee tin. Whilst developing BerryCam I thought it would be pretty cool to create a timelapse camera that could be left outdoors over a period of time, to capture a sequence of images that could be later joined together into a video clip.
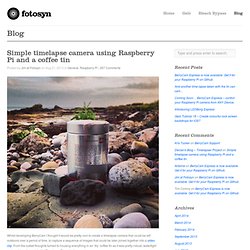
From the outset thoughts turned to housing everything in an ‘Illy’ coffee tin as it was pretty robust, watertight and could easily contain the Raspberry Pi and battery pack. What you need Raspberry Pi – Model A or B (A has better battery life)Raspberry Pi camera module installed and set upIlly coffee tin or similar sized container. Watertight and metal is best.Some clear plastic, taped onto outer tin over holePlastic holder for camera. I used the lid from the case of these batteriesElastic bands to hold the camera and cable in positionBattery pack – a 4xAA unit is best for size to power rating – I used this oneThe raspiLapseCam.py Python script. Setting up the camera A small hole drilled into the side of the tin allows the camera module to peer out of the tin.
Ls. Making A PiGlow Remote - Raspberry Pi @ Gadgetoid. A week or so ago I discovered the Pimoroni PiGlow via Twitter.
Not so long after, it arrived in the post and I excitedly set about discovering its ins-and-outs. First up, the PiGlow is small. Really small. It shouldn't come as much of a surprise, since in the photos its clearly narrower than the GPIO header. The diminuative size of the PiGlow counts in its favour, letting it fit snugly inside a PiBow case. The PiGlow neatly circumvents the current expense and supply problems with RGB LEDs, its 18 LEDs are discrete colours, fanning out from a central point in 3 spokes of white, blue, green, yellow orange and red triplets.
Turning the PiGlow on and off via SSH quickly got tedious, so I decided to put together a colour-wheel remote in Python and Javascript so that I could pick up any device around the house and adjust the lamp. Dewarping 360° images from the Pi camera board. Katherine Scott, newly equipped with a Raspberry Pi camera board, was looking for an image processing challenge.
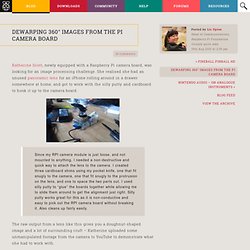
She realised she had an unused panoramic lens for an iPhone rolling around in a drawer somewhere at home, and got to work with the silly putty and cardboard to hook it up to the camera board. Since my RPI camera module is just loose, and not mounted to anything, I needed a non-destructive and quick way to attach the lens to the camera.
I created three cardboard shims using my pocket knife, one that fit snugly to the camera, one that fit snugly to the protrusion on the lens, and one to space the two parts out. How Raspberry Pi changes game for creatives and clients. Since its release in 2012, the Raspberry Pi has become a Great British innovation success story, selling over million units in its first 12 months, and even sitting alongside the likes of Sir Ranulph Fiennes and will.i.am as a cover star on Wired magazine.
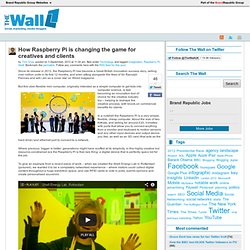
But this uber-flexible mini computer, originally intended as a simple computer to get kids into computer science, is fast becoming an innovation tool of choice for the creative industry too – helping to reshape the creative process, with knock-on commercial benefits for clients. In a nutshell the Raspberry Pi is a very simple, flexible, cheap computer. About the size of two KitKats, and selling for around £20, it bristles with ports that allow you to connect anything from a monitor and keyboard to motion sensors and any other input devices and output device you like, as well as an SD card (that acts as the hard drive) and ethernet port to connect to a network. First: Power. Tom Gray is Senior Creative Strategist at Imagination.