

Cron and Crontab usage and examples. Cron Cron is a daemon that executes scheduled commands.

Cron is started automatically from /etc/init.d on entering multi-user runlevels. Cron searches its spool area (/var/spool/cron/crontabs) for crontab files (which are named after accounts in /etc/passwd); crontabs found are loaded into memory. Note that crontabs in this directory should not be accessed directly - the crontab command should be used to access and update them. Cron also reads /etc/crontab, which is in a slightly different format. Cron then wakes up every minute, examining all stored crontabs, checking each command to see if it should be run in the current minute.
Additionally, cron checks each minute to see if its spool directory's modtime (or the modtime on /etc/crontab) has changed, and if it has, cron will then examine the modtime on all crontabs and reload those which have changed. Only jobs that run at a particular time (not specified as @hourly, nor with '*' in the hour or minute specifier) are affected. Manual Page for vncserver(1) Vncserver - a wrapper to launch an X server for VNC. vncserver [:display] [-geometry widthxheight] [-depth depth] [-pixelformat rgbNNN|bgrNNN] [-name desktop-name] [Xvnc-options...]

Networking - wifi setup for multiple networks. I recently stumbled across a console application that sorts all the wireless configuration hell out.
You can also use this tool to configure the LAN interface. sudo apt-get install wicd-curses It will install quite a few other packages but ir uns its own daemon in the background. This manages the networks and makes sure you connect to the ones you want. Run it with sudo wicd-curses If you get a message saying no networks detected press P (must be capital so use [SHIFT]p) and type in wlan0 in the wireless interface field and press F10 to save. Raspberry Pi WiFi configuration. Configuring WPA2 using wpa_supplicant on the Raspberry Pi. To use WPA2 pre-shared key on the Raspberry Pi, you will first need to add a network configuration to “/etc/wpa_supplicant/wpa_supplicant.conf”.
Note the lack of space in “network={“. ctrl_interface=DIR=/var/run/wpa_supplicant GROUP=netdev update_config=1 network={ ssid="Your SSID Here" proto=RSN key_mgmt=WPA-PSK pairwise=CCMP TKIP group=CCMP TKIP psk="YourPresharedKeyHere" } After you have modified wpa_supplicant.conf, you will need to change the “wlan0″ section of “/etc/network/interfaces”. Raspberry Pi and the Serial Port. Raspberry Pi and the Serial Port By default the Raspberry Pi’s serial port is configured to be used for console input/output.

Whilst this is useful if you want to login using the serial port, it means you can't use the Serial Port in your programs. To be able to use the serial port to connect and talk to other devices (e.g. Arduino), the serial port console login needs to be disabled. Needless to say you will need some other way to login to the Raspberry Pi, and we suggest doing this over the network using an SSH connection. Disable Serial Port Login To enable the serial port for your own use you need to disable login on the port. The first and main one is /etc/inittab This file has the command to enable the login prompt and this needs to be disabled.
Getting Started With Raspberry Pi. Servidor casero con Raspberry Pi: DNS local con actualizaciones DHCP. Bytes y formas de sacarle partido. Raspberry Pi Blog: Turn Raspberry Pi into a wireless access point. In this post I will demonstrate how to transform the Raspberry Pi into a Wireless Access Point.
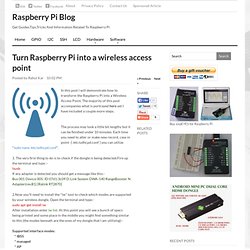
The majority of this post accompanies what is portrayed here yet I have included a couple more steps. The process may look a little bit lengthy but it can be finished under 10 minutes. Each time you need to alter or make new record, case in point -[ /etc/udhcpd.conf ] you can utilize "sudo nano /etc/udhcpd.conf". 1. The very first thing to do is to check if the dongle is being detected.Fire up the terminal and type :-lsusb If any adapter is detected you should get a message like this:-Bus 001 Device 005: ID 07d1:3c09 D-Link System DWA-140 RangeBooster N Adapter(rev.B1) [Ralink RT2870] 2.Now you'll need to install the "iw" tool to check which modes are supported by your wireless dongle.
Raspberry Pi Blog: Turn Raspberry Pi into a wireless access point. Interfacing with a Wiimote - Physical Computing with Raspberry Pi. Difficulty: intermediate This tutorial will show you how to connect a Wiimote to the Pi over Bluetooth.
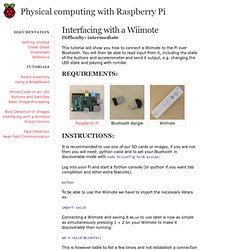
You will then be able to read input from it, including the state of the buttons and accelerometer and send it output, e.g. changing the LED state and playing with rumble. It is recommended to use one of our SD cards or images, if you are not then you will need: python-cwiid and to set your Bluetooth in discoverable mode with sudo hciconfig hci0 piscan. Log into your Pi and start a Python console (or ipython if you want tab completion and other extra features). python To be able to use the Wiimote we have to import the necessary library so: import cwiid Connecting a Wiimote and saving it as wm to use later is now as simple as simultaneously pressing 1 + 2 on your Wiimote to make it discoverable then running: wm = cwiid.Wiimote() This is however liable to fail a few times and not estabalish a connection but raise a RuntimeError, we will handle this when writing a fuller script. wm.state.
Desinstalar paquetes (por consola) Una de las maneras que tenemos en Ubuntu de desinstalar paquetes es mediante el comando apt-get remove.

Lo que hace este comando es desinstalar el software que ya no usemos pero nos deja los archivos de configuración y los archivos que hayamos descargado para su instalación. Raspberry Pi: tutoriales (servidor web, ownCloud y XBMC) Tutorial Raspberry Pi - 2. Crea tu propia nube con OwnCloud. Servidor web casero y económico con el Raspberry Pi. Antes de empezar recomiendo tener instalado y configurado la versión de Debian oficial de la web de Raspberry Pi.
En la web del IEEEsb-UniOvi he escrito un artículo explicando los pasos para instalar y configurar adecuadamente el sistema. Hay que instalar/configurar 6 tipos de programas: Acceso SSH (para administrar remotamente), Apache (servidor), PHP (para las páginas dinámicas), MySQL (base de datos), phpMyAdmin (para administrar fácilmente las bases de datos) y Cliente de DDNS (para mantener actualizada la IP de casa). Para ello usaré el manual publicado en: , y pondré aquí un resumen (recomiendo visitar la web original, pues viene todo explicado paso a paso). Habilitar SSH. RPi Low-level peripherals. Back to the Hub Hardware & Peripherals: Hardware - detailed information about the Raspberry Pi boards.
Hardware History - guide to the Raspberry Pi models. Low-level Peripherals - using the GPIO and other connectors. Los diez mejores proyectos para hacer con una Raspberry Pi en el hogar. Muchos de vosotros os estaréis pensando para qué sirve un Raspberry Pi. Otros ya tendréis una y estaréis buscando inspiración para ver qué tipo de proyectos podéis llevar a cabo con ella. En esta entrada vamos a ver qué tipo de usos podemos darle a una Raspberry Pi y cuáles serían los diez mejores proyectos para la placa de desarrollo más popular en este momento. Las ventajas de la Raspberry Pi y su hardware ya fueron descritas en otra entrada de Xataka Smart Home por mi compañero Pedro Santamaría, y podéis verlas aquí. 1. Diez proyectos que me gustaría hacer con la Raspberry Pi. Seguimos con nuestra cita con la Raspberry Pi, ese ordenador pequeño en tamaño y en precio pero casi infinito en posibilidades. Tras terminar en Xataka Home mi proyecto de ordenador portátil con la Raspberry Pi llega la hora de ver a qué otros proyectos dedicar el tiempo libre de experimentación.
Así, en esta entrada voy a hablaros de diez proyectos que me gustaría hacer con la Raspberry Pi, y que no descarto llevar a la práctica en el futuro. La idea es no reinventar la rueda y centrarme en proyectos cuyo coste sea inferior a lo que podríamos encontrar en el mercado con poco trabajo por nuestra parte. Camera board. Can I Install Google Chrome on Raspberry Pi? WL:Wifi Configuration - gc-linux. From gc-linux Our port of the Linux kernel to the Nintendo Wii supports the internal wireless LAN daughter card when booted via BootMii. The following sections describe the necessary steps to configure a wifi connection on Debian-based distributions (like whiite-linux). Preparing the firmware files The Nintendo Wii WLAN card requires a system provided firmware to operate. The team leaded by Francesco Gringoli and Lorenzo Nava from the Universita' degli Studi di Brescia has developed a custom firmware compatible with the Nintendo Wii WLAN card and distributed under the GNU General Public License.
The firmware files can be easily built using a Linux PC and following these steps, or alternatively you can download a pre-built tarball. 1. . $ mkdir workdir && cd workdir 2. . $ git clone 3. Chapucillas: Como apagar Raspberry Pi desde línea de comandos. Cómo apagar de forma segura tu RasPi usando un jumper de dis. Escritorio Remoto - Raspberry Pi - Electroensaimada DIY, Raspberry Pi, Arduino ... Cómo manipular imágenes desde el terminal. Tutorial Raspberry Pi – 7. Escritorio remoto VNC + NO-IP. Tutorial Raspberry Pi – 10. Conectar la Raspberry Pi al WiFi.