
Infrared (IR) Webcam. Make a super cheap 3D printer using recycled parts. Reverse Engineering LCD Displays. Over at DorkbotPDX in Portland, a member showed up with a stack of large LCD displays from point of sale terminals.
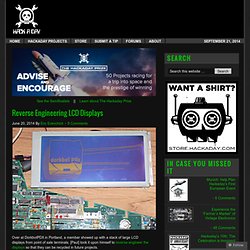
[Paul] took it upon himself to reverse engineer the displays so that they can be recycled in future projects. The control circuit for this LCD resides on a rather large PCB with quite a variety of components. The board was reduced to three main components: an MSM6255 display controller, a 32k RAM chip which is used as the framebuffer, and a tri-state driver. With all the unneeded components out of the way, a custom board based around an ATmega88 MCU was added.
This board was soldered in to interface with the LCD controller’s bus. Now that data could be written, [Paul] figured out the correct configuration for the display controller. Re-purposing an Old Laptop Display. [Tim] found himself with a laptop that had a good 18.4″ screen, but otherwise didn’t run properly.
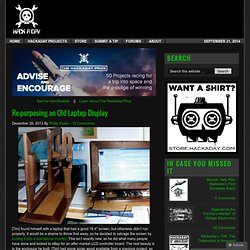
It would be a shame to throw that away, so he decided to salvage the screen by turning it into a standalone monitor. This isn’t exactly new, as he did what many people have done and looked to eBay for an after-market LCD controller board. The real beauty is in the enclosure he built. [Tim] had some scrap wood available from a previous project, so he set about designing a new frame for the monitor, and a very nice adjustable stand, as can be seen in the photo above. One nice detail is in the control panel buttons. Overall, it’s a nice looking project, and it is always nice to see electronics re-purposed rather than ending up in a landfill.
Cordless Power Tool Conversion 18VDC to 120/240VAC. Necessity is truly the mother of all inventions....and my case was no different.
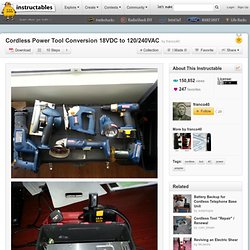
About a year ago, I found myself with a dead battery for my Ryobi 18V cordless tools and no means of getting a new one as I was working overseas. So I came up with a setup to run my tools off AC (household current) safely and with no worries of my tools dying halfway into the job. Now I enjoy all the benefits of battery operated power tools just as much as the next guy....They're convenient, flexible, and you can usually get quite an assortment of tools that run off the same battery. Then the inevitable happens....you get the dreaded blinking set of lights on your charger and the batteries die out almost instantly. DIY Tazer/Stun glove *With Altoids Case. Wireless Power Charger! Wirelessly power your iDevices!
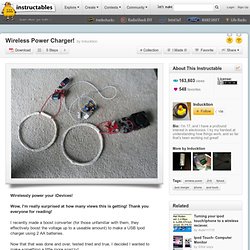
Wow, I'm really surprised at how many views this is getting! Thank you everyone for reading! I recently made a boost converter (for those unfamiliar with them, they effectively boost the voltage up to a useable amount) to make a USB Ipod charger using 2 AA batteries. Now that that was done and over, tested tried and true, I decided I wanted to make something a little more snazzy!
Video: Behold, the wireless ipod charger! Throbbing/Fading/Flashing LED with 555 Timer. How can a battery be made to charge faster? IOGear GBU221 Bluetooth antenna mod. First things first, you know the scoop if you decide to do this or something similar based on my insane ramblings and you screw up your hardware, blow your computer up, electrocute yourself, skewer your hand with a screwdriver, etc, etc, etc its not my fault.
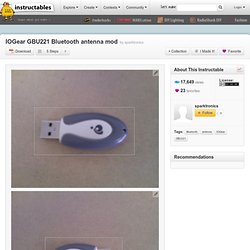
Ok, here we go. First up you need to crack the case. You will find its just snapped together with plastic clips, I used a small flathead screwdriver but feel free to use whatever implement you like. Be careful not to damage the case or brake any of the plastic clips. External Bluetooth Antenna for Increased Range! FIRST THINGS FIRSTMusic, for this hack i listened to an iTunes Genius playlist based on Evil by Interpol.

Including CSS, The Bravery, Modest Mouse, Yo La Tengo, Menomena, MGMT, Franz Ferdinand and Death Cab. it was beautiful. In order to do this, I of course needed a bluetooth dongle! (I love saying dongle. dongle dongle dongle!) After shopping, I pulled out the trusty credit card (lifesaver of the unemployed) and purchased this mighty little dongle. it even has an external antenna! Upon receiving my package in the mail, and pulling out the usual junk (except the nifty USB extension cable! So after some googling. found thisthis fancy instructable, on adding an external antenna.
Things You Can Do With Small Motors. Diy spy drone. ATX to Lab Bench Power Supply Conversion. First, a bit of background on a typical ATX power supply: Computer power supplies are Switch Mode Power Supplies (SMPS), which use high-frequency switching circuit elements to provide a high-quality output voltage, with good energy efficiency.
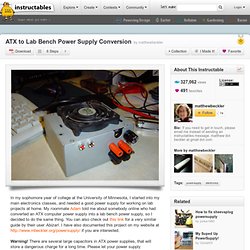
One side effect of this technology is the minimum load requirement that each power supply has. In order to function properly, the power supply needs at least a very small electrical load connected to it. In other words, ATX power supplies will only work if you have something connected to it. Altoids Tin Portable Breadboard with Power Supply.
Simple Light Detector with Sensitivity Control. The schematic diagram for the circuit is given in the picture above.
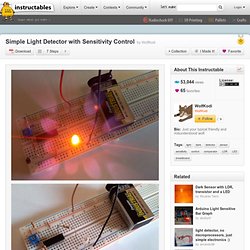
Like its name suggests, a comparator compares two given voltages. The pair of 1K ohms resistors create a voltage divider and provide a 4.5 volts reference for the comparator. The variable resistor and LDR both form another pair for a second voltage divider. When light falls on the LDR, its resistance lowers and that voltage divider provides a voltage lower than 4.5 volts. The comparator produces no output (0 volts). An interactive flash animation of how the circuit works can be accessed by clicking here or on the file below.
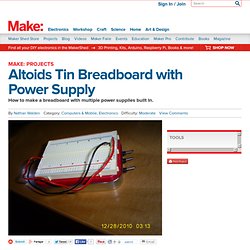
Altoids Tin Breadboard with Power Supply. Step #1: PrevNext First you should gather the parts:1 half-sized breadboard.1 regular 50+ Altoids tin.Three 1-way toggle switches.A nine-volt battery and clip.1 single-AA or AAA battery holder and batteries for it.1 2-AAA holder and batteries (preferably) or if not, a 2-AA holder and batteries.At least 3 feet of red wire and three feet of black.
Make sure you have both; color-coding is helpful when wiring. Use 20- to 24-gauge wire. A high power LED flashlight. Building flashlights seems to be a fixation of mine.
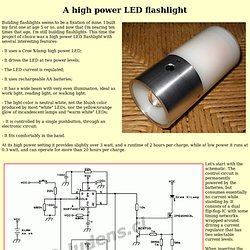
I built my first one at age 5 or so, and now that I'm nearing ten times that age, I'm still building flashlights. Fully Functional Television Oscilloscope. This project involves working in close proximity to the television's exposed flyback transformer and high voltage capacitors, which are both potentially lethal devices if you do not take proper safety precautions. First, the obvious step: Is it plugged in? Edge Lit Displays. Do you ever need a cheap, quick way to make an impressive display? Do ever want to show more than a blinking LED but want something easier to use than a LCD? Do you want to make light appear to hover in mid-air? Then give some thought to edge lighting. Camera-flash-diagram.gif 400×300 pixels. Scavenging OR salvaging electronic components. Diy prank shock. Build a World's Smallest Electronic Shocker! AdWords We use AdWords to deploy digital advertising on sites supported by AdWords.
Ads are based on both AdWords data and behavioral data that we collect while you’re on our sites. The data we collect may include pages you’ve visited, trials you’ve initiated, videos you’ve played, purchases you’ve made, and your IP address or device ID. Diy magnetic door lock. LED Testing.