Raspberrypi Arduino and kits
> Mikeharri
Balena-sound - Home. ISS Mimic: A Raspberry Pi-powered International Space Station model that syncs with the real thing. A group of us NASA engineers work on the International Space Station (ISS) for our day-jobs but craved something more tangible than computer models and data curves to share with the world.
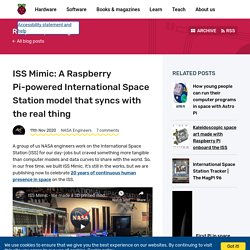
So, in our free time, we built ISS Mimic. It’s still in the works, but we are publishing now to celebrate 20 years of continuous human presence in space on the ISS. This video was filmed and produced by our friend, new teammate, and Raspberry Pi regular Estefannie of Estefannie Explains it All. Most of the images in this blog are screen grabbed from her wonderful video too. What does Mimic do? ISS Mimic is a 1% scale model of the International Space Station, bringing the American football field-sized beauty down to a tabletop-sized build. Physical connection Despite the global ISS effort, most people seem to feel disconnected from space exploration and all the STEAM goodness within. Raspberry Pi brains and Braun As you may have guessed, a Raspberry Pi is the brain of the business.
Luni64/VisualTeensy: VisualCode projects for PJRC Teensy boards. Arduino Hero Toolbox & The Plantmeter – Build Comics. In this adventure the Arduino Hero Toolbox has a run in with a different kind of meter than it is used to… The antagonist of this story rises as a Hartmann & Braun type portable 60 ampere gauge.

Looking inside we find the meter mechanism and a fairly large coil. The coil consists of four double wires with 16 loops each. The antagonist is of the type Moving Iron. Moving iron meters are non-linear, require a lot of power and are difficult to get accurate.
PX-HER0 Board. PX-HER0 is a low-power ARM Cortex development board that’s been carefully crafted with embedded education in mind - hardware, software, and documentation.
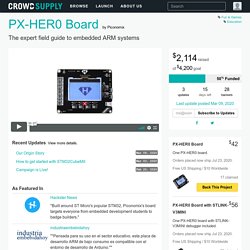
Discover and free your inner embedded hero! ARM Cortex Educational Tool. Arduino Shield List. ESP32-CAM Video Streaming and Face Recognition with Arduino IDE. This article is a quick getting started guide for the ESP32-CAM board.
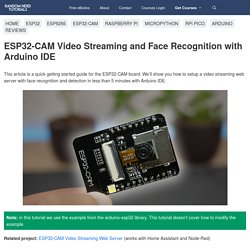
We’ll show you how to setup a video streaming web server with face recognition and detection in less than 5 minutes with Arduino IDE. Note: in this tutorial we use the example from the arduino-esp32 library. This tutorial doesn’t cover how to modify the example. Related project: ESP32-CAM Video Streaming Web Server (works with Home Assistant and Node-Red) Watch the Video Tutorial You can watch the video tutorial or keep reading this page for the written instructions. Parts Required To follow this tutorial you need the following components: You can use the preceding links or go directly to MakerAdvisor.com/tools to find all the parts for your projects at the best price!
Technoblogy. 2nd February 2019 This is a small battery-powered thermometer that displays the temperature as a binary sequence of red and green flashes on a bi-colour LED: ATtiny10-based thermometer, flashes the temperature on a bi-colour LED.

It consists of an ATtiny10, a DS18B20 1-wire temperature sensor, and a bi-colour LED, and fits on a printed circuit board 19mm (0.75") in diameter including a 12mm CR1225 button cell. To avoid the need for a digital display, and minimise current consumption, the thermometer pulses the temperature as a series of red or green flashes on the bi-colour LED. It's based on my earlier project ATtiny10 Thermometer, which also gives details of the way in which temperatures are encoded.
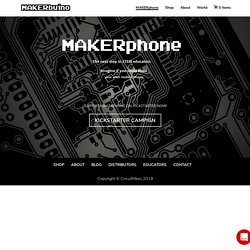
KiteBoard. CircuitMess/MAKERphone: A DIY mobile phone project that recently launched on Kickstarter. MAKERphone. The next step in STEM education Imagine if you could build your own mobile phone.
LattePanda – A Windows 10 Computer with integrated Arduino. Old, dusty portable DVD player given new life with Pi Zero W. Compukit UK101 - Reg's Microcosm. The Compukit UK101 was my first computer build, so happening on this site bought back memories of soldering all night long and actually getting it to work; all before going off to work that morning!
I still have this machine in the loft – I wonder if it still works? I reproduce Johns pages here for posterity and just in case all his work on this resource disappears. The following pages was created by John Honniball.
OpenHardware.io - Enables Open Source Hardware Innovation. Visuino. Viduino is designed around the concept of software components.
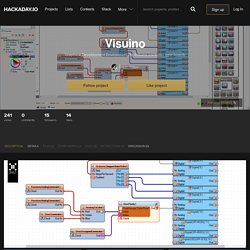
Each component represents ready to use functionality. Some of the components represent and are designed to control real hardware such as Sensor, Motor or Servo, others are representing pure software functionality such as signal generator, filter, mathematical function, or communication protocol. The components have connection points called "Pins", and the Pins can be connected with "Wires" sending data between the components. Each component can have one or more pins capable of sending and receiving different data types. Visuino also includes components for sending multiple data channels through the Serial Port, and the Visuino IDE has Scope and Visual Instruments that can display the multichannel data, allowing the Maker to monitor and display simultaneously multiple sensors or data points from the project.
Electronic Waste Gets a New Life with a Raspberry Pi. Technology Published on August 5th, 2014 | by Jeff McIntire-Strasburg When we use the term “upcycling,” we’re almost always discussing creative reuse of materials by the crafty set: folks that have a sewing machine, and pinking shears, and a hot glue gun at the ready.
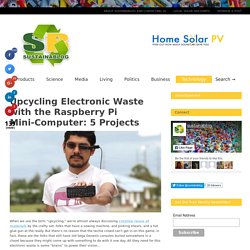
But there’s no reason that the techie crowd can’t get in on this game: in fact, these are the folks that still have old Sega Genesis consoles buried somewhere in a closet because they might come up with something to do with it one day.
ScratchX. What is ScratchX?
ScratchX is a platform that enables people to test experimental functionality built by developers for the visual programming language Scratch. What's the difference between Scratch and ScratchX? Scratch is a programming language and online community where you can create your own interactive stories, games, and animations. ScratchX is a separate experimental platform built to test experimental Scratch features, also known as Experimental Extensions. There is no login or community component to ScratchX, and projects created within ScratchX can only be run on ScratchX. What are Scratch Extensions?
Arduino Simulators Lineup - Start Developing Without a Real Board. Launched in 2005, the Arduino open hardware and software platform has grown to be very popular among hobbyists, educators, and professionals alike, gaining momentum especially in the robotics field.
Backed by a massive online community, and with most development boards and hardware accessories available at very low prices, this platform is perhaps the best place to start in working with embedded devices. But what if you want to learn programming and do not own an Arduino board, or are overwhelmed by the selection of hardware out there? This is where simulation software comes in.
PiBakery - The blocks based, easy to use setup tool for Raspberry Pi. Arduino-info - Nrf24L01-2.4GHz-HowTo. Print this pageUPDATES: (Comments,Critique to terry@yourduino.com) Having two or more Arduinos be able to communicate with each other wirelessly over a distance opens lots of possibilities:Remote sensors for temperature, pressure, alarms, much moreRobot control and monitoring from 50 feet to 2000 feet distancesRemote control and monitoring of nearby or neighborhood buildingsAutonomous vehicles of all kindsThese are a series of low-cost 2.4 GHz Radio modules that are all based on the Nordic Semiconductor nRF24L01+ chip.
(Details) The Nordic nRF24L01+ integrates a complete 2.4GHz RF transceiver, RF synthesizer, and baseband logic including the Enhanced ShockBurst™ hardware protocol accelerator supporting a high-speed SPI interface for the application controller. The low-power short-range (50-200 feet or so)Transceiver is available on a board with Arduino interface and built-in Antenna for less than $3! There is also a high-power version (right). nRF24L01 Modules (Left to Right) NOTE!
Build your own robotic vacuum from scratch. Build your own robotic vacuum from scratch Arduino Team — September 23rd, 2016 This dust buster-based robotic vacuum may or may not work as well as a Roomba. If you’re fascinated by the idea of a robotic vaccum cleaner to keep you from having to do certain chores, you could buy an iRobot, or you could make your own instead.
This particular DIY model uses four motors for locomotion, an Arduino Uno, IR and ultrasonic sensors to avoid obstacles, as well as a (formerly) handheld vacuum cleaner to suck up debris. The assembly sits on a wooden chassis, and as author B. In this project we will use the power of embedded systems and electronics to make our own robot which could help us in keeping our home or work place neat and tidy.
Bean - Punch Through.
Michael Teeuw. A few weeks ago I replaced the MagicMirror Raspberry’s power supply with a 2A version to improve stability. Unfortunately this new power supply tends to shutdown after a while. I expect this is caused by overheating due to the fact it was mounted directly on display. I’ve now moved the power supply to the bottom side of the mirror with some added spacing in between. Hopefully this solves the issue. 6domotica, iot, usb, power, magicmirror, internetofthings, raspberrypi, mirror, electronics, makers, smart, anotherhashtag. PfodApp V2™ and pfodDevices™
“A really great app but the underlying protocol is the real genius behind the app.Was able to develop a relatively sophisticated interface for an arduino project in a short time with straight forward code.Just about any embedded micro project can benefit from the interface that this app provides.”Google Play review posted by Greg Brandt Check out the new Arduino for Beginners, controlled by Android.
Also see Single Click Control for turning devices on and off with one click. For programmers check out the new pfodDesignerV2 which lets you interactively designs pfodApp menus and then generate the Arduino sketch to serve the menu via bluetooth or Wifi/ethernet or SMS and handles the commands returned.
Get C.H.I.P. - The World's First Nine Dollar Computer. PIK3A: The Raspberry Pi 3 IKEA Retro Gaming Table. Gaming is the perfect way to help newcomers to the Raspberry Pi to connect it with a recognisable lifestyle technology.
Thebenheckshow/223-Raspberry-Pi-Bitscope-Mod: In this episode Ben and Felix make a DIY Raspberry Pi Oscilloscope using the Bitscope and a Raspberry Pi 2.
Learn — Embedit Electronics. Learn. Teensy 3.2 + header:Amazon.co.uk:Computers & Accessories. FISHINO: Arduino becomes wireless. PSoC 4 Hints - MONTMAN.INFO. EduKit in partnership with The Pi Hut. From this page you can visit pages for all our EduKits. The EduKits are compatible with all models of the Raspberry Pi.
Goldilocks Analogue = classic Arduino + audio superpowers by Phillip Stevens. Goldilocks Analogue. Recap I’ve been working on the Goldilocks Analogue now for so long that its been the centerpiece of my coding evenings for the past 18 months.
This is the first time that I’ve designed a piece of hardware, and I’ve managed to make many mistakes (or learnings) along the way, so I think that every […] Just over 6 months since the third iteration of the Goldilocks Analogue Prototyping was started, and now I’ve finished the design for a forth iteration. The Goldilocks Analogue Prototype 4 design is now finished, and I’m working out what the final bill of materials will cost to assemble into a final outcome.
Testing for the […]
Make your own smart watch. LEDMatrix. Using Android cell phone and Arduino + BT to control LED ON/OFF. This is a simple example to implement how to use android mobile phone to control LED ON/OFF thru Arduino +BT HC_05.
Creating your first Scratch Program — Embedit Electronics. First off, here is a video demonstration of Scratch. It goes through the creation of a Scratch program that utilizes the RPiSoC’s analog functionality.
Raspberry Pi 7" Touchscreen Display - Raspberry Pi Swag. The 7” Touchscreen Monitor for Raspberry Pi gives users the ability to create all-in-one, integrated projects such as tablets, infotainment systems and embedded projects. The 800 x 480 display connects via an adapter board which handles power and signal conversion. Only two connections to the Pi are required; power from the Pi’s GPIO port and a ribbon cable that connects to the DSI port present on all Raspberry Pi’s.
Element14. Capacitive Switching with the Arduino Uno. MicroView: Chip-sized Arduino with built-in OLED Display! by Geek Ammo. 64 I/O Arduino Shield by mantas jurkuvenas. Quickly Prototype Circuits With New Inkjet-Printable Conductive Ink. Getting Started with the ESP8266 ESP-12. Servo Tools For Maya. An Arduino universal remote: record and playback IR signals. Arduino IR Remote Control with do-it-yourself info. Website. March 30 - Day 1: The World of PSoC.
Cypress PSoC4 Pioneer Kit Review. Supports PSOC 4 from Cypress - AnalysIR Blog. Website. PSoC Developer - Getting You To Market Quicker! PSoC Developer. Make: DIY Projects, How-Tos, Electronics, Crafts and Ideas for Makers. Embedit Electronics. Embedit - Celery. Element14. Ray Burnette - Hackster.io. Iain Chalmers. TechNERVE. SmartiPi Kit by SmartiCase. Sniff. Turning Technology into Art. LeoStick (Arduino Compatible)
Barth Development -
21 Arduino Modules You Can Buy For Less Than $2. Home Automation For Geeks. Sniffing SPI data with Bus Pirate. MSP430 Launchpad Tutorial - Part 2 - Interrupts and timers - Enrico Garante. Launchpad TI. Getting Started With the ESP8266 Chip - Open Home Automation. ESP8266 Projects. The Gizmologist's Lair. Arduino as a programmable logic controller (PLC)
Visual Development for Arduino by Mitov Software. Introduction to Arduino TCRT5000 (IR Sensor)
An open-source firmware based on ESP8266 wifi-soc.
PlcLib - PLC Software for the Arduino - Electronics and Micros. ESP8266: This $5 Microcontroller with Wi-Fi is now Arduino-Compatible. Flutter. Pi PoE Switch HAT - power over Ethernet for Raspberry Pi by Pi Supply. Fritzing. Arduino Maker Projects. Introduction to Arduino TCRT5000 (IR Sensor)
Free PCB Design Tools. Arduino Challenge!
Arduino Extras. Where to buy Kits & Components. Chip for Raspberry Pi by Soldering Sunday. RaspiCam (Rasberry Pi)
LinkIt ONE.
