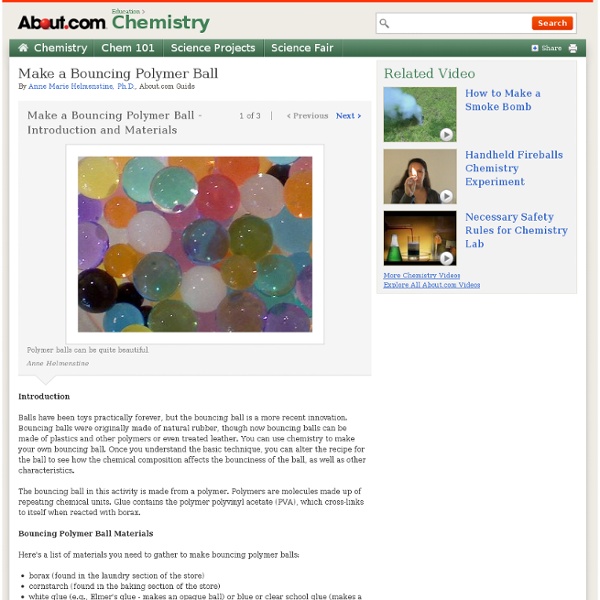
Make a Bouncing Polymer Ball - Experiment with Polymers
Introduction Balls have been toys practically forever, but the bouncing ball is a more recent innovation. Bouncing balls were originally made of natural rubber, though now bouncing balls can be made of plastics and other polymers or even treated leather. You can use chemistry to make your own bouncing ball. Once you understand the basic technique, you can alter the recipe for the ball to see how the chemical composition affects the bounciness of the ball, as well as other characteristics. The bouncing ball in this activity is made from a polymer. Bouncing Polymer Ball Materials Here's a list of materials you need to gather to make bouncing polymer balls: Let's make bouncing polymers balls... Polymer Projects Make Gelatin PlasticMake Plastic from MilkSlime RecipesMake Plastic Sulfur Plastics and Polymers Plastics and Polymers Science ProjectsExamples of PolymersWhat Is Plastic?
http://chemistry.about.com/od/demonstrationsexperiments/ss/bounceball.htm
Related: EXPERIMENTS
• Crafts
• DIY
11 cheap gifts guaranteed to impress science geeks
Science comes up with a lot of awesome stuff, and you don't need a Ph.D, a secret lab, or government funding to get your hands on some of the coolest discoveries. We've got a list of 11 mostly affordable gifts that are guaranteed to blow your mind, whether or not you're a science geek. Click on any image to see it enlarged. 1.
How to Make Cool Friendship Bracelets with Strings- Really Easy DIY Friendship Bracelet Pattern
Here, I've created another really easy DIY friendship bracelet pattern. To get started with this cool bracelet, you need to prepare 8 strands of nylon thread in five colors. Please keep reading and learn how to finish the easy cool friendship bracelet. Materials for making cool colorful friendship bracelet: 1mm Nylon Thread (5 colors) Lighter Scissors
Song Lyric Wall Art / D.I.Y. Project
A couple weeks ago, I found a paint-by-number at an unbeatable price. I can't pass these things up even though I already owned this particular design. I thought that I could maybe use it to make a fun D.I.Y., but my new rule is that all thrifts that I purchase with the intent of restyling need to get done right away. I have way too many half finished projects in my life.
vintage belt frame
I’m sure you’ve seen plenty of wayward western belts at vintage shops and thrift stores. Judging that most seem to be recent (early 80s) vintage, we can probably thank Kenny and Dolly for their previous popularity. So, what to do with this surplus if you’re not ready to reenact the look of Urban Cowboy? Why not find one to repurpose into a vintage styled picture frame? I know you’ve got an old pic of Grandpa that would work perfectly. — Matt See the full how-to after the jump!
DIY: Ottoman; Build your own from scratch
**All images are property of Do It Yourself Divas. Please do not use without permission. You are welcome to pin. **
Top 10 Mad Science-Worthy Chemistry Experiments
Chemistry is a fascinating science, but it's often taught poorly in today's boring schools. Here's how chemistry should be taught: by mad scientists! Here's Neatorama's list of the Top 10 Mad Science-Worthy Chemistry Experiments: 1. Briggs-Rauscher Reaction
Front post double crochet decrease, back post double crochet decrease and combined decreases
This tutorial will show you how to decrease the ribbing stitches front post double crochet, back post double crochet and also a combined decrease of the front and back post double crochet stitches. *Disclaimer: This post includes affiliate links. Stitches, terms and abbreviation used in this tutorial: fpdc: front post double crochet bpdc: back post double crochet fpdc dec: front post double crochet decrease
Organic Gardening… Growing Seedlings in Recycled Containers (tutorial)
I have been saving some old boxes and cardboard tubes and plastic lids and such for the past several weeks… it’s so wonderful how you can recycle things you find around your home into something you needed and wanted, for free! Today I’ll show you two different ways to create mini-greenhouses for your precious seedlings. Here are just some items from a large collection of recyclable goods I’ve been saving. After the planting season, I’ll just rinse out any plastics I’ve used and toss them back in the recycling bin. The cardboard I generally just plant right into the soil with the seedlings… that’s the advantage of using toilet paper and paper towel cardboard tubes for your seedling pots.
Related:


