
DIY $10 Macro Photo Studio. Today we are going to learn how to build a DIY light tent for product photography, for next to zero cost.
Even saying it costs "$10" is a bit of a stretch, because you can probably build this mostly for free. The ten dollars assumes you cannot scrounge a cardboard box and some white tissue paper you have saved in the gift-wrap supplies box. You can get this stuff at an office supply store, but it is more fun to scrounge. Besides, we are all about re-use and recycle here at Strobist. (I can proudly report that 98% of my bad jokes are recycled!) If you have this stuff, the only thing you will need to buy is two sheets of posterboard - black and white. Some Basic Theory Small flash gear is especially well suited for shooting macro shots and other small-object still life and product shots. Studio Lighting - Flash Mounted homemade DIY Softbox. If you are a photographer and using flash (either for studio pictures or for outdoor shooting), you are probably aware of the problems that a hot-shoe flash introduces: the shadows of an object are crisp-sharp, creating an artificial look to the object.
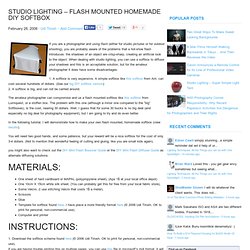
When dealing with studio lighting, you can use a softbox to diffuse your shadows and this is an acceptable solution, but for the amateur photographer it does have some disadvantages: 1. Studio Lighting - Soft Panel Frame Designed for Hotlight. A stand made of 3/4″ PVC to hold a diffusion panel made of ripstop nylon that slides up and down and tilts.
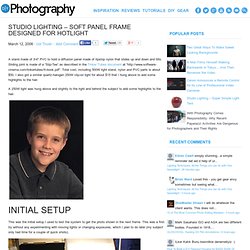
Sliding joint is made of a “Slip-Tee” as described in the Tinker Tubes document at “ Total cost, including 500W light stand, nylon and PVC parts is about $50. I also got a similar quartz-halogen 250W clip-on light for about $15 that I hung above to add some highlights to the hair. A 250W light was hung above and slightly to the right and behind the subject to add some highlights to the hair. This was the initial setup I used to test the system to get the photo shown in the next frame. This was a first try without any experimenting with moving lights or changing exposures, which I plan to do later (my subject only had time for a couple of quick shots). Fabric is hemmed on all sides, then stichted along the shorter 3′ ends to create a loop into which the PVC pipe slides at top and bottom. 500W worklight was purchased at Lowes for $31.
. © 2002 Brian L. Low On Budget? Consider A Desk Lamp + Softbox. If you read this blog long enough, you know I am a big fan of small strobes.
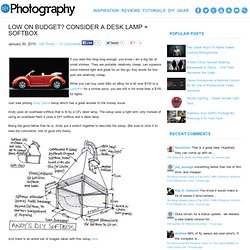
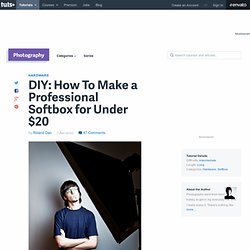
They are portable, relatively cheap, can squeeze some intense light and great for on the go. Key words for this post are relatively cheap. Studio Photography - The Best Softbox Ever. If you did not meet Nick Wheeler (Flickr Stream – a must) until now, you are in for a treat.
Nick is what I call a Lean Mean Studio DIY Machine. Unlike the softbox for a hot shoe flash and the softbox made from a well…. a box, this softbox design by Nick is as close to a real life studio softbox design as a softbox can be. As always, Nick has done great job of documenting his work so all the DIYP community can benefit. Making this studio grade softbox takes some time and effort, but well worth the investment. While this project is great, Nick calls it a prototype and plans on a follow up.
This is a DIY project I have had in mind for a while now. While I achieved most of these goals, the finished softbox was a bit heavier than I would have liked and as is usually the case with these projects I figured out a number of modifications I would like to incorporate into my next attempt after it was finished. For anyone interested, here is the full step by step build of the softbox: DIY: How To Make a Professional Softbox for Under $20. Nowadays a softbox needn't be all that expensive - you can get nice results for $100 or even less.
But what if there's a way of making it much cheaper, with the same results? That's what we'll be explaining in this DIY tutorial; how to make a softbox with professional results for less than $20. Step 1: What is a Softbox? A Softbox is a type of light modifier, used specially in studio or outdoor portraits. It creates a soft diffused light by directing light through some diffusing material. It can be used with either strobe light or continuous light sources. Step 2: Materials required In order to build the softbox, this is all you need: Large cardboardTapeAluminium foilGlueVelcro strapsScrews and nutsPaper roll (at least 40 inch wide, and 50 inch large) Black spray Step 3: Drawing and Measuring In this tutorial, we'll explain how to create a 30x25 inch softbox, but this method will work for any size.
First of all, you need to draw the four sides of the softbox in trapezoid shape. How to Create an Inexpensive Photography Lightbox.