
Render Passes, Layers, and 3D Compositing. A beauty pass (sometimes called diffuse pass or color pass) is the main, full-color rendering of your subject, including diffuse illumination, color, and color maps.
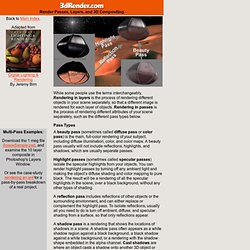
A beauty pass usually will not include reflections, highlights, and shadows, which are usually separate passes. Highlight passes (sometimes called specular passes) isolate the specular highlights from your objects. You can render highlight passes by turning off any ambient light and making the object’s diffuse shading and color mapping to pure black. The result will be a rendering of all the specular highlights in the scene, over a black background, without any other types of shading. A reflection pass includes reflections of other objects or the surrounding environment, and can either replace or complement the highlight pass. Photoshop Scripting. 3D Export from Vanishing Point Photoshop Extended.
Store.strata.com/SearchResults.asp?Cat=100. MAXScript 101. MAXScript 101 is a digital video-based introductory course for MAXScript, the scripting language in Discreet's 3ds max® and gmax® and Autodesk's VIZ 3D applications, designed and presented by MAXScript's creator, John Wainwright.
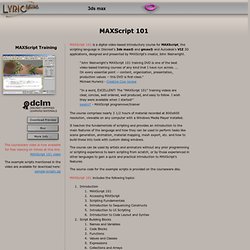
"John Wainwright's MAXScript 101 training DVD is one of the best video-based training courses of any kind that I have run across. ... On every essential point -- content, organization, presentation, production values -- this DVD is first-class. " Michael Hurwicz - Creative Cow review "In a word, EXCELLENT! The "MAXScript 101" training videos are clear, concise, well ordered, well produced, and easy to follow. The course comprises nearly 3 1/2 hours of material recorded at 800x600 resolution, viewable on any computer with a Windows Media Player installed. The source code for the example scripts is provided on the courseware disc. MAXScript 101 includes the following topics: 1-6 point perspective explained. This forty-page PDF takes you from traditional Renaissance, one and two point perspective, all the way to six point perspective.
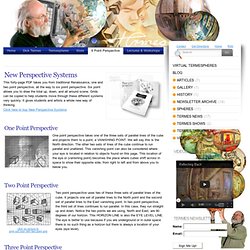
Six point allows you to draw the total up, down, and all around scene. Grids can be copied to help students move through these different systems very quickly. It gives students and artists a whole new way of thinking.Click here to buy New Perspective Systems. CAMERA MATCHING IN SIX STEPS IN 3DSMAX. Photo montage with camera match in 3d studio max. Second Picture is devoted to original tutorials about 3D graphics, Photoshop, Photography and Web Design.
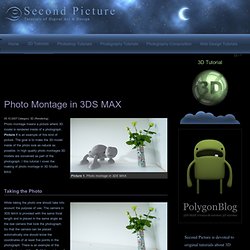
Picture 1. Photo montage in 3DS MAX. 05.10.2007 Category: 3D (Rendering) Photo montage means a picture where 3D model is rendered inside of a photograph. Picture 1 is an example of this kind of picture. The goal is to make the 3D model inside of the photo look as natural as possible. Taking the Photo Picture 2. 111_cameraMatch. Author Name: Andrei Kletskov (111) This is a script that creates camera according to perspective lines on your image.
It is sort of a beta version and has no error handling yet, so be warned:). 1 - get an image for which you want a camera being created. 2 - run the script (it is ordinary maxscript). 3 - press first button in UI and select the image 4 - an image plane and helper curve will be created 5 - modify helper curve (subcurves) so that they follow perspective lines, the vanishing points with three pairs of subcurves 6 - press the second button in UI, the camera with correct FOV will be created and another one, aligned to the image. 111_cameraMatch_tutorial.
Creating 3d model building. Modeling from Photographic Reference in 3DsMax. In today's tutorial, Pratik Gulati takes a look at how to reproduce a model from a reference image, even if you don't have any information on the camera used!
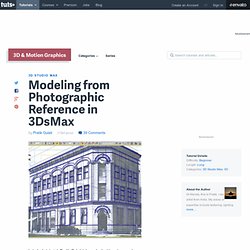
Let's take a look... An introduction This tutorial is divided into two parts : an introduction covering the different types of perspective, and then how to apply this knowledge when modeling from a reference image. Perspective is very important to keep in mind whilst creating architectural models; by understanding simple dimensions like the height of a door, or the average human height, we can often pick out visual cues which can then be used to recreate the models as accurately as possible. One of the biggest challenges in architectural modeling is trying to maintain a 'realistic' scale in our 3d application. The different types of perspective. Making Interior Scene. First of all have to create help lines in Adobe Photoshop (using line tool) to set the perspective of the image.
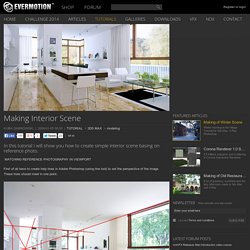
These lines should meet in one point. Open 3d Studio Max Now open Views -> Background view (shortcut ALT+B), it will allow You to select Viewport Background. Choose the reference file from hard disk and press ok. Now You have to change render output in rendering menu to match the resolution of reference file (in our case 1025 x 819 ).
Rendering Tip. Tip of the Week - Use Section Planes for realistic interior views For more information, check out these links.
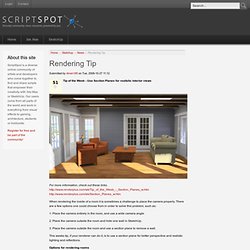
When rendering the inside of a room it is sometimes a challenge to place the camera properly. V-ray quick photorealistic room. This is a beginner-level tutorial on how to model and light a simple, photorealistic room with Vray.
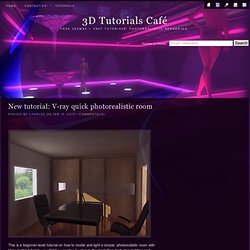
In this tutorial, we will take you step by step in the modelling, texturing, lighting and rendering processes required to create a photo-real room in Vray and 3dsmax. Well, let’s get started ! 1. You will need some texture files for this tutorial, download them here. 2. 4. Видео уроки 3d max, maya.