
Low-Poly Character Modeling and Texturing tutorial. Now go to 3dsmax and open the material editor (m) and pick an unused slot (one of the grey spheres). Click on the box next to Diffuse and choose Bitmap, just like before. Find your TGA texture and click ok. Now go back to the material main options (click the button circled in the image below) Check the 2-Sided option, and then scroll down to the rollout for +Maps and expand it. In the Maps rollout you should see the Diffuse Color has a Check next to it, and lists a map. A window will pop up, make sure you set it to Copy , not Instance. Now Click on the new map in Opacity and it will let you go in and edit it. Set the Mono Channel Out put to Alpha, and set the Alpha Source to Image Alpha. Now I changed my view to the Front view and went to the create tab and made 3 plans with 0 segments. I assigned the hair texture I just made to all 3 planes. All three planes should now show the entire hair texture on it with opacity.
Once it's all set, collapse the stack. Texturing with UVW & Unwrap UVW Maps. By Stealth_Snake | 3D Studio Max | Intermediate This tutorial will teach you a couple of methods to use to texture your objects in 3D Studio Max.

Texturing an object is understood as the process of adding skin and colour to an object. We are going to use UVW and Unwrap UVW Maps to texture our objects in this tutorial. This method involves the creation of a 2D map that is 'glued' to our 3D model. You are assumed to have the basic knowledge on how to model your own objects in 3D Studio Max. The point of this tutorial is to teach you how to apply textures to models that you have already created. To follow this tutorial please download this file. The first part of this tutorial will teach you how to texture using UVW and UnWrap UVW Maps. Open the file that you downloaded, you should see the model on the screen. Hiding objects that you are not using gives you more spaces and speeds up the viewport updates.
Multi/Sub-Object. ). Click to enlarge. Edit UVW's Window. Our first wall is done! Tutorial: Its all in the Eyes - By Adam Baroody. Eyes Creating a character is one thing but creating a character in 3d that has depth is another.
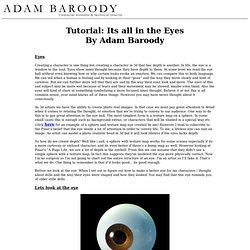
In life, the eye is a window to the soul. Eyes show inner thought because they have depth to them. At some level we read the eye ball without even knowing how or why certain looks evoke an emotion. We can compare this to body language. As 3d artists we have the ability to create photo real images. So how do we create depth? Before we look at the eye. Lets look at the eye Here's the eye. How real this eye looks depends on 3 factors: the actual geometry, shaders, and lighting. Geometry. 3D-Coat - Texturing of 3D Model.
PolyBoost. 3dS. Finalizing the 3d model of a human head in 3ds max. Second Picture is devoted to original tutorials about 3D graphics, Photoshop, Photography and Web Design. 23.10.2007 Category: 3D (Modeling) | Modeling Human Head in 3D Studio MAX 10/10 Finalizing the Eye Lids Picture 1. Eye lids are created by copying edges inwards. Activate border sub-object mode and select all edges surrounding the eye hole and create new polygons by copying edges inwards according to picture 1. 3D Modeling Inside the Mouth Picture 2. Picture 3. Select 9 edges surrounding the hole in the mouth and create new polygons by copying edges inwards according to picture 2. Activate polygon sub-object mode and use Editable Poly's "Hide Selected" and "Hide Unselected" buttons to hide all polygons except the ones surrounding the mouth.
Finalize the 3D Model of the Head Picture 4. Unhide all polygons and finalize the head. It should be fairly easy to modify this model for example to more realistic or more stylized direction. 3D Models, 3D Modeling Textures and Plugins at TurboSquid.