How to control a RGB or a WS2812 LED Strip with a Raspberry Pi. Measuring Internet Speed In Python Using Speedtest-cli. SpeedTest.net is an excellent website that lets you measure your internet upload and download speed.

It’s useful for checking the performance either for fault finding purposes or to see if you are getting the service promised by your ISP. Matt Martz has created a Python project called speedtest-cli which allows you to do a basic upload/download measurement using SpeedNet’s infrastructure. It works fine on the Pi and is really easy to try out on the command line. Installation Downloading the utility is easy if you clone the projects git repository : git clone Running SpeedTest To run the script you need to navigate to the directory : cd speedtest-cli and then run the Python script : python speedtest_cli.py The script will run and you should see something like this : If you add –share to the command like this : python speedtest_cli.py --share it will create a link to an online image showing your results which you can share with your friends/family/enemies.
Here’s mine : Video wall. “What’s innovative about a video wall?”
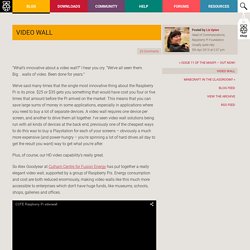
I hear you cry. “We’ve all seen them. Big…walls of video. Been done for years.” We’ve said many times that the single most innovative thing about the Raspberry Pi is its price. $25 or $35 gets you something that would have cost you four or five times that amount before the Pi arrived on the market. Plus, of course, our HD video capability’s really great. So Alex Goodyear at Culham Centre for Fusion Energy has put together a really elegant video wall, supported by a group of Raspberry Pis.
You can use different sizes and orientations of screen in the same set-up here; you can use the screens to show one large moving image or many small ones; you can display static content like photos or web pages alongside moving content on the same wall. Read more about what Alex has come up with at CCFE – we’re looking forward to seeing more of these in the wild! Raspberry Pi Wall Mounted Google Calendar : Raspberry Pi Setup.
First we'll setup the Raspberry Pi, to do this you'll need to have Raspbian installed.
You can buy a Pi with Raspbian pre-installed or you can use a 2GB or larger SD card that you already have. I am using an SD card I already have. Plug the SD card into your computer and download the latest Raspbian I'm using windows so I unzipped the file and used win32diskimager ( to write the Raspbian image to the SD card. If you are still not sure there is a tutorial here Ok now we have Raspbian installed it's time to get our Pi up and running, plug in your SD card, Wi-Fi dongle, USB keyboard, Ethernet cable to your router, HDMI to your monitor and lastly the micro USB cable to the power socket.
Raspberry Pi. Raspberry Pi as a VPN Wireless Access Point. The following post explains how you can turn a Raspberry Pi (RPI) into a wireless router that connects to the Internet over a VPN.
By plugging this into your existing wireless router, you give yourself a second wireless network, and any devices connected to this network will access the Internet over the VPN. This is especially useful for: Sharing a single VPN connection between several devices.Using the VPN connection with devices that don't support VPN or proxy settings. As an added bonus, the use of NAT and a couple of firewall rules provides a good level of security for any connected device. I've found this setup works very nicely, and is fine even for streaming media. Sources These instructions draw heavily from the following extremely useful articles: You'll Need A Rasberry Pi with Raspbian installed.A wireless USB adapter with a chipset that supports Access Point or Master mode.
Instructions Basic Security Initial Setup Install Software sudo apt-get install hostapd udhcpd bind9 openvpn. Browse Anonymously with a DIY Raspberry Pi VPN/TOR Router. Surf the Internet securely with your very own portable WiFi VPN/TOR router.

You can configure a Raspberry Pi with Linux and some extra software to connect to a VPN server of your choice. The VPN connection encrypts your internet traffic so that hackers and spies can’t figure out what web sites you are visiting, and the web sites you are visiting can’t tell which computer you are surfing from. Not sure what board is right for you? Make:’s interactive Board Guide lets you dial into the field to find the best one for your needs. The router is small and portable, so you can plug it in anywhere, adding secure internet browsing to any occasion, from your room to the café. The project consists of a Raspberry Pi, two USB WiFi dongles, an SD card, and a power plug.
Raspberry Pi Mumble / Murmur Server Complete Tutorial Guide Walkthrough HD.