
Getting Started With Raspberry Pi Archives - fossBytes. Evancohen/smart-mirror. HannahMitt/HomeMirror. Michael Teeuw. Being a guy while visiting a shopping city with your girlfriend may cause your mind to drift away while walking thru Macy’s.

Or at least, this happened to me while i was visiting New York last january. Long story short: while wandering around I noticed a mirror with an illuminated sing on it. This is something i could built myself. Only better. I wanted my own Magic Mirror! (Ok, a mirror like this would be awesome. Once home, I started to figure out what was needed: a mirror, a thin monitor, a Raspberry Pi, some wood and paint, and lots of spare time. The Mirror. Now, a regular mirror would not work. This is the same idea how a mirror in a police interrogation room works. What i needed was a observation mirror. Anyway, eventually I was able to get my hands on a nice piece of observation mirror: let the fun begin!
Magic Mirror Part II: The Monitor. This Raspberry Pi powered voice controlled smart mirror is mind blowing. A Seattle web developer has created a smart mirror that runs on voice commands.
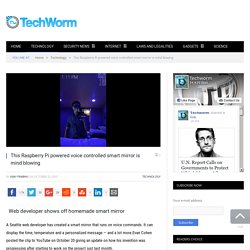
It can display the time, temperature and a personalized message — and a lot more.Evan Cohen posted the clip to YouTube on October 20 giving an update on how his invention was progressing after starting to work on the project just last month. Cohen’s mirror operates by turning it on with his voice commands, before getting it to display maps of Seattle and Berkley in California before he gets it to adjust the lights and the colour they emit in his room. “I started this project back in September and have been hacking things together in some of my spare time,” Mr Cohen wrote.
Cohen says he first got inspired to build his smart mirror when he saw the work of Hannah Mitt, who built an Android application that powers her mirror. Cohen also took some inspiration from Michael Teeuw’s “Magic Mirror” concept, but Cohen built his own project from scratch. RS Components. From cables and cases to cameras and cards, click below to find everything you need for your Raspberry Pi.
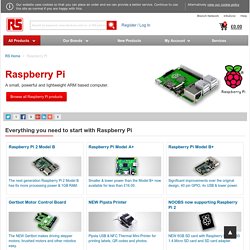
NEW Official Raspberry Pi Case The perfect case for your Raspberry Pi Model B and B+! Official Raspberry Pi red and white colour schemeFive separate pieces which clip togetherEasy access to all pins with a removable topCut outs for all connectors and the microSD card. About Raspberry Pi Based in the UK, the Raspberry Pi Foundation (registered educational charity number 1129409) aims to accelerate the education and improve the skills of children and adults in computer science, programming and related subjects.
What you need to get your Raspberry Pi up and running. Now that you have purchased either a Raspberry Pi Model A+ (833-2699) or a Raspberry Pi Model B+ (811-1284), the next question is “What else do I need to add to get things up and running?” Here we discuss some of the basics that every new user will require and links to help you get up and running as quickly as possible. In order to do anything there are some essentials required 1) Power Supply2) Operating System3) Keyboard and Mouse4) Cable to your choice of monitor or TV In addition once you have everything plugged in, you may want to connect to the internet or your local network. Five kits for building drones, gadgets and robots with your Raspberry Pi.
While the Raspberry Pi already has a range of add-ons to make it simpler to get started on making robots and other neat gizmos - there are always new kits around the corner.
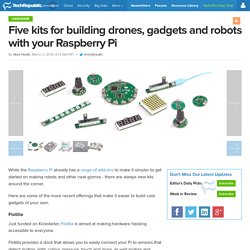
Here are some of the more recent offerings that make it easier to build cool gadgets of your own. Flotilla Just funded on Kickstarter, Flotilla is aimed at making hardware hacking accessible to everyone. Flotilla provides a dock that allows you to easily connect your Pi to sensors that detect motion, light, colour, pressure, touch and more, as well motors and simple screens. Controlling these electronics and linking them together can be done by dragging and dropping commands using a simple graphical interface.
Price: £24 ($36) - £109 ($165) Buy Raspberry Pi B+ Starter Kit - Embedded (includes Raspberry Pi B+) Online at Low Prices in India. Buy Raspberry Pi 2 Model B 1GB -The Complete Kit Online at Low Prices in India. Buy Raspberry Pi IR Camera Module - Pi NoIR Online at Low Prices in India. Buy Raspberry Pi 2 - MODB - 1GB - Quad core Online at Low Prices in India. NAVIO+ Autopilot HAT for Raspberry Pi B+/2 - Pimoroni. Navio+ is an improved version of Navio autopilot shield for Raspberry Pi 2/A+/B+.
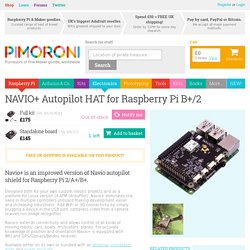
Designed both for your own custom robotic projects and as a platform for Linux version of APM (ArduPilot). Navio+ eliminates the need in multiple controllers onboard making development easier and increasing robustness. Add WiFi or 3G connectivity by simply plugging a device in the USB port, compress video from a camera or even run image recognition. Navio+ extends connectivity and allows control of all kinds of moving robots: cars, boats, multirotors, planes. For accurate knowledge of position and orientation Navio+ is equipped with IMU and GPS/Glonass/Beidou receiver. Available either on its own or bundled with an antenna, connection wires and power module! *Raspberry Pi & Frame not included Navio+ runs well proven APM autopilot and can operate in different flight modes including manual, stabilize, follow-me and auto. Use camera module, webcam or control a DSLR over USB. Navio+ - new version of Raspberry Pi autopilot [+ copter video] We are happy to announce the new version of our Raspberry Pi autopilot - Navio+, that was developed to run APM under Linux.
![Navio+ - new version of Raspberry Pi autopilot [+ copter video]](http://cdn.pearltrees.com/s/pic/th/version-raspberry-autopilot-117876619)
With more than 300 Navios in the wild we’ve got plenty of feedback and now it is time for an upgrade. We have been so busy testing and flying it, that almost forgot to share our latest progress. For those who never heard of Navio - Navio is a sensor and connectivity shield that allows to run APM’s Linux port directly on Raspberry Pi. Compared to the classic autopilot hardware it is more flexible and provides higher performance for additional tasks as well as for scientific and research purposes. For example, it is possible to perform GPS real-time processing or image recognition.
Full HD video from Raspberry Pi Camera Module can be streamed over long-range Wi-Fi or LTE thanks to the Raspberry Pi’s built-in hardware 1080p H.264 encoder. Here’s a list of main features of the new version: Make an open source Raspberry Pi drone with Navio+ #piday #raspberrypi @Raspberrypi. January 16, 2015 AT 12:00 am Navio+ Raspberry Pi inspired autopilot!
APM AUTOPILOTNavio+ runs well proven APM autopilot and can operate in different flight modes including manual, stabilize, follow-me and auto. First flight of Linux APM on Raspberry Pi 2 with Navio+ On the weekend we made the first flight of Linux APM on Raspberry Pi 2 with Navio+.
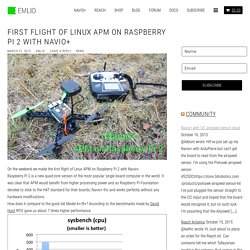
Raspberry Pi 2 is a new quad-core version of the most popular single board computer in the world. It was clear that APM would benefit from higher processing power and as Raspberry Pi Foundation decided to stick to the HAT standard for their boards, Navio+ fits and works perfectly without any hardware modifications. How does it compare to the good old Model A+/B+? According to the benchmarks made by David Hunt RPi2 gave us about 7 times higher performance.
For real-time performance we fly on PREEMPT_RT patched kernel only. Despite the strong wind copter behaves nicely, loiters steadily and overall is a lot of fun to fly. New Raspberry Pi 2 gives clear advantages over the older model, we are able to run main loop at 400Hz without missing a single cycle. Deb package and setup instructions are coming later this week. Raspberry pi. Raspberry Pi Quadcopter – DIY Drones. Raspberry Pi is a superpowerful and popular new computer board, like Arduino but with a much faster processor and built-in video.
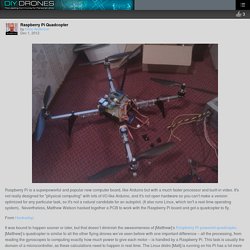
It's not really designed for "physical computing" with lots of I/O like Arduino, and it's not open hardware so you can't make a version optimized for any particular task, so it's not a natural candidate for an autopilot. (It also runs Linux, which isn't a real-time operating system). Nevertheless, Matthew Watson hacked together a PCB to work with the Raspberry Pi board and got a quadcopter to fly. From Hackaday: How to build your own Quadcopter AutoPilot / Flight Controller. Back to my home page Fig 1: 3DR Quadcopter Contents This article will walk you through building your own controller whilst teaching you the details of how it works.
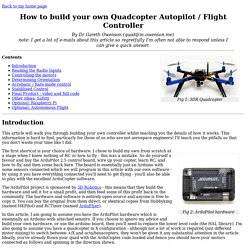
This information is hard to find, particarly for those of us who are not aerospace engineers! I'll teach you the pitfalls so that you don't waste your time like I did. Remote Controlled Quadcopter Based On Raspberry Pi. We have seen a lot of remote controlled quadcopters based on many micro processors or dedicated flight controllers, but not many people would have thought of running a Linux machine on a quadcopter!
Since Raspberry Pi has been very popular these years, and the it’s compact size and computation power compared to most micro-controllers, it would make a good flight controller. The PiCopter is a remote controlled quadcopter based on a Raspberry Pi. The Raspberry Pi handles all the flight control without using a micro controller like Arduino. However many people have doubt about Raspberry Pi doesn’t run in real time so might have trouble getting sensor data and sending commands to the motor in the right timing, eventually leads to instability. But Marlon explains “Hard real time” is not required (no need for real time kernel, only stardard Raspbian) as you only have to update the motors with at least 10hz.
Here is a video of the result. Related Fun Projects 5th July 2013. How feasible is it to use a Raspberry Pi as the control system on an autonomously flying quadcopter? Owenquad - Raspberry Pi based quadcopter with full walkthrough coding tutorial. Quadcopter+Raspberry Pi = PiCopter. Autonomous, Cardboard, Rasberry Pi Controlled QuadCopter. Cardboard from the recycling bin, The sheet we we used was 32"x20" with a thickness off around 4.1mm. A large clean box should do. Motors from Hobby King, 4x + Propeller clamps, We used Turnigy D3530/14 1100KV Brushless Outrunner Motor at $14.56 each. Our motors also came with propeller clamps which allowed us to easily connect our propellers to the motors. Electronic Speed Controllers (ESC) from Hobby King, 4x, We used TURNIGY Plush 18 amp Speed Controller at $11.90 each.
Propellers from GWS props, 2x counterclockwise rotating, 2x clockwise We used 3 bladed 8x4x3 GWS props at $2.00 each. Flight Controller from Hobby King, 1x We used HobbyKing Multi-Rotor Control Board V2.1 at $12.99 Flight Controller Mounting Pads from Hobby King, We got a pack of Gyro / Flight Controller Mounting Pad at $1.99 but one can also use double sided tape.
RC Receiver from amazon.com, 1x, We got a CSRC-RX3000 Spektrum DSM2 Compatible 2.4Ghz 6-Ch Receiver on sale for $9.99. Foam block, cut into 4 2 inch by 4 inch chunks, Accessories For Raspberry Pi. How to setup Raspberry Pi 2 Model B 900Mhz Quad Core 1GB RAM. Beginner. Servo control using Raspberry Pi. Controlling DC Motors Using Python With a Raspberry Pi. In this tutorial I will show you how to connect some motors to your Raspberry Pi. Doing so will allow your Raspberry Pi to interact in the real world, making it possible to build a robot, turn on a fan on a hot day or even drop a treat for your cat or dog while your away. What we plan to do is safely connect one or two motors to the Raspberry Pi with as few components as possible. Once we have the electronics put together on the breadboard, I will show you how to control them easily using Python to first make the motor spin, and then add some control to change the motor direction so we can go backwards.
This guide will require a careful eye to catch any mistakes, and a bit of courage, especially if you are new to the GPIO connectors. USB Camera for Raspberry Pi A+/B+/2 and PcDuino. Raspberry Pi 2 Model B. The New Quad-Core Raspberry Pi 2 - Setup and Testing.