
GIMP. Welcome to AdaptableGIMP - AdaptableGIMP Wiki. Adaptable Gimp – Laissez vous guider dans The Gimp. Adaptable Gimp – Laissez vous guider dans The Gimp Philosophiquement parlant, vous préférez The Gimp à Photoshop... oui mais The Gimp est tellement peu intuitif que vous en revenez toujours à la suite d'Adobe.
Pas facile de s'y retrouver dans toutes ces options et tous ces outils. Mais cessez de pleurez comme un petit faon perdu sur une autoroute et adoptez la Adaptable Gimp attitude ! Adaptable Gimp est une version modifiée de The Gimp qui intègre toute une série de bulles d'aides (en anglais) et ce que nos amis anglophones appellent des Task sets, c'est à dire des instructions pour faire telle ou telle chose.
Vous cherchez comment dessiner un rectangle ou enlever les yeux rouge d'une photo, et Adaptable Gimp vous accompagnera avec une doc et une mise en avant des outils que vous devrez utiliser (et dans le bon ordre) Bref, du pain béni pour les furieux qui veulent vraiment et définitivement passer à The Gimp. Le côté sympa avec les tasksets, c'est que vous pouvez même créer les votres ! (1) GIMP - Google+ - We are submitting a request to participate at Google Summer… Git Tutorials and Training. How to transform photos into pencil drawings using gimp ? Photo to Sketch. Turn Image into a Pencil Drawing - GIMP Tutorial.
Gimp Pop Art. How To Turn a Photo into Cartoon with GIMP. Photo to Comic Cartoon Effect #GIMP. Hey guys!
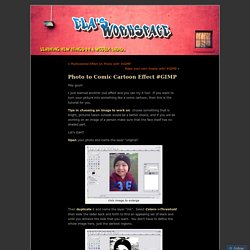
I just learned another cool effect and you can try it too! If you want to turn your picture into something like a comic cartoon, then this is the tutorial for you. Tips in choosing an image to work on: choose something that is bright, pictures taken outside would be a better choice, and if you will be working on an image of a person make sure that the face itself has no shaded part. Let’s start! Open your photo and name the layer “original”. click image to enlarge Then duplicate it and name the layer “ink”.
Duplicate the original layer again and move it to the very top of the layer stack. After which, select Colors->Threshold again but on the “lines” layer. Set the Mode of the “lines layer” to Multiply then right click on the it and select Layer->Merge Down. Now let’s put some color on it. Duplicate the Original layer again then move the new layer to the top of the layer stack, and name it “Color” and set the layer Mode to Color. Thanks to my source! Like this: Like Loading... Learn How to Create a Cartoon in GIMP 2.6.11 - ARCHIVED. Creating a Cartoon in GIMP Open your image.
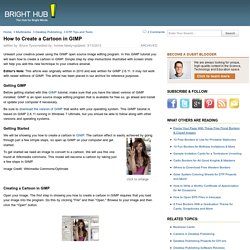
The first step in showing you how to create a cartoon in GIMP requires that you load your image into the program. Do this by clicking "File" and then "Open. " Browse to your image and then click the "Open" button. Next, duplicate this layer by going to the "Layers" window. Now, disable visibility of your first level and then choose click "Colors" on the main menu and then click "Threshold. " Next, make this layer visible, reactivate the original layer and create another duplicate. Now you can see an outline of the image in the "DoG Edge Detect" box. GIMP 2.8 - How to Remove People [HD-1080p] lGrdVqE.jpg (640×640) Photoshop: Make a Bi-Directional, Optical Illusion, Photo Portrait. Gimp 2.8 face illusion. Gonzalez01.jpeg (818×677) AAEAAQAAAAAAAAAVAAAAJDg0MzUwNWZmLTI2ZTMtNGU2MS1hZmNlLWMzNTBmNGFkNzVhZA.jpg (400×400) Stupid Photoshop Tricks: Create An Optical Illusion Double Portrait.
Because there’s not enough ways to mess with people’s heads in Photoshop, here’s how to recreate this bizarre double portrait seen around the internet, showing the side and front of a face at the same time.
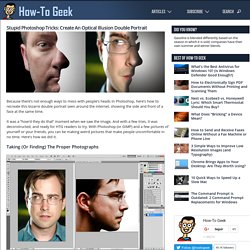
It was a “how’d they do that” moment when we saw the image. And with a few tries, it was deconstructed, and ready for HTG readers to try. With Photoshop (or GIMP) and a few pictures of yourself or your friends, you can be making weird pictures that make people uncomfortable in no time. Here’s how we did it. Taking (Or Finding) The Proper Photographs A pair of photos like these are fairly ideal, particularly the amazing profile shot on the right. Here’s the image in question. Select the pen tool (Shortcut key ) and select “Shape Layers” in the top options panel. With “Shape Layers” turned on, you automatically start drawing your silhouette in a new layer.
Carefully trace all the shapes of the outside of your profile image. Notice how the vector shape runs off the actual canvas. Profil De Face by Dmitri Elson on Art Limited. Tuto Gimp 19: Restaurez vos vieilles photos. Tuto Gimp 12: Les outils de clonage et de correction. Kleidung einfärben mit G'MIC in Gimp 2.9.