
Quick Dungeon Making in Gimp. It's a nice evening on friday.
You are relaxing in front of your PC to just shut yourself off a busy week. Suddenly the phone rings. It's someone of your gaming group asking you if you have time to play this night. [CG Textures] - Textures for 3D, graphic design and Photoshop! GIMP. View topic - GIMP - removing semi-transparent numbers in maps from WOTC. View topic - Forest map in Gimp. Creating Simple Backgrounds with the Gimp. November 2005 Sometimes finding that perfect desktop background can actually end up taking a lot of time.

Making one might be a better approach. In this article, the basics of building nice looking background images from a simple colored one with a pattern to multiple sourced bump mapped ones is discussed. The tool used is the GNU Image Manipulation Program also known as the GIMP. How to make a map using GIMP - TribalWars Forum. I know there is already a topic about this by allyboo, but when I started, I used Ally's guide, and found that it lacked some vital information, so I thought I would have a go at one myself - I will post it belowAll feedback is welcomedHow to Create a Map using GimpVersion The version that I am using is v2.6, but if you are using a different version, then that is fine as well, it will just look slightly different (to download the latest version, go to Download Gimp)Twstats Before you can start making maps on Gimp, you need to learn how to use Twstats first.
You need to get to the site www.twstats.com, and then from the homepage, select the world that you are on e.g. World 25. Next you want to go to the Maps Tool (top right of the page)This is how your page should look... And there you have it... Map Making Techniques Using GIMP - video tutorials for tutorials, creation, help, maps, mapping, cartography, GIMP, coordinateconversion, making, tips. Gimp Tips Part 6: Using The Clone Tool. Digital photography truly is amazing.
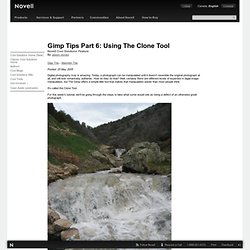
Today, a photograph can be manipulated until it doesn't resemble the original photograph at all, and still look remarkably authentic. How do they do that? Well, certainly there are different levels of expertise in digial image manipulation, but The Gimp offers a simple little tool that makes that manipulation easier than most people think. It's called the Clone Tool. For this week's tutorial, we'll be going through the steps to take what some would see as being a defect of an otherwise great photograph. If you notice, there is a water bottle on the rocks on the bottom-left portion of the image, which seems horribly out of place. To begin, you'll need to use the magnify tool to zoom into the area of the image which contains the bottle. Then select the clone tool as is circled below. The clone tool is used by taking one portion of an image and using it to paint another portion of the same image.
After painting a while, my image looked like the image below: Separating image with masks – Gimp videoturorial. Fantasy illustration in Gimp – tutorial. In this post I’ll show how to create a fantasy illustration in Gimp.
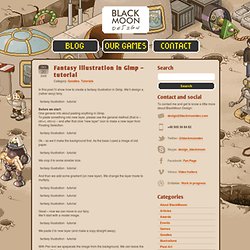
We’ll design a (rather sexy) fairy. Before we start: One general info about pasting anything in Gimp. To paste something into new layer, please use the general method (that is – ctrl+c, ctrl+v) – and after that click “new layer” icon to make a new layer from Floating Selection. Ok – so we’ll make the background first. As the base I used a image of old paper. GIMP tutorials. GIMP Tutorials and useful snippets. Gimp-tutorials.net - Gimp , tutorials , brushes , downloads, forum. Bump Mapping - Practical Exercise and usage. I learnt use of Bump Map from a tutorial at gug.sunsite.dk.
So, here is my try explaining it a bit more so that it becomes easy for all level users to understand the use of Bump-Map plugin, and possibilities. Prerequisites You must be familier with creating new image, adding new layers, deleting layers, naming/renaming a layer, filling solid color and gradient in layers/selections. If you do not know how to perform above mentioned operations then Click here to read beginners tutorial first. [line] What is Bump Map? What is use of Bump Map? Simple Example For example, we have a simple layer filled using golden Gradient, and we want to bump an elliptic (circle) area of this layer. LimitationsAny area of any layer can be bumped up using any layer as map.
Recomendation To get 100% results from this plugin, use BLACK & WHITE layers as map to use for bumping an area of other layer. Core Practice and Tutorial Here we will create the same effect shown above, using the powerful plugin Bump Map. Gimp Advanced Guide - 8.3 The Emboss and Bump map Filters. There are two filters that are particularly useful for rendering. These are Emboss and Bump map. The Emboss filter, found in Image:Filters/Distorts, creates the effect that an image is embossed into a thin metal plate. Figure 8.9 illustrates the use of the filter for a very simple case. Figure 8.9(a) shows an image that was created using a radial gradient, and Figure 8.9(b) shows the corresponding dialog for the Emboss filter. The three sliders in the filter dialog control the embossing effect, and Figure 8.10 shows a 3D scene that defines the effect of each one.
When the light source is on one side of the object, the other side must be in shadow, as shown in Figure 8.10. Creating Maps and Graphics with GIMP. [Award Winner] Using GIMP to Create an Artistic Regional RPG Map. Sylvarre Regional Map in GIMP. Guide: The GIMP. [RPG maps] Making interior maps on computer? - RPGnet Forums. How to graphically create a Town!? - EN World D&D / RPG News. Electivire GIMP Sig Tutorial - Zelda Universe Forums. Quick Dungeon Making in Gimp. Drawing Maps With Gimp. Blog Archive » Medieval town map tutorial. Blog Archive » Creating an old-school map in GIMP. Tutorial: Old Parchment Paper - gimpusers.com. 1 Open a new file: 400×500 px and set the background color to black. 2 Create a new transparent layer, fill it with #bc8b46. 3 Go to Filter / Noise / RGB Noise and use these values as input:Independent RGB Channels: checkedRED: 0,20GREEN: 0 BLUE: 0ALPHA: 0 4 - Filter / Blur / Gaussian Blur: 10px.The noise-effect should be still very little visible- 5 Now, we’re going to bring some depth into play.
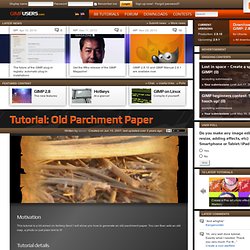
Open the channels tab (Dialogs / Channels). Create a new channel there, name it “knittern” or “crinkle” which is the english word for this.Opacity to 100%. 6 Click the just created channel to make it active.Apply Filter / Render / Plastic Noise. Activate “Random”.Values:-——- Random: on X: 2,3 Y: 3,3 Details 15.You get this kind of picture: 7 In the channels tab deactivate the eye-symbol to make it invisible. 8 Change to the layers-tab and click the brown layer to make it active. Now apply Filter / Light and Shadow / Lighting Effect. Tutorial: The Battlemap, a guest post by Jonathan Roberts « www. Newbie DM .com. With this website, I’ve tried to give new DM’s out there tools, resources, and tips to run a better D&D game with.
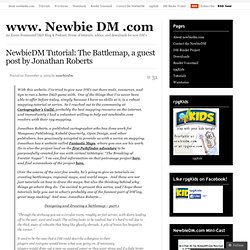
One of the things that I’ve never been able to offer before today, simply because I have no skills at it, is a robust mapping tutorial or series. So I reached out to the community at Cartographer’s Guild, probably the best mapping resource on the internet, and immediately I had a volunteer willing to help out newbiedm.com readers with their rpg mapping.Jonathan Roberts, a published cartographer who has done work for Mongoose Publishing, Kobold Quarterly, Open Design, and other publishers, has graciously accepted to provide us with a series on mapping. Jonathan has a website called Fantastic Maps, where you can see his work. He is also the project lead on the first Pathfinder adventure to be purposefully created for use with virtual tabletops: “The Breaking of Forstor Nagar”.