
Photoshop Essentials. Design a Vintage Car Poster with Grunge Texture, Font and Brushset in Photoshop - PSD Vault. Design a Vintage Car Poster with Grunge Texture, Font and Brushset in Photoshop Guaranteed success with testking 642-982 labs, testking EX0-101 video and testking 640-816 demo tests!

In this tutorial, I will show you the processes involved in making an old-looking, vintage car poster with grunge texture, font and brushset in Photoshop. Along the way, we will be using a series of Photoshop techniques such as layer blending options, image adjustments, filter effects and masking. Some of the techniques can be a bit tricky (especially with the Pen Tool), but why not just have a try :) Here is preview of the final image result for this tutorial: Alternative version with Newspaper Texture overlay – This idea comes from one of my workmates Claudia Ferreira, who is awecome web/graphic designer and a very nice person! PSD File Download You can download the PSD File for this tutorial via the VIP Members Area for only $6.95/Month (or less)!
Ok let’s get started! Step 1 I chose “Texture 1″ from the pack: How to make a trendy Christmas Wallpaper in Photoshop. The festive season is fast approaching us all, with Christmas decorations quickly popping up over night it seems Christmas comes earlier each year!
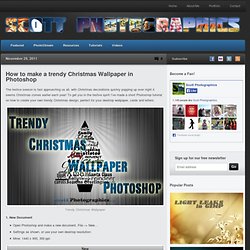
To get you in the festive spirit I’ve made a short Photoshop tutorial on how to create your own trendy Christmas design, perfect for your desktop wallpaper, cards and letters. Trendy Christmas Wallpaper. Perfect masking using a highpass — Tutorials — gimpusers.com. 1 Open any picture that contains a big shot of a person / celebrity / whatever.

Old Parchment Paper — Tutorials — gimpusers.com. 1 Open a new file: 400×500 px and set the background color to black. 2 Create a new transparent layer, fill it with #bc8b46. 3 Go to Filter / Noise / RGB Noise and use these values as input:Independent RGB Channels: checkedRED: 0,20GREEN: 0 BLUE: 0ALPHA: 0 4 - Filter / Blur / Gaussian Blur: 10px.The noise-effect should be still very little visible- 5 Now, we’re going to bring some depth into play.
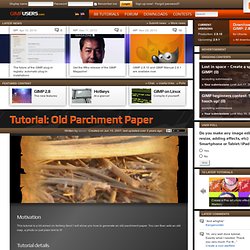
Open the channels tab (Dialogs / Channels). Create a new channel there, name it “knittern” or “crinkle” which is the english word for this.Opacity to 100%. 6 Click the just created channel to make it active.Apply Filter / Render / Plastic Noise. Activate “Random”.Values:-——- Random: on X: 2,3 Y: 3,3 Details 15.You get this kind of picture: 7 In the channels tab deactivate the eye-symbol to make it invisible. 8 Change to the layers-tab and click the brown layer to make it active. Fantasy illustration in Gimp – tutorial. In this post I’ll show how to create a fantasy illustration in Gimp.
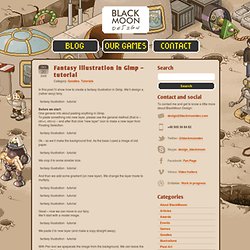
We’ll design a (rather sexy) fairy. Before we start: One general info about pasting anything in Gimp. To paste something into new layer, please use the general method (that is – ctrl+c, ctrl+v) – and after that click “new layer” icon to make a new layer from Floating Selection. Ok – so we’ll make the background first. Free Photography, GIMP & Photoshop Tutorials. An easy way to make ordinary white cloud on blue skies into dramatic significant parts of your photographs.

This is a very simple trick to do in GIMP and the results are great! Dramatic Skies in GIMP 1. Starting. Creating Light Leaks on Photographs using GIMP. Light Leaks are a product of film in the camera being exposed due to a hole/gap in the cameras body letting in light.
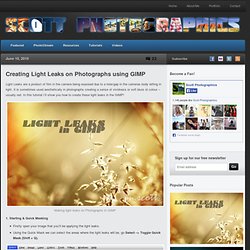
It is sometimes used aesthetically in photographs creating a sense of vividness or soft blurs of colour – usually red. Make an explosion effect — Tutorials — gimpusers.com. Games and pixel-art studio. The creepy zombie hand of death! — Tutorials — gimpusers.com. 1 Make a photo of your own hand against a single colored baclground.

Crank your hand and be sure that all single fingers are well viewable not overlapped. 2 Scale the Foto to app. 1000px height. Mask your hand. You can use the paths tool very good for this. Click aside your hand – the advantage of the paths tool in this specific case is that you can use curves for some parts of the fingers. You can save alot of clicking when using curves.Don’t forget about the in-between areas. 3 So far, so good. Download the background, that I prepared. Human Torch Effect: A Flaming Hand - Gimpshop. Ever want to create incredible photo illustrations, or just edit your friends into ridiculous situations?
How to Digitally Color a Black & White Photograph in GIMP. In my last GIMP tutorial I showed you how to make a sepia-tone photo from a color photo.
Today we’re going to do something similar—follow along to learn how to digitally color a black and white photo in GIMP. Step 1. Find a black and white (or grayscale) image The image I found from the Internet is not copyrighted and is perfect for colorizing since it has large, distinct areas to color. Create an oscilloscope/frequencies display — Tutorials — gimpusers.com. 1 Create a new image: 600×250px.Fill the background-layer with a dark gray: #515151. 2 Now set the Foreground-Color to #aacaff.- Create a new, transparent layer. - Choose the rectangle selection tool: Then create a 1px wide but pretty long selection.
Fill the selection with the FG-Color by using EDIT / FILL FG COLOR - Press CTRL+C to copy that thin line - Deselect all using SELECTION / NONE 3 Very practical in GIMP: You can use copied parts (in the clip board) as a brush to paint with it. With that technique in mind you can create very nice effects and also pretty fast! The painted parts are mostly black although so you have to colorize them afterwards.In the screenshot it is called “Zwischenablage” which is the german word for clipboard.This copied part is displayed as the first brush of certain paint-tools such as the paint brush-tool. The Plugin Site - Adobe Photoshop plugins and plug-ins, filters and effects for Paint Shop Pro, Corel Photo-Paint, Adobe Premiere. Means recently added means that the plugin(s) is available for the Mac, too. means very useful means useful means less useful No star means that I haven't tested it yet.
Smudge painting — Tutorials — gimpusers.com. 1 linda_sarsa_brushes.zip PreperationsBefore you start please install the brushes attached to this step. There are 2 brush packs inside the zip-archive. Lindas brushes are used to smudge homogene and same-colored areas while Sarsas brushes are used on fine details like hair. Smoke and Flames — Tutorials — gimpusers.com. 1 Create a new file: 800×600px. (black background-color) - add a new layer, it shall be transparent - take a big, white brush and paint some big dots as seen on the picture below. 2 Now take the Eraser-Tool, and delete some parts of these dots, so that you get something like a half moon at the end. 3 Next apply a gaussian blur to this layer: Filter / Blur / Gaussian 4 This step is now very important: Go to Filter / Distorts / IWarp.Adjust the settings as seen on the picture.Deform Mode: Swirl CW. In the preview window hold your left mousebutton down and start to zigzag from left to the right pretty fast.The purpose of this is to get points that are streched a little bit.
DON’T click the OK button yet. 5 Now swith to another Deform Mode: Move. This step will take some time until you’re finished. Try to move the single points/dots together and alsy try to move them a little to the top. Or you can just colorize it blue, looks cool too! Crazy Ions — Tutorials — gimpusers.com. 1 Create a new file with the size 500×500 Px (size doesn’t matter but it has to be square) 2 Choose any color gradient and use the same parameters as in the image below. 3 Create the gradient (click on a point in the image, hold and drag a line) 4 click the right mousebutton on your image, then select Filters>Artistic>Cubism and use the same parameters as in the image below 5 click the right mousebutton on your image, then select filters>blur>Motion blur and use the same parameters as in the image 6 click the right mousebutton on your image, then elect filters>blur>Gaussian Blur strength 3 7 click the right mousebutton on your image, then elect filters>Edge-Detect>Edges and use the same parameters as in the image 8 For simulating a light depth click the right mousebutton, then select filters>Blur>Motion blur> and use the same parameters as in the image 9 We’re done ;) I hope you like the result!
Effect. Websites. GIMP. Photographics | Free Photography, GIMP & Photoshop Tutorials. Turning people into stone — Tutorials — gimpusers.com. Create.