
Gimp Tutorials - Gimp.PixTuts.com GIMP GIMP-Tutorials GIMP (GNU Image Manipulation Program) ist ein Open-Source-Programm zur Bildbearbeitung, das viele Funktionen anbietet, die auch das kostenpflichtige Pendant Adobe Photoshop zur Verfügung stellt: Filter, Pinsel, Umwandlungs-, Auswahl-, Ebenen- und Maskierungsfunktionen. GIMP ermöglicht auch das Arbeiten mit Plug-Ins und Skripten, ICC-Profilen und das automatische Freistellen von Objekten. In dieser Kategorie erhältst du eine herausragende Sammlung mit kreativen und lehrreichen GIMP-Tutorials, die dir die Funktionsweise des Programms nahebringen und dich bei der Erstellung der unterschiedlichsten Objekte und Effekte unterstützen. Übersicht Tutorials Ihr habt euch schon immer gefragt, wie man Waben in GIMP erstellt, ohne das Pinsel- oder Stiftwerkzeug zu benutzen? Mit Tilt/Shift soll dem Betrachter der Eindruck des Blickes auf eine Miniaturlandschaft vermittelt werden. Ich möchte euch zeigen, wie ihr einfach animierte GIF-Bilder in GIMP erstellen könnt. ... DarkSide Anzeige
GIMP bump map tutorial · Tankedup-Imaging Preamble This tutorial has been updated for use with GIMP 2.6. I have split the tutorial into two different levels. The one on this page is for people reasonably familiar with the GIMP interface and image manipulation commands. The second is for people with very little experience of image manipulation programs and GIMP particularly. The Bump Map Tutorial Scale your logo and create a new image The first thing to do is decide what size you want your photos to be displayed at and how much space the logo will take up. The logo for this tutorial is 91px × 47px, to fit into a 300px × 225px photo. In the active window create a new blank image File » New You can fill the new image by clicking the Advanced Options and choosing from the Fill with options. For this exercise the logo background is transparent, so choose a transparent fill for the new image. Copy logo and paste into blank image In the logo image copy the logo Edit » Copy Paste the logo into the new blank image Edit » Paste Create a Gaussian blur
GIMP Tutorials - Gimp Tips and Tricks Handy Tweaks To Make GIMP Replace Photoshop - Smashing Magazine 20 Awesome Photo Manipulation Tutorials For GIMP There’s nothing better than free open source software that can do a lot of the same things and sometimes more than your professional overpriced software can do. I don’t know, it just feels good and that’s why I love GIMP. The tutorials below are some great examples of GIMP in use and several are Photoshop tutorials converted for GIMP use. Well, minus the $700 you had to pay to do it with Photoshop. You’ll learn how to transform a stock image – into a fireball and explosion scene. Article Link Advertisement This tutorial was converted from Giackop’s tutorial at psdtuts.com. Article Link This tutorial will describe how to make a colorful photo manipulation using a parrot picture, two flower stock photos and two texture background. Article Link This tutorial has been converted from the original Photoshop tutorial into Gimp. Article Link In this GIMP tutorial we will transform this stock bulb photo into a switched on 2watt? Article Link Convert a photograph to a pencil sketch. Article Link
Mit GIMP Vorlagen und Musterschablonen für eigene Passfotos anlegen | schieb Bei Passbildern kennen Behörden keinen Spaß – im wahrsten Sinne des Wortes. Lächeln und Emotionen sind auf Passfotos tabu. Auch beim Format und den Positionen der Augen gelten strenge Richtlinien. Alles muss millimetergenau stimmen, sonst wird das Foto abgelehnt. Schwierige Zeiten also für Hobbyfotografen, die eigene Passfotos anfertigen möchten. 1. 2. 3. 4. 5. {link|Alle Regeln und Richtlinien zu Passfotos und eine Musterschablone zum Ausdrucken gibt’s hier| Hier gibt es das kostenlose Bildbearbeitungsprogramm GIMP * Nichts mehr von schieb.de verpassen * Exklusive Extras wie Audios, Videos und eBooks * Kostenloses eBook "PC Tuning" direkt zum Download * und viele andere Vorteile...
Gimp Tutorial: Awesome Bokeh Effect in Gimp It was fun to to follow Abduzeedo tutorial for making bokeh digital effect in Photoshop (i'm using photoshop and gimp) and i really excited when i managed to do similiar effect in Gimp. So i decided to make a Gimp tut for this one..it's been over a months since my last tutorial and i think after this i'll make more Gimp tuts..Click More Inside The Post to read the tutorial. P/s: This tutorial has been converted from the original Photoshop tutorial into Gimp. Before you try this tutorial,please download my Eclipse brush where i made it by myself. Create new document. Then create new layer.I renamed it as dark violet. Choose a dark purple. Select gradient tool, Radial for the shape and low the opacity to 50. Now create a new layer and i renamed it as eclipse. Select the brush tool. and I'll using my Eclipse brush. Now we'll paint some ellipses at the eclipse layer. Go to Filters>Blur>Gaussian Blur. Create another layer ( I named it eclipse 2 ) and start painting again. Finish! Result
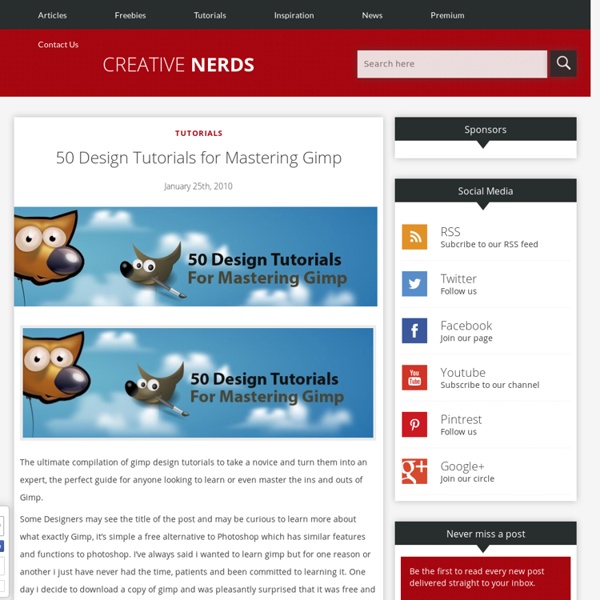
Best 35+ GIMP Tutorials | Qbrushes Blog Best 35+ GIMP Tutorials The Gimp is a free open source image editing application that can do many things to suit your needs, whether they be making a gig poster for a local concert, or touching up a few family photos, the Gimp can do it. Here is a top 30 list of Gimp tutorials hand selected by Gimper and SGlider12 that will help you to add many new Gimp design techniques to your arsenal. 1) Gimp Galaxy by abduzeedo.com Fabio Sasso at Abduzeedo presents us with a great little space illustration done completely in the Gimp. 2) Leopard’s Aurora Borealis Wallpaper by abduzeedo.com Fabio Sasso at Abduzeedo presents us with yet another great tutorial on how to create the Aurora Borealis Leopard wallpaper in Gimp. 3) Gold Text Effect by gimpology.com Kasrak at Gimpology.com presents us with a great tutorial adapted from a Photoshop tutorial on how to create a slick golden text effect in Gimp. 4) Create a Worn Vintage Popart Design by sglider12.blogspot.com 5) Vista-Like Wallpaper by gimpusers.com
Download free GIMP plugins (40+ plugins) GIMP is the undisputed king of image editing in Linux platforms, and is next only to Photoshop in popularity in Windows and Mac platforms. With a large community of developers and an even larger pool of users, it is no surprise that GIMP is very popular. Much like Firefox, GIMP’s strength lies in its plugins, which are developed by the open-source toting community. Since the users themselves develop them, they know all the needs and conceive a plugin for everything. And what better way for me to endorse GIMP than a list of good plugins? You might also want to read our previous posts on GIMP: GIMP plugins for Web Design Anti-aliasing: Smoothen and fix straight lines.Adaptive contrast enhancement: Intelligent adjustment of contrast.Fourier Transformation: GIMP plugin version of Fourier Transformation.Refract/Reflect: Refraction effects to simulate falling water drops.Borders: Add borders to your image. Photography plugins for GIMP Miscellaneous GIMP plugins Further GIMP plugin resources
Free Gimp tutorial PDFs Issue 128 of Linux Format magazine carries the last instalment of our Gimp tutorial series. It's been going on-and-off for years now, with the latest batch running from June 2008 until now. Although we're sad to see the Gimp tutorial go away for the time being, we'd like to thank its author - the incredibly prolific Michael J. Hammel - for all the awesome work he's done over the years, and we're happy to announce that we're releasing high-res PDFs of Michael's 18 most recent GIMP tutorials for everyone to enjoy. LXF readers have, we hope, learned a lot following in Michael's footsteps over the years, and it's great to be able to share these tutorials with an even wider audience. Read on for download instructions and more information about what's inside... What's inside We're giving you the high-res PDFs - the same ones we use to actually print the pages of the magazine - which means they'll look awesome on your screen, or printed out. Here's a full list of the tutorials: How to get it