

Red-pitaya-notes/red_pitaya_daisy_tx.v at master · pavel-demin/red-pitaya-notes. Home Energy Monitoring System. 1.
The Purpose (Mission) Monitor, archive and analyze energy consumption in the houseVisualize historical consumption dataAccess data remotely from WebEventually include data from other sensors, like temperature, pressure, humidity, motion, light, security, etc. UPDATE: Temperature, Pressure and Humidity sensors added: Additional Sensors for Home Energy Monitor 2. Components.
ESP8266 Pinout Reference: Which GPIO pins should you use? This article is a guide for the ESP8266 GPIOs: pinout diagrams, their functions and how to use them. The ESP8266 12-E chip comes with 17 GPIO pins. Not all GPIOs are exposed in all ESP8266 development boards, some GPIOs are not recommended to use, and others have very specific functions. With this guide, you’ll learn how to properly use the ESP8266 GPIOs and avoid hours of frustration by using the most suitable pins for your projects. - Téléchargement. Fil Pilote : Directement avec un Raspberry et Jeedom. Bonsoir,
ESP8266 Wi-Fi Button Amazon Dash. In this project you’re going to build an ESP8266 Wi-Fi Button that can trigger any home automation event.
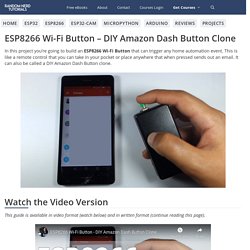
This is like a remote control that you can take in your pocket or place anywhere that when pressed sends out an email. It can also be called a DIY Amazon Dash Button clone. Watch the Video Version. Réalisation d'un contrôle d'état des volets. Dans cet article nous allons étudier comment créer un objet connecté en WiFi, autonome et capable d'envoyer un signal à notre serveur domotique lors du changement d'état d'un microrupteur!
Bon d'accord, dit comme ça, cette phrase n'est pas très sexy et on se demande bien à quoi ça va servir ! Connaitre le changement d'état d'un microrupteur c'est bien gentil mais c'est pas ça qui va améliorer notre solution domotique ! Hé bien si vous pensez cela détrompez vous ! 3.2.10. Compiling and running C applications — Red Pitaya STEMlab 0.97 documentation.
You can write simple C algorithms, make executables and run them on the STEMlab board.
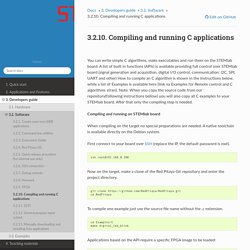
A list of built in functions (APIs) is available providing full control over STEMlab board (signal generation and acquisition, digital I/O control, communication: I2C, SPI, UART and other) How to compile an C algorithm is shown in the instructions below, while a list of Examples is available here [link na Examples for Remote control and C algorithms stran]. Note: When you copy the source code from our repository(following instructions bellow) you will also copy all C examples to your STEMlab board. After that only the compiling step is needed. Compiling and running on STEMlab board. Réparer le système de fichier ext4 de votre Raspberry Pi. Zynq with RedPitaya from scratch: Hello PS World. Posted on Dec 24nd 2017 By Noah Hütter Description In this post we are going to say Hello from the processing system (PS) in the Zynq SoC Table of Contents In this post we are going to say Hello from the processing system (PS) in the Zynq SoC.
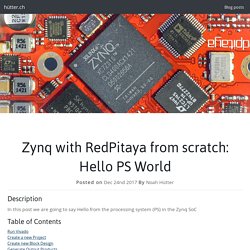
As a platform I am using the RedPitaya board. ESPEasy Command Reference - Let's Control It. Notice: The ESPEasy Command Reference page is transitioning to a new format.
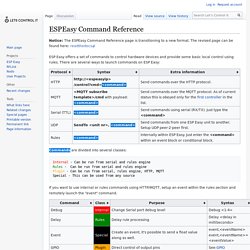
The revised page can be found here: readthedocs ESP Easy offers a set of commands to control hardware devices and provide some basic local control using rules. Troc Echange Recepteur YAESU FRG 7700 sur France-Troc.com. Red Pitaya - Learn FPGA — Documentation_test 0.0.1 documentation. Red Pitaya is a Zynq7 FPGA – based low cost electronic board with many components such as two core ARM processor, fast ADCs, fast DACs, USB, LAN, etc.

15. Installation of Vivado — Documentation_test 0.0.1 documentation. This installation tutorial is intended for who want to use the FPGA of the Red Pitaya board.
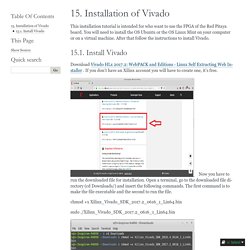
You will need to install the OS Ubuntu or the OS Linux Mint on your computer or on a virtual machine. After that follow the instructions to install Vivado. Verilog-uart @ LibreCores. AXI UART Lite. Pg143 axi uart16550. Red Pitaya Notes. Red-pitaya-notes/block_design.tcl at master · pavel-demin/red-pitaya-notes. [Interrupteur différentiel] - Règles de l'amont et de l'aval.
Bonsoir,
![[Interrupteur différentiel] - Règles de l'amont et de l'aval](http://cdn.pearltrees.com/s/pic/th/interrupteur-differentiel-217586572)
LED blinker. Introduction For my experiments with the Red Pitaya, I’d like to have the following development environment: recent version of the Vitis Core Development Kit recent version of the Linux kernel recent version of the Debian distribution on the development machine recent version of the Debian distribution on the Red Pitaya basic project with all the Red Pitaya peripherals connected mostly command-line tools shallow directory structure Here is how I set it all up. Sonde de mesure de cuve d'eau de pluie à base d'ESP8266 - Xavier Carl's Blog. - VHDL customizes serializer/deserializer - EDN. 4 in 1 BME680 - Temperature, Humidity, Pressure and Gas Sensor - ขาย Arduino อุปกรณ์ฯ ,ESR meter 18650 : Inspired by LnwShop.com.
BME680 Breakout - Air Quality, Temperature, Pressure, Humidity Sensor – Pimoroni Store. The state-of-the-art BME680 breakout lets you measure temperature, pressure, humidity, and indoor air quality, and is Raspberry Pi and Arduino-compatible! Use this breakout to monitor every aspect of your indoor environment. Its gas resistance readings will react to changes in volatile organic compounds and can be combined with humidity readings to give a measure of indoor air quality. Want to get an idea of whether there's adequate ventilation in your bedroom, your workshop, or workplace?
Set up a BME680 on a Pi Zero W and have it log sensor readings to a file, or stream live data to a web service like adafruit.io or freeboard.io. It's also compatible with our fancy Breakout Garden, where using breakouts is as easy just popping it into one of the six slots and starting to grow your project, create, and code. Features. The BSEC Software. BSEC precisely performs several calculations outside the device such as ambient air temperature, ambient relative humidity, pressure and air quality (IAQ) level. Besides health monitoring, well-being (warning regarding dehydration / heat stroke), home automation control and HVAC applications, BSEC supports a broad range of further applications, e.g. gaming, indoor and outdoor navigation and many more:
ANET A6: MONTAGE COMPLET. Energy consumption and power measurement... from panStamp! - panStamp - Wireless Arduino-compatible miniatures. SCT-013-005 and SCT-013-030 current clamps from YHDC have been used for the tests. These transformers basically convert AC current to AC voltage (maximum amplitude = 1V) so depending on the current to be measured we may decide to use the 5A version or the 30A one... or even the 50A one.
Amsat.fr/ August 2016 – SWHarden.com. I just spent the afternoon reverse-engineering the 72 series TENMA multimeter serial interface, and can now access all of its readings from a standalone Python script. This lets me send all measurements made with the multimeter to my computer in real time (using an optically isolated connection), and eliminates the need for the TENMA PC interface software. In addition to allowing the development of custom software to use measurements from TENMA multimeters in real time, this project also lets allows TENMA multimeters to interface with Linux computers (such as the raspberry pi).
PighiXXX. Web page. Integrate ArduinoISP and Atmel Studio: 4 Steps. Since you have used the Arduino IDE to load the ArduinoISP sketch to your Arduino board, this means that you already have AVRDUDE installed in your computer. AVRDUDE is a command line application that intermediates the firmware loading process on your computer side. Long story short, AVRDUDE reads the .hex file produced by the compilation and translation process and queues it in order to output it correctly through the serial port. From there the USB-serial converter on your Uno board (the black square next to the USB port) reads it from the USB line, sends it to the ATMEGA on the Arduino Uno board and finally outputs it through SPI to the target microcontroller. One of the coolest features of Atmel Studio is the support to external tools, like the AVRDUDE itself.
Basically, Atmel Studio leaves this open enough to customization, that with the press of a button, you can perform a full command line program call and deploy your firmware to the target microcontroller. Enough said, Arduino Xyloband Transmitter. After much fumbling around with parameters I FINALLY managed to get my Xyloband to receive packets I sent with the help of an Teensy 2++ and a radio module. To spare others from also having to do this, I attach a small packet containing an Arduino Sketch and a patch file for the RadioHead library to make it work with the Xyloband.
The sketch simply receives packets to be sent via the Arduino's UART and sends them over the air. This allows me to test commands for the Xyloband from the PC rather than reflashing the Arduino all the time. Raspbian : Tout un Tas de Trucs... - Framboise 314, le Raspberry Pi à la sauce française.... DIY Reference 10 MHz Distribution Amplifier - JackenHack. I wanted to get a distribution amplifier for my 10 MHz lab reference signal from my GPSDO to feed my equipment, like my timer/frequency counter, signal generator and other stuff.
I also needed a way of distribute a 1 PPS signal from my Trimble GPSDO to my NTP servers and other clocks and monitoring systems. The Trimble only got two 10 MHz outputs and one 1 PPS signal output, so I really needed to add more, especially for experimentation. I saw this video by Gerry Sweeney where he modifies an Extron 300MX video distributions amplifier, adding a rubidium reference standard and was intrigued. But I changed the modifications to fit my needs and here is the result. I got hold of a Extron ADA 4 300MX HV, a model where there’s only four outputs per inputs, instead of six for the RGB and sync inputs. Renommer le compte utilisateur principal du Raspberry PI – guibrpi. Pour améliorer la sécurité de votre RPI, il peut être intéressant de renommer le compte utilisateur par défaut (“pi”)
Un Stéthoscope électronique ou comment écouter les battements du coeur ~ Schema Electronique Net. Cet article vous propose de réaliser un Stéthoscope électronique ou Cardiophone, un appareil destiné à l’écoute de la pulsation cardiaque. Bien sûr cette dernière est nettement amplifiée et l’écoute se fait dans un casque à écouteurs. Cet instrument va vous permettre de distinguer les différents sons provenant du coeur, ou alors de réaliser à partir du muscle cardiaque un générateur d’effets sonores. [TUTO] HomeDashScreen Réveil. Arduino Based GPS Watch #arduino. Adafruit Industries, Unique & fun DIY electronics and kits. Comment protéger vraiment vos cartes SD des écritures ? RASP-GOF-GSM-GPRS-UART. X Forwarding with sudo « blog. Shield GSM/GPRS - MicroControleur Hobby - MC Hobby sprl. Mobileforensics.files.wordpress.com/2007/03/sim-card-protocols.pdf.
LTC2872 - RS232/RS485 Dual Multiprotocol Transceiver with Integrated Termination.
Elektor. Oxymetre. SDR. RaspberryPi. Arduino. Eagle. Sites infos. Programmation. Matériel. Exemples. Datasheets.