
Creator / Home - Online Lighting Diagram Creator - Tools for photographers. Photography lighting diagrams made easy with this online tool: use the drop down menus, select objects, drag them, rotate them, change their layers then export your diagram to JPEG or save its URL. v3 beta is now public with iPad support, it includes ability to add notes.
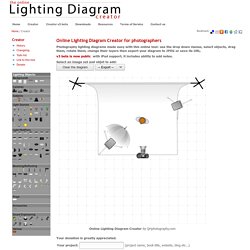
Select an image set and objet to add: Online Lighting Diagram Creator by QHphotography.com Your donation is greatly appreciated. A minimum donation of $10 USD is asked for each commercial project (except the use on a photographer website, blog or gallery). The Online Lighting Diagram Creator is a personal project that requires a lot of resources to be developed and maintained. If you use the OLDC and are happy with it, I'd love if you would consider donating. Known issues : You can now export to JPEG and generate a URL that allows you to bookmark your diagram. Lighting Diagrams made easy by Sylights. Professional Snapshots: Photo Diagram. Loop.pdf (application/pdf Object) Split.pdf (application/pdf Object) Rembrnt.pdf (application/pdf Object) The Standard 3-Point Lighting Technique. One of the oldest lighting techniques in the book is called “Three Point Lighting”.
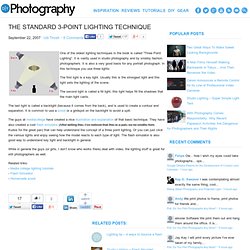
It is vastly used in studio photography and by snobby fashion photographers. It is also a very good basis for any portrait photograph. In this technique you use three lights: The first light is a key light. Usually this is the strongest light and this light sets the lighting of the scene. The second light is called a fill light, this light helps fill the shadows that the main light casts. The last light is called a backlight (because it comes from the back), and is used to create a contour and separation.
The guys at mediacollege have created a nice illustration and explanation of that basic technique. While in general the guys (or girls, I don’t know who works there) deal with video, the lighting stuff is great for still photographers as well. Related links:- Media college lighting tutorials- Flash Simulator- Homemade snoot. Portrait Lighting For Beginners: 2/3 And 3/4 Facial Portraits. Portrait Lighting For Beginners: Introduction. Lighting 101: Using Gels to Correct Light. (Photo by Strobist reader Siddarth Siva) Some you may be starting to realize already, but I'll say it aloud: When lighting a photo it is not about absolute light levels.
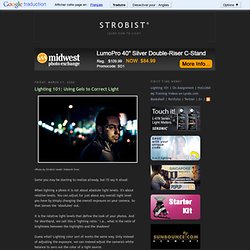
It's about relative levels. You can adjust for just about any overall light level you have by simply changing the overall exposure on your camera. So that zeroes the "absolutes" out. It is the relative light levels that define the look of your photos. Guess what? For instance, if you were in a fluorescent room, you might balance on the "FL" white balance to make ambient light photos. So if you used flash in that environment, and was "mixing" the balance with the ambient, your flash would appear … too magenta. How do you fix this?
What about those orange-tented tungsten (AKA, "incadescent") lights? Hint: It's the other gel in the photo above… You get the picture—orange tungsten ambient light, you compensate in the camera by going to tungsten WB. Taking Amazing Studio Portraits On a Tight Budget. So there I was in my socks, standing on a milk crate with a beautiful half-naked woman lying motionless on a painter's tarp in the middle of by bedroom floor.
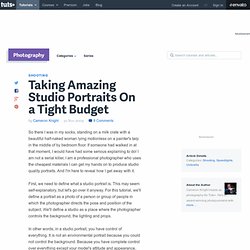
If someone had walked in at that moment, I would have had some serious explaining to do! I am not a serial killer, I am a professional photographer who uses the cheapest materials I can get my hands on to produce studio quality portraits. And I'm here to reveal how I get away with it. First, we need to define what a studio portrait is. This may seem self-explanatory, but let's go over it anyway. In other words, in a studio portrait, you have control of everything.
The Final Effect Recommended Equipment So let's look to that definition to determine what you're going to need. Tutorials. Lighting Tutorial: Fashion Lighting Made Easy. I did a shoot back in February for one of my regular clients that was more fashion oriented.
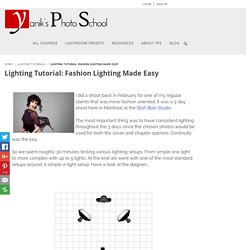
It was a 3-day shoot here in Montreal at the Blah Blah Studio. The most important thing was to have consistent lighting throughout the 3 days since the chosen photos would be used for both the cover and chapter openers. Continuity was the key. So we spent roughly 30 minutes testing various lighting setups. From simple one light to more complex with up to 5 lights. Both lights were set at roughly 45 degrees about 3 feet away and about a foot above the models’ heads.
So there you have it! Here are a few sample shots from the photo shoot. Related Acupuncture Shoot Explained [singlepic=313,320,240,,left]I recently did a small photo shoot to get a few acupuncture shots for both my TouchPhotography Website and for my stock photo portfolio. June 9, 2008 In "Photo Shoots" Introduction to Macro Photography - Part 2 Welcome to Part 2 of this Introduction to Macro Photography. January 22, 2009. Professional Lighting in Model Photography. This case study shows how lighting was manipulated to create the perfect environment for a fashion photoshoot.
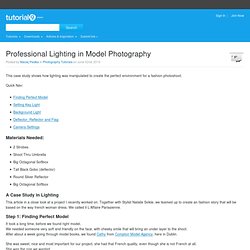
Materials Needed: 2 StrobesShoot Thru UmbrellaBig Octagonal SoftboxTall Black Gobo (deflector)Round Silver ReflectorBig Octagonal Softbox A Case Study in Lighting This article in a close look at a project I recently worked on. Together with Stylist Natalie Svikle, we teamed up to create an fashion story that will be based on the way french woman dress.