
Wireless RGB lamp · Zápisník Josefa Rouska. 29 May 2012 For a long time I wanted to have a wirelessly controlled RGB light in my kitchen.
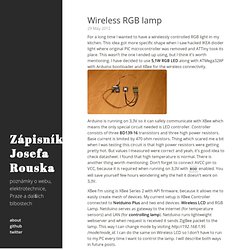
This idea got more specific shape when I saw hacked IKEA dioder light where original PIC microcontroller was removed and ATTiny took its place. This wasn’t the one I ended up using, but I think it’s worth mentioning. I have decided to use 5,1W RGB LED along with ATMega328P with Arduino bootloader and XBee for the wireless connectivity. Arduino is running on 3,3V so it can safely communicate with XBee which means the only special circuit needed is LED controller. XBee I’m using is XBee Series 2 with API firmware, because it allows me to easily create mesh of devices. Firmware is pretty straightforward.
Commands Schematic Part list Source code Source code is available on Github. 1000 Lumen Maglite Mod with Voltage Monitor. If you are dissatisfied with the brightness and lasting power of your flashlight, check out the tutorial below by our laser and lighting expert, Jayrob.

The XM-L T6 emitter, will output 1000 lumens at 3 Amps (on high mode), and will output an impressive 386 lumens at only 1 Amp. (medium) One problem with high output flashlights, is that 18650 batteries don’t give you much run time. Well here’s the answer! This modification is outputting about 1000 lumens on high and uses large capacity 32600 Li-Ion batteries! Note: Some of the steps of this modification may be familiar to you if you have seem my Maglite Monster Laser thread Features: Good heat management because of heatsink massGood battery capacity vs size of lightVoltage monitor optionHeavy duty side button forward clicky for easy mode switchingTurn the head for focusingAnd of course the nice quality finish of the Maglite with color choices Parts: AVR Projects with LED's.
An44. ZXSC310. Maglite mod - XL-M T6. Use an Arduino to flicker a household light bulb like a candle. This build was inspired by the flickering candelabras in the haunted house attraction at Disneyland.
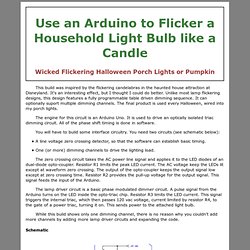
It's an interesting effect, but I thought I could do better. Unlike most lamp flickering designs, this design features a fully programmable table driven dimming sequence. It can optionally suport multiple dimming channels. The final product is used every Halloween, wired into my porch lights. The engine for this circuit is an Arduino Uno. You will have to build some interface circuitry. A line voltage zero crossing detector, so that the software can establish basic timing. The zero crossing circuit takes the AC power line signal and applies it to the LED diodes of an dual-diode opto-coupler. The lamp driver circuit is a basic phase modulated dimmer circuit. While this build shows only one dimming channel, there is no reason why you couldn't add more channels by adding more lamp driver circuits and expanding the code.
Schematic Click on the figure to get a large version. Arduino controlled light dimmer. Switching an AC load with an Arduino is rather simpel: either a mechanical relay or a solid state relay with an optically isolated Triac.

(if you use an 8051 or PIC16F877A microcontroller, there is stuf for you too here) It becomes a bit more tricky if one wants to dim a mains AC lamp with an arduino: just limiting the current through e.g. a transistor is not really possible due to the large power the transistor then will need to dissipate, resulting in much heat and it is also not efficient from an energy use point of view. The proper way to do it is through phase control with a Triac: the Triac then is fully opened, but only during a part of the sinus AC wave. One could let an Arduino just open the Triac for a number of microseconds, but that has the problem that it is unpredictable during what part of the sinus wave the triac opens and therefore the dimming level is unpredictable. One needs a reference point in the sinus wave.
For that a zero crossing detector is necessary. NOTE! Step 1: Making the LED lights dance to your music. Blinky the one-eyed clock using Arduino -Arduino for Projects. In this tutorial you learn how to make a blinking clock with a difference!

Updated 18/03/2013 Followers of my website would realise that I tend to make too many clocks in those tutorials. Well, I like making clocks… so here is another one. However this time I have tried to make the most simple version possible. Usually projects will have many LEDs, or perhaps an LCD, buzzers, buttons, all sorts of things. So here is my answer to that question: Blinky the one-eyed clock … It reminds me of the giant killer orb from The Prisoner… Using a minimal Arduinobootloader system, a DS1307 real time clock IC and an RGB diffused LED … we can make a clock that blinks the time, using the colours of the LED to note different numerical values. Setting the clock is simple. Head to the bottom of this article. Design process narrative… So let’s get started! It was interesting to alter the value of d, the delay variable, to get an idea for an appropriate blinking speed. Major Components in Project.