
Everything 3D: Positioning the Camera in Blender the Pro Way. In this quick tip, I'd like to explain a little Blender feature that apparently is not widely used.
I find it incredibly powerful, to the extent that I think it should be the default behavior. Oftentimes, while watching other people's workflow in Blender, I get the impression that the most common way to frame a shot is by going into Camera view, selecting the camera itself, pressing G or R, plus a specific key for each axis (X, Y, Z) in order to move or rotate the camera itself. Alternatively, one can press Shift-F to go into Fly Navigation mode. However, I really never liked Fly Navigation mode. I find it hard to control. There is a third way that lets you fine tune the position of the camera intuitively—without leaving Camera view. Once you select that option, make sure you're in Camera view. Blender 2.6 Normal/Bump Mapping. Blender 3D: Noob to Pro/Procedural Eyeball in Cycles. You previously learned how to model an eyeball using just procedural textures with the Blender Internal renderer.
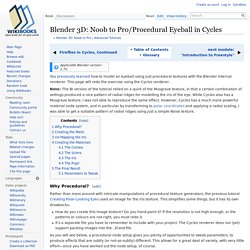
This page will redo the exercise using the Cycles renderer. Note: The BI version of the tutorial relied on a quirk of the Musgrave texture, in that a certain combination of settings produced a nice pattern of radial ridges for modelling the iris of the eye. While Cycles also has a Musgrave texture, I was not able to reproduce the same effect. However, Cycles has a much more powerful material node system, and in particular by transforming to polar coordinates and applying a radial scaling, I was able to get a suitable pattern of radial ridges using just a simple Noise texture. Why Procedural? Rather than mess around with intricate manipulations of procedural texture generators, the previous tutoral Creating Pixar-Looking Eyes used an image for the iris texture.
How do you create this image texture? Creating the Mesh[edit] Start in Object mode. UV-Mapping the Iris[edit] and. Blender 3D: Noob to Pro/Advanced Tutorials/Introduction to Cycles. Cycles is a renderer which first appeared in Blender 2.61.
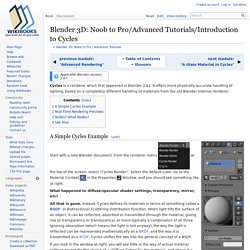
It offers more physically-accurate handling of lighting, based on a completely different handling of materials from the old Blender Internal renderer. A Simple Cycles Example[edit] Start with a new Blender document. Beginners' Guide To Blender: Procedural Textures (Cycles) Blender 2.6 Tutorial 08 - Adding Color & Material(s) Blender - Track To Constraint Use on a Camera. Camera crane/dolly rig for blender 2.70. Waylow/Add_Camera_Rigs. Camera Rigs Add-on. Extensions:2.6/Py/Scripts/Rigging/Add Camera Rigs.
From BlenderWiki Description This script was designed to add some extended functionality to a camera by creating control rig with custom shapes and UI to easily access the cameras settings from the 3d window.
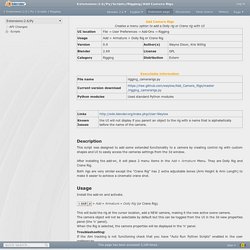
After installing the add-on, it will place 2 menu items in the Add » Armature Menu. They are Dolly Rig and Crane Rig. Both rigs are very similar except the "Crane Rig" has 2 extra adjustable bones (Arm Height & Arm Length) to make it easier to achieve a cinematic crane shot. Usage Install the add-on and activate. ⇧ ShiftA » Add » Armature » Dolly Rig (or Crane Rig). Troubleshooting: If the Aim tracking is not functioning check that you have "Auto Run Python Scripts" enabled in the user preferences.
The Rigs. Blender: Tip - Using the Track To Constraint. Three Point Lighting Tutorial. Three lights: the Key Light, Fill Light, and Rim Light (also called Back Light), are adjusted to achieve the classic Hollywood lighting scheme called three-point lighting.
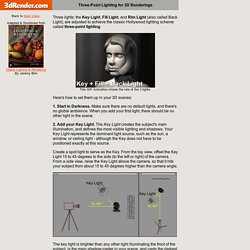
This GIF Animation shows the role of the 3 lights. Here's how to set them up in your 3D scenes: 1. Start in Darkness. Make sure there are no default lights, and there's no global ambience. Lighting tips from the Masters. What do I know about lighting after all?
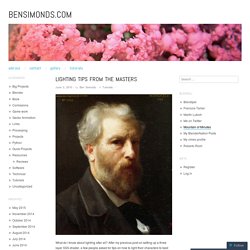
After my previous post on setting up a three layer SSS shader, a few people asked for tips on how to light their characters to best show them off. As it happens, this something I’m rather interested in, and I’ve had a blog post on the subject brewing for a while, so I’ve finally found the motivation to finally write it up. I didn’t want to spend too much time talking about specific settings for this tutorial, so instead you can download this blendfile from BlendSwap.com for some ideas on the specifics of how to set up your scene. Lighting in portraits is key to how you want your character to be seen.
The exact same character with the same pose and expression can be seen in completely different ways depending on how they are lit. I don’t get it right every time, so when I’m looking for inspiration for lighting I usually turn to those who know better. Three Point Lighting: Conrad Veidt as Major Strasser in Casablanca.