
Sculptural braided extension cords. I’m constantly getting into silly arguments with my partner about my DIY projects.
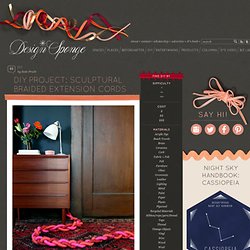
Whenever I turn to him for advice, ever the left-brainer, he gives me the practical answer, which I hate. Shouldn’t you be able to carry it this way? Wouldn’t this shape make it sturdier? What’s this extra piece for? Excellent questions, all. I’m realizing that on the art/design spectrum, I fall much closer to the former than I thought. I’ve prefaced this particular project with the above disclaimer because I want everyone to know that this project is not practical.
Is this project practical? Read the full how-to after the jump! Materials 3 extension cords (all the same length, 6′ or longer is better)scissorsmasking tape3 skeins of thick/bulky weight yarn3 plastic cord tubes (these can be found at IKEA or most hardware stores in the electrical section) Instructions. How To Remove a Light Fixture. Changing out a light fixture can be an easy, relatively quick way to update a room, and it can often make a dramatic difference.
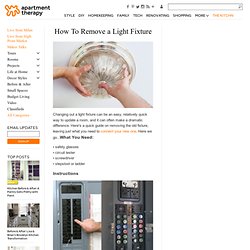
Here's a quick guide on removing the old fixture, leaving just what you need to connect your new one. Here we go...What You Need: • safety glasses• circuit tester• screwdriver• stepstool or ladder Instructions 1. 2. 3. 4. 5. 6. After making certain there is no power flowing through your wires, unscrew the wire nuts holding the wires together. Important note: If you don't feel confident about doing an electrical job yourself, don't hesitate to call a pro! Now that you've removed your unwanted light fixture, here is a step by step on how to install the new one: • How To Install a Light Fixture (Images: Breaker Box: Shutterstock, all others: Sarah Dobbins) Mason jar lamp. How To Make A Globe Pendant Light. Ubiquitous as they are around here, I can't seem to shake globes from my affections.
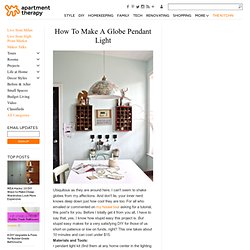
And don't lie, your inner nerd knows deep down just how cool they are too. For all who emailed or commented on my house tour asking for a tutorial, this post's for you. Before I totally get it from you all, I have to say that, yes, I know how stupid easy this project is. But stupid easy makes for a very satisfying DIY for those of us short on patience or low on funds, right? This one takes about 10 minutes and can cost under $15. Materials and Tools:• pendant light kit (find them at any home center in the lighting sections. Other thoughts: If I don't end up going for the spray paint, I'm toying with the idea of wrapping the cord, canopy, and cover in hemp twine for added texture.
(Images: Leah Moss) Outdoor Entertaining: Handmade Garlands. 5 Upcycled Lamps. Whirl-it lampshade - free DIY tutorial. We really needed a new lamp, and we´ve planned to make one for months.
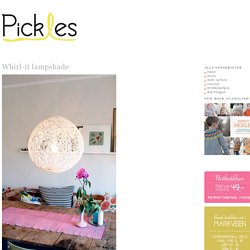
This week we finally got around to it. It takes a bit of different materials, but it´s really easy when you´ve started. We recommend making it outdoors, as it gets quite messy. The result is pretty neat, especially at night when the threads cast shadow on the walls. We planned to make the lamp using the yarn Garnstudio Ice, but it ran out really quickly, and we had to improvise by using a thinner yarn to complete it. What we used One big, round balloon. How we did itGather all the materials.Put the yarn into the glue and mix properly. Fill the balloon to a desireable size. Tin Can Candle Holder. Upholstery basics: how to make a lampshade. Although I’m admittedly a chair addict, they’re not my only obsession.
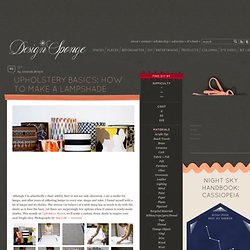
I am a sucker for lamps, and after years of collecting lamps in every size, shape and color, I found myself with a lot of lamps and no shades. The success (or failure) of a table lamp has as much to do with the shade as it does the base, yet there are surprisingly few options when it comes to ready-made shades. This month on Upholstery Basics, we’ll make a custom drum shade to inspire your next bright idea. Photography by Mel Cole — Amanda Read the full how-to after the jump . . . Materials fabricpainter’s tapemeasuring tapechalksquareyardstickpressure sensitive styrenepencilscissorshard, flat object like a plastic rulerbottom and top ringsbulldog clipswhite craft gluesmall paint brushweights for the seampaper tapesewing machinethreadiron Resources Fabric: Amy Butler Lampshade Supplies: Lamp Shop Don’t forget to check out Upholstery Basics: Tool Time to learn more about the tools we’re using today.
Instructions.