
Cichorium intybus var. foliosum (Chicory, Chicorée) An ARM GNU/Linux box for $25. Take a byte! 20 Awesome Projects for Raspberry Pi Microcomputers. Raspdroid mediacenter casemod. Www.southampton.ac.uk/~sjc/raspberrypi/pi_supercomputer_southampton.htm. Return to View video at: Prof Simon Cox Computational Engineering and Design Research Group Faculty of Engineering and the Environment University of Southampton, SO17 1BJ, UK.
V0.2: 8th September 2012 V0.3: 30th November 2012 [Updated with less direct linking to MPICH2 downloads] V0.4: 9th January 2013 [Updated step 33] First steps to get machine up 1. I originally used: 2012-08-16-wheezy-raspbian.zip Updated 30/11/12: 2012-10-28-wheezy-raspbian.zip My advice is to to check the downloads page on raspberrypi.org and use the latest version. 2. You will use the “Write” option to put the image from the disk to your card. Www.southampton.ac.uk/~sjc/raspberrypi/pi_supercomputer_southampton_web.pdf. Raspberry Pi at Southampton. The steps to make a Raspberry Pi supercomputer can be downloaded here [9th Jan 2013 update]: Raspberry Pi Supercomputer (PDF).
You can also follow the steps yourself here [9th Jan 2013 update]: Raspberry Pi Supercomputer (html). The press release (11th Sept 2012) for our Raspberry Pi Supercomputer with Lego is here: Press Release University Page The press release is also here (PDF): Press Release (PDF). Pictures are here - including Raspberry Pi and Lego: Press Release (More Pictures). We wrote up our work as a scientific journal publication where you can find further technical details on the build, motivation for the project and benchmarking. The reference to the paper is: Simon J. Iridis-pi: a low-cost, compact demonstration cluster Cluster Computing June 2013 DOI: 10.1007/s10586-013-0282-7 These are some links you may find helpfulul. Coffee Table Pi. The LCD screen I went with a 24inch LCD screen with LED backlight. Select any size screen you wish. Make sure it has good viewing angles as the screen will be mounted upwards and almost always viewed at an angle.
Test out the screen viewed from above and below, from the left and right and make sure it still looks almost as good as when viewed straight on. Select one that can be wall mounted as it can then be attached to the table from underneath. Select one that turns on without needing any buttons to be pressed as all the buttons with be hidden inside the table. The Joystick and Button This is up to you, I went with a Happ 4 or 8 way arcade ball top joystick, 2 blue American style buttons, 1 player and 2 player buttons. Perspex sheet 4mm Cut to the size of the outside edge of the LCD screen, larger than the viewing size of the screen as it will be screwed onto the underside of the top of the table.
Raspberry Pi powered time lapse dolly (RasPiLapse) The heart of this machine is a Raspberry PI, a low cost small footprint computer.

It runs linux so it's easy to write and deploy code on it. It also has a GPIO (General Purpose Input/Output) connector which we can control. The code is pretty basic and written in python. Raspberry Pi: Project 1 – Pandora Streamer « Engineering « Shaun Gehring. Overview – What is it Using a Raspberry Pi you can create a pretty cool stand alone Pandora Streamer.
Its a pretty easy project to put together and will only take an evening. Even though this project is basic from a Electrical Engineering standpoint you will learn the basics of GPIO, Python, BASH and basic Circuts. The best part is you can totally use this project on a daily basis. This version also will allow you to use the device as a Airplay reciever when you are not using Pandora. I do not just want to show you what i did but show you where i went wrong and how i got the correct answers so you will feel confident trying this stuff yourself. I originally found this project on Instructables ( I started with this but re-wrote most of the code. What you will need Optional WIFI adapter Lets get started. Solar Powered Raspberry Pi. Tutorial: How to Set Up a Raspberry Pi Web Server. People are doing a lot of cool things with the Raspberry Pi.
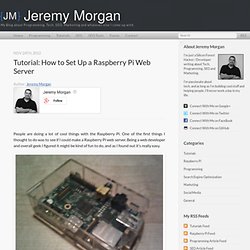
One of the first things I thought to do was to see if I could make a Raspberry Pi web server. Being a web developer and overall geek I figured it might be kind of fun to do, and as I found out it’s really easy. Getting Started Setting up a Web Server on this device really isn’t much different from any other Linux machine, but there are a couple things you’ll want to do in order to get it working right. The first thing you want to do is get the Raspian Wheezy Image from here. The Raspberry Pi has a “memory_split” option that divides the memory between the CPU and GPU (Graphics). You may want to also enable the SSH server if that’s how you’re going to be accessing the device. Note: You can overclock this device, but I wouldn’t recommend it. After you’ve saved your settings reboot the device. Next we’re going to do a firmware upgrade, we need to install git: then download the firmware update and run it: Install Apache and PHP: Summary.