
Adafruit Electret Microphone Amplifier. Did we spell Electric wrong?
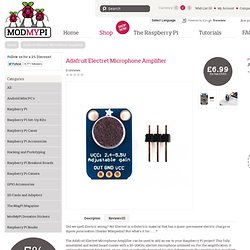
No! Electret is a dielectric material that has a quasi-permanent electric charge or dipole polarisation (thanks Wikipedia)! But what's it for. . . . ? The Adafruit Electret Microphone Amplifier can be used to add an ear to your Raspberry Pi project! This fully assembled and tested board comes with a 20-20KHz electret microphone soldered on. Korylprince/python-google-transcribe. EZ430-Chronos. The eZ430-Chronos is a highly integrated, wireless development system that provides a complete reference design for developers creating wireless smart watch applications.
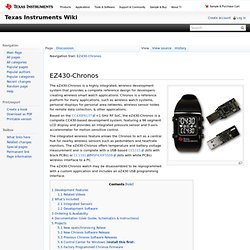
Chronos is a reference platform for many applications, such as wireless watch systems, personal displays for personal area networks, wireless sensor nodes for remote data collection, & other applications. Based on the CC430F6137 <1 GHz RF SoC, the eZ430-Chronos is a complete CC430-based development system, featuring a 96 segment LCD display and provides an integrated pressure sensor and 3-axis accelerometer for motion sensitive control. The integrated wireless feature allows the Chronos to act as a central hub for nearby wireless sensors such as pedometers and heartrate monitors.
Edward's Stuff. Quick video showing the entire setup in action.
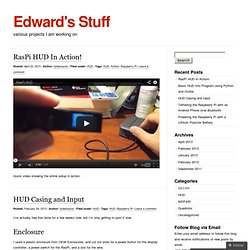
I’ve actually had this done for a few weeks now, but I’m only getting to post it now. I used a plastic enclosure from OKW Enclosures, and cut out slots for a power button for the display controller, a power switch for the RasPi, and a slot for the wire. I purchased a “Ring Mouse” made by Genius to use as an input device. It fits right on your finger with a rubber strap, which is pretty nifty. You move your thumb around on the optical sensor to move the mouse and press down on it to click.
I am tethering my Raspberry Pi with my Android phone over Bluetooth for internet connectivity. I used the Kinivo BTD-300 Bluetooth 3.0 USB dongle, which works right out of the box. Here are the steps I used to get tethering working: Install bluetooth packages:apt-get install bluetooth bluez-utils blueman? Your Pi should now be tethered! Over the past few years, smartphones have become ubiquitous as a constant mobile information stream.
Build a Raspberry Pi Powered Retro Game Console Inside a Game Boy. How to Build an All-In-One Retro Game Console for $35, the Easy Way. Build Your Own: Safeplug (Tor Proxy Box) Safeplug is a special router that creates an anonymous Internet connection via Tor network (what is Tor?)
; it costs $50 – but you can make your own with a Raspberry Pi and USB WiFi dongle. In truth, you won’t be saving much: the cost of the Pi plus a suitable WiFi dongle will cost you about $50 or more. But DIY is fun, we’ll learn lots in the process, and you probably already have a Pi sitting around collecting dust. Shopping List Raspberry Pi (model B)SD Card of at least 4 gigabytesEthernet cableCompatible USB Wifi adapter – this means able to work in structure mode with hostapd package (such as this one based on RT5370 chipset)Micro USB power adapter The Theory We’ll adapt Raspberry Pi to act as a router: it’ll plug into an Ethernet port on your existing Internet router just like any other device, but it’ll also connect to the Tor anonymising network. There is, of course, a reduction in speed to doing this, both through the routing element and the actual Tor network. Getting Started. Trevor Appleton: Installing MediaWiki on a Raspberry Pi.
I cannot sing the praises of MediaWiki highly enough. For those who don't know, MediaWiki is the program which is used for Wikipedia. I introduced the company I work for to MediaWiki so they could use it as a repositry for all the information about projects, HR, Finance, IP etc. Basically anything which should be written down and referred to in the future is stored in the wiki. As an experiment I installed MediaWiki on my Raspberry Pi. I was surprised how well it ran and thought I would share with you the installation process for this. Before we get onto the installation of MediaWiki its worth pointing out that you are installing a LAMP server onto your Raspberry Pi.
Linux, you should all be familiar with, I hope. :-)Apache is a web server. OK enough talking on with it! Installation Most of the installation will be through the command line. Wi-fi on Raspberry Pi, a simple guideRaspyFi. Since the Raspberry Pi comes only with a wired network, it could be useful for lot of us to get it wi-fi ready.
Wi-fi on Raspberry Pi can be achieved with little effort and at cheap expences. We do only require a compatible wi-fi dongle, and the best candidate for the job is the Edimax EW-7811Un. These are the features: Supports 150 Mbps 802.11n, so if you have a N network, you’ll have enough bandwith to stream even Hi-res FLACsLow power consumption, it can work directly attached to the Pi withouth a powered usb hubWorks automatically with Raspbian, since it’s drivers are includedIt’s very small, so there’s plenty of space left on the Pi to attach your USB DAC or USB DongleIt’s quite cheap, you can find easily at prices above 10 euros (see later)