How to use MultiScatterTexture. Light and render an interior day and night scene using 3ds Max and V-Ray. In this step by step tutorial you will learn how to set lights, cameras and render settings for an interior scene using 3ds Max and V-Ray 2.0.

Each step will take you through how to render during the day as well as rendering at night as each scenario requires different lighting and render settings. The day scene will be illuminated using the VRaySun and VRaySky and the night scene will be illuminated using artificial light generated from interior lights and lamps. Correct material properties and light intensities are the key to achieving correct overall illumination. The V-Ray Physical Camera will be used to control the exposure as the lights and camera work together to create the correct intensity for day and night. Scenes that have low level lighting are more likely to generate artefacts, so the right balance is required in order to get a high quality render with minimal noise and splotches within an acceptable render time. Topics covered: Downloads Material settings for the floor lamp. Vray Render Elements Tutorial Architectural Visualisation - Jironomo 3D Visualisation Australia.
Vray Proxy's - How to create and use them.
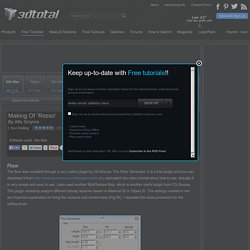
In this tutorial I will show you how to create a vray proxy so that you can drop it into your 3d scene - with all the materials already on it!. A vray proxy allows you to import selected geometry from an external mesh at render time only. This enables you to use mutiple complex objects within your scene without completely bogging down 3ds max. I will now show you how to create a simple vray proxy of a plant that you can then merge into other scenes with the material already applied. The key to being able to import your proxy with the materials applied and on the correct geometry is in the way that you both create the vray proxy and also the actual method of importing it onto your scene. Rosso' by Alfa Smyrna. Floor The floor was modeled through a very useful plugin by CG-Source: The Floor Generator.
It is a free plugin and you can download it from and watch the video tutorial about how to use. Actually it is very simple and easy to use. I also used another MultiTexture Map, which is another useful plugin from CG-Source. This plugin randomly assigns different bitmap textures based on Material ID or Object ID. Fig. 06 Curtain The curtain was modeled by simulating through the MaxCloth. Fig. 07 Fig. 08 Fig. 09 Books. Different ways to add Gamma in your renders. Share with your friends!
Every real device to take pictures adds gamma. Only experts can produce amazing renders? Share with your friends!
This is the story of Najith, a beginner producing great images! He was inspired by this render (made from a V-Ray expert!) And modeled it from zero. Dune Apartments by Jakub Gramczynski. Here’s a selection of images Jakub Gramczynski showcased on the forums that were made while working at Mellon Architekci architectural office.
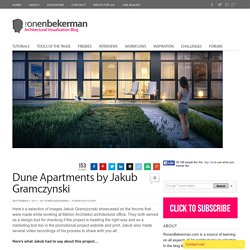
They both served as a design tool for checking if the project is heading the right way and as a marketing tool too in the promotional project website and print. Jakub also made several video recordings of his process to share with you all. Here’s what Jakub had to say about this project… Dune Apartments is the first out three buildings in a complex designed by Mellon Architekci on the Polish Baltic seacoast. I took part in the design process but mostly focused on visualizing different concepts, details, landscaping features and preparing final images for marketing purposes. The whole project has been executed in Archicad. Since the time for each shot was pretty slim (everything had been done during normal working days in between other projects) I had to render simpler views and upgrade them in Photoshop. Kind regards, Creating Photorealistic Floors. Share with your friends!

Did you saw how realistic is the floor in Delicate Room? > CLICK HERE This is because the floor is not a flat plane with a texture map but it’s modeled! Now I’ll show you how to create photorealistic 3d floors using FloorGenerator to achieve this results: You also will see how create funny run-down floor like that: Using Floor Generator Script by Bertrand Benoit.
In this how-to article Bertrand describes in detail the way he uses the Floor Generator Script using the GH House model as an example.
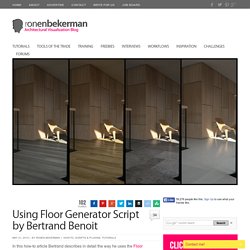
Check Bertrand’s full GH House making of article for more information about his work. Back in the old days, I always struggled to create hardwood parquet floors that would work in any situation. Either my texture maps were big enough to cover large expanses of floor without showing visible tiling but they would show some pixelization when zooming on individual floor planks. Or they were detailed enough to be seen up close but did not cover large enough areas, showing repetitive patterns over a certain distance. Initially, I solved the dilemma by actually modeling my parquets and texturing individual planks, placed at random, instead of an entire floor. 3D Ground Cover Modeling in 3D Studio Max. Following a great thread in the finished works section of the forums, Chris (blowback) was very kind to send me a ‘Making-Of’ article about the 3D modeling of the ground cover in the architectural visualization of ‘Jeff’s House’.
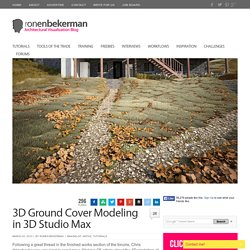
I hope you’ll enjoy this article and learn from it as much as I did! I started the process of modeling the ground with a simple plane, adding a displacement modifier to it. To the bitmap slot of that modifier I then added a ‘Height map’ that I manually created in Photoshop. You can see the map I used below. To further adjust the shape of the ground surface I added a FFD Modifier to allow for general and quick adjustments. How to Strip Texture Paths in 3ds Maxcgways. Changing Multiple Texture Paths in 3ds Max Quickly and Easily. << Back to Tutorials When using multiple machines to render an animation or still image, it’s important that every computer has access to every texture in the scene.
Unfortunately when working on a project there are usually always a few textures that can only be found on the computer you have been using. Linear Workflow in 3DSMax and VRay - Page 2 - Free Vray Rendering Tutorials for 3dsmax. Users of other apps/renderers, I am starting to put pertinent info at the bottom of the page Have you ever wondered why your GI renderings start out so dark?
Well, in fact they are not so dark. The problem lies with the display device (the CRT or LCD) and that the software is not making adjustments for the gamma that the displays put on our images. That gamma is specifically called sRGB. Technical information about sRGB can be found at that site. Let's take a look at what your monitor does to image data you send it.
HDR Image Based Lighting 3D Scene Setup. This short video is a follow-up on a comment made by alex_starc in the 10 Free HDRI Spherical Skies Maps post. He had issues with the sky being too dark in the render so I just recorded a short session of how I setup my scene with Image Based Lighting (IBL) using and HDRI map. Hope this helps. 3DS MAX Materials Changing Multiple Texture Paths in 3ds Max Quickly and Easily Tutorial. August 2011. James Cutler written this tutorial for Mintviz Diffuse Diffuse This is the actual colour of the surface, reflection and refraction colours can affect the visual appearance of this colour. It is important to understand that no material in the real world is pure white RGB (25,255,255) nor pure black RGB (0,0,0). When creating a white or black material, set the colour values to an off white RGB (245,245,245) / black RGB (2,2,2).
Roughness. Vray Dirt Tutorial. A quick tutorial on adding dirt to specific materials in Vray. A very useful application of the vraydirt shader in Vray is to make materials look dirty/weathered. Used in it's basic form, with default settings, vraydirt can be used to add a general darkening around edges/corners in your 3d model. It can also be modified to affect only areas directly below 3d features. VRayLightMtl + VRayDirt for Quick AO Render Checkup. Here’s a quick tip I use almost all the time now, mostly because I really like the look and it’s easy and quick to setup, but the main advantage of an AO (ambient occlusion) pass is spotting problem areas in the geometry – especially holes and flipped normals you might have missed Setting up the AO pass with VRayLightMtl & VRayDirt is real easy and fast.
You don’t need to turn on GI or use a VRay Physical Camera for this (if you do, make sure to tick off the exposure option). After I import the model into 3d Studio Max, or just finished modeling inside 3dsmax, I run this quick pass to check the model for geometry bugs such holes and flipped normals i might have missed. In the image below you’ll see how those problem areas will show in such a pass. This will only work if the Emit light on back side option in the VRayLightMtl is off allowing for all those problem areas to appear pure black since they are not emitting any light. Shadow Matte with V-Ray. SUN RAYS TUTORIAL (VIDEO) - BLOG. Tutorial: V-Ray Distributed Rendering and Backburner. Part 1: Network and User Setup | Part 2: V-Ray Installation | Part 3: Distributed Rendering | Part 4: Backburner. How to reduce the rendering time. Share with your friends! I remember that some years ago, have produced a rendering in 10/15 hours was cause for pride.
Untitled Document. Linear workflow 'reloaded' 3D Studio MAX Hotkeys and Mouse Essentials. When you start out with 3D Studio MAX you will likely start with trying out different tools and features and the basics.