
How To Dye Buttons. I ran into a dilemma last week.
I was completely out of a specific colour of buttons and I needed some ASAP! After frantically searching the internet for the exact same buttons (same size, same colour, same shape) I came out empty handed. I was at my wits end when I decided that the only route to take would be to dye some existing buttons I had in a different colour that were the exact same shape and size. After doing some research, I found out that RIT dye was pretty much the only dye that would work on plastic buttons properly. Then came my adventure to find said dye in my little town.
Stain PVC Any Color You Like. Hot/Cold LEDs In this project, we will combine an Arduino, a Ping sensor, and a small assortment...
MonoBox Powered Speaker MonoBox is a small, inexpensive powered speaker that amplifies the output of your headphone music... Little Big Lamp Add bright lighting to your space with powerful LEDs housed in PVC. Make Pom Poms With A Fork. According to the Merriam-Webster dictionary, a pom pom is “an ornamental ball or tuft used especially on clothing, caps, or costumes”.
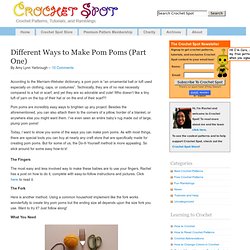
Technically, they are of no real necessity compared to a hat or scarf, and yet they are so adorable and cute! Who doesn’t like a tiny tuft of yarn on the top of their hat or on the end of their scarf?! Pom poms are incredibly easy ways to brighten up any project. Make Pom Poms With A DIY Template. In part one (see part one here), I mentioned three different ways to make pom poms: with your fingers, with a tool, and with a fork.
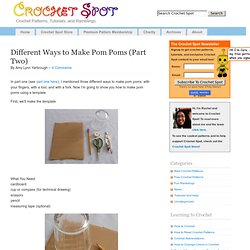
Now I’m going to show you how to make pom poms using a template. First, we’ll make the template. What You Need: cardboard cup or compass (for technical drawing) scissors pencil measuring tape (optional) The first thing you’ll do is trace a circle. Connection Technique: Homemade Rivets. Although I can silver solder, there are times when other methods of joining are required, or I just fancy a change, or a design warrants the look of little rivets.
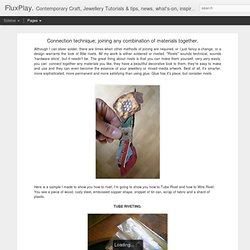
All my work is either soldered or riveted. "Rivets" sounds technical, sounds 'hardware store', but it needn't be. The great thing about rivets is that you can make them yourself, very very easily, you can connect together any materials you like, they have a beautiful decorative look to them, they're easy to make and use and they can even become the essence of your jewellery or mixed-media artwork. Best of all, it's smarter, more sophisticated, more permanent and more satisfying than using glue. Glue has it's place, but consider rivets. DIY Stunning Wall Murals. Plant-theme wall decals and stickers are in vogue.
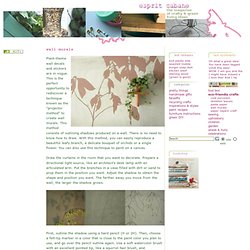
This is the perfect opportunity to rediscover a technique known as the "projector method" to create wall murals. This method consists of outlining shadows produced on a wall. How To Stencil & Stenciling Tips. Happy {giveaway} Thursday!
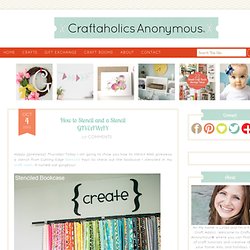
Today I am going to show you how to stencil AND giveaway a stencil from Cutting Edge Stencils! Yay!! So check out the bookcase I stenciled in my craft room. It turned out gorgeous! I stenciled the back of my fabric bookcase {originally found on the side of the road!} I stenciled a turquoise paint on the back of the white book shelf. Casting Resin Tutorial - Flickr. The Easiest Way To Make Resin Jewelry. We’ve all seen cool resin pendants at jewelry shops, boutiques, and on fashionistas everywhere.
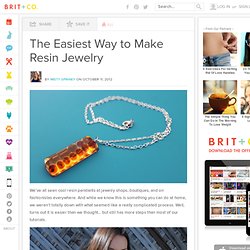
And while we know this is something you can do at home, we weren’t totally down with what seemed like a really complicated process. Well, turns out it is easier than we thought… but still has more steps than most of our tutorials. If you’ve always wondered if you could make resin jewelry in the comfort of your home, the answer is yes. You just need a few simple tools, all available on our favorite online craft store, Amazon ;) While you get your “fillers” together, place the resin and hardener bottles in a bowl of hot water. This helps the resin mix nicely, and helps avoid air bubbles. We’ve got repurposed jewelry, flowers and twigs found outside, sprinkles (yes, sprinkles!) Use your resin mold to organize your fillers. Now it’s time to mix the resin! Or sacrifice a cheap plastic measuring cup, and pour the resin mix into a condiment bottle for easy pouring.
Transfer Images Onto Wood. You can transfer printed images and text onto wood with this tutorial.
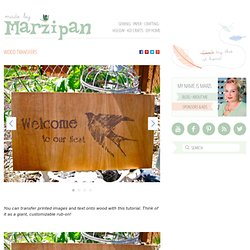
Packing Tape Image Transfers. I love image transfers.
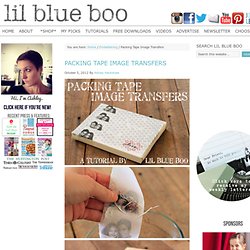
It’s something I’m always using in my journals but there are so many other fun uses for them. All you need to make a transfer is a photocopy of an image or words and packing tape. You can also use printouts from a laser printer or magazine pages. Inkjets will not work because they are not heat based toner. So take some photos to the copy machine or tear some pages out of your favorite magazine to get started. 12 Easy Image Transfer Methods for DIY Projects. Preserve Autumn Leaves.
DIY Skeleton Leaves. It is hard to reproduce the beauties of nature. In the fall, by a pool of water, you may sometimes find skeleton leaves in which the pulp has decomposed, so that only the veins are left, like a fragile piece of lace created by nature. Here are instructions on how to "skeletonize" leaves. With this method, you will need to use thick, shiny leaves, such as ivy, maple, or hydrangea. If the leaves are too fragile, this approach will not work.
Choose a dozen or so leaves and put them in an old saucepan that can withstand a few stains. When the leaf pulp has completely softened - this might take up to one or two hours, depending on the type of leaf - lay a leaf on a dishtowel. Once only the skeleton of veins is left, place the leaf on a sheet of paper and cover with a few drops of hydrogen peroxide. Preserve & Create Skeleton Leaves. Danelle Karth's image for: "How to Preserve and Create Skeleton Leaves for use in Handicrafts" Caption: Location: Image by: Ultra Quick & Cheap Resin Casting. DIY Painted Feathers. I’ve always loved the idea of painting fake feathers, and with festival season underway it seemed like the perfect time to do it. How To Cut Glass With String. I posted a picture about 1 week ago on Instagram, Facebook and Twitter of me cutting glass using just string. I got LOT’S of requests for a tutorial on how I DID THIS!
So here it is. How To Stencil & Write On Glass. {yay for thursday!} You know, sometimes its the little things in life that make the difference. And I think its the same with crafts. Those small touches and personalization-s make a huge difference! For example, the I {heart} You votive candle holders below {also part of my V-day mantel!} Those votive holders just wouldn’t be nearly as interesting without the I {heart} U. seriously! Supplies: 3D Gloss Enamel by DecoArt in Red, glass, paper 1. 2. How To Drill A Hole In A Glass Jar.
The other day, I wrote about attempting to drill through glass and I finished up the project this weekend.