
Create an Army of Toy Soldiers - Arnold for Maya Tutorials. In this tutorial you are going to regress to a fun part of your childhood when you may have enjoyed playing with toy soldiers.

Unlike your childhood, you will be using XGen to arrange the soldiers into interesting formations using expressions and texture maps as masks. We will also cover ways to add color to the individual soldiers using expressions and texture maps. For some real world inspiration you should also look at some of the work by this artist and also this artist. Both artists use toy soldiers, among other things, to create interesting works of art. The tutorial is broken up into the following chapters: Creating the Archive Files Creating the XGen Description. Displacement Maps. Lumok' by Jean-Michel Bihorel. It was only once all the elements of the model were finished, retopologised and I'd even opened the UV that I decided to make a big change.
I was satisfied with the head much more than the rest of the body. As the body was pretty tall in proportion, the head had less importance overall. I thought that making a small body and a big head would give much more importance to his face. After a very basic sketch I made a few tests in ZBrush and became convinced that it was the good choice. Making of Varga. This tutorial is dedicated to AREA community. 1.Intro2.Game modeling workflows3.Tools used4.Workflow used for Varga 5.Final model You could also check the first part of this tutorial : Varga hair tutorial (low poly game character hair) This is not a step by step tutorial.I will summarize the workflow i used for one of my characters with lots of images and some print-screens directly from the applications used ( maya/mudbox/photoshop etc ...), also in the end i will provide some info about tangent space normal maps so you could think of this tutorial as mainly normal mapping related stuff.
Tip:whenever you see a hand cursor while hovering over an image you can click on it to see a high rez version of the image , like in the image below :) 1.Intro This character is my entry for Dominance War II competition ( www.dominancewar.com ). I will start by showing you the final files sent to the competition to give you an idea about the direction this tutorial is going. One-Click Ambient Occlusion in Maya. Blendnormals. Octane Render. Урок по освещению. Maya User's Guide: Increase overall rendering speed in mental ray for Maya. Controlling Primitives with a Texture Map. Image Description: Scene formed of XGen 'archive' cube primitives driven by a texture map XGen is a powerful tool that offers many creative opportunities for positioning an arbitrary number of primitives either randomly or uniformly placed. You can use texture files with XGen Descriptions to specify the location and density of primitive generation as well as to control the number of primitive attributes.
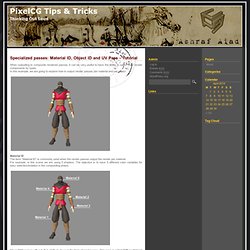
This tutorial will show you how you can very easily use a texture map to 'drive' the length, width and depth of an XGen primitive. These primitives can range from spheres, splines or as in the example below, geometry that has been exported as an archive. Specialized passes: Material ID, Object ID and UV Pass – Tutorial. When outputting to composite rendered passes, it can be very useful to have the ability to select your render components by types.
In this example, we are going to explore how to output render passes per material and per object. Material ID The term “Material ID” is commonly used when the render passes output the render per material. The Best Way to Render Wireframe in Maya. Posted: January 25th, 2010 | Author: Ayan | Filed under: 3D | Tags: 3D, Maya | 61 Comments » A quick google for render wireframe in Maya will get you some sound results.
Unfortunately, I tried them and they didn’t consistently produce the results I needed. So here is the most consistent, and thus in my opinion best way to do wireframe in Maya. Method 1: “The Best Way” – Mental Ray Contours Why is it the best? Create Light Streaks in Maya Mental Ray Final Gather. Maya render bat batch file. Maya User's Guide: Render from the command line. Z-Depth Pass. Добрый день!!!
Сегодня я расскажу о том как настроить рендер пасс Z-Depth. Что такое Z-Depth? Z-Depth пасс используют для настройки фокуса изображения при композитинге. Так как при рендере программными средствами, время просчета увеличивается в разы, для этого используют z -depth пасс, благодаря которому можно сократить время просчета.И так открываем майку и создаем сферы в таком порядке как изображено на рисунке. После чего заходим в Layer Editor во вкладку Render и создаем пустой render layer нажав на кнопочку Create new empty layer. Переименовываем слой в Z_Depth. Нажимаем на правую кнопку мыши и выбираем Attributes В появившемся меню ставим галочку на против Global. zDepth-Workflow Autodesk Maya. GPU Ambient Occlusion in Maya 2014. One of the new features in mental ray 3.11 is the ability to render Ambient Occlusion (AO) on the GPU while your CPU renders the other framebuffers.
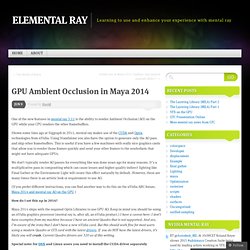
Shown some time ago at Siggraph in 2011, mental ray makes use of the CUDA and Optix technologies from nVidia. Using Standalone you also have the option to generate only the AO pass and skip other framebuffers. This is useful if you have a few machines with really nice graphics cards that allow you to render those frames quickly and send your other frames to the renderfarm that might not have adequate GPUs. We don’t typically render AO passes for everything like was done years ago for many reasons. It’s a multiplicative pass in compositing which can cause issues and higher quality indirect lighting like Final Gather or the Environment Light will create this effect naturally by default. Tips & Tricks FAQ. What kind of camera will I need?
A digital SLR camera with interchangeable lenses is the ideal solution, but almost any camera will work if you can lock the aperture, lock the focus, and lock the white balance. Ultimately, you get what you pay for. Digital SLRs generally have more options for white balance, mirror lockup, etc… the more choices, the better! If you want a camera with the most convenient HDR shooting setup, choose a camera that has an auto-bracketing (AEB) option. Mental Ray nodes. Contains all the materials maya nodes has and many more. These are specificly designed for mental ray render.
For access the mental ray nodes in hypershade you have to hold the RMB over “Create maya nodes” and choose “create mental ray nodes”, if you don’t see this option you have to go to window>setting/preferences>plug in mananger and turn of the “loaded” checkbox of mayatomr.mll Misss-fast-simple-maya Is a render efficient version of Subsurface Scattering but not as accurate as Misss. Mental Ray Sampling (adaptive sampling settings) Mental Ray Sampling (adaptive sampling settings) Introduction Sampling is one of the most delicate features of Mental Ray (and most of the other renderers) rendering-time and quality-wise.
Some Maya-renderer users tend to use only the default preset render settings of Maya and this technique leads to very drastic rendertime increases when dealing with Mental Ray. To properly tune rendetimes and image quality to your taste you have to understand a few fundamental concepts and techniques. Sampling Sampling itself is basically the process of shooting rays for every sample from the camera (eye rays) into the scene and where these rays intersect geometry they query the shading information for that point. The Native IBL. Inside mental ray there is a Native or Builtin image based lighting scheme called environment lighting mode.
This was integrated into mental ray some time ago in version 3.7. So it’s been around for about 4 years or more. Faking ray-traced shadows with depth-map shadows. To produce realistic 'soft shadows' in Maya, you have two solutions. # Ray-traced shadows (with radius > 0); it works pretty well, but the higher rays samples (at low value, you get a noisy shadow), the longer it'll take to compute an image. # Depth-map shadows, which is the quickest way, but has some limitations in realistic rendering: by default a depthmap shadow is sharp or blurred (according to the Dmap filter size value in the shadow section of a light) Before starting the tutorial, let's review what a depthmap shadow is and how it's generated.
A depthmap shdw is a depth image (Z channel) of your scene, calculated from the light's point of view, and that indicates to maya, which surface is illuminated and which surface is in shadow. Now, in order to produce realistic depthmap shadows, you'll need a lightInfo node, and an anim curve connected to your light. Depth May versus Raytraced Shadows in Maya and Mental Ray Renderers.
Rasterizer. Skeletons from the TV series Merlin - rendered with the rasterizer If you read my post on unified sampling you might have heard me talking about using the unified sampling settings to control the rasterizer. While it is important to note that there is no difference between how the regular rasterizer and unified rasterizer work, it is convenient to be able to control all of mental ray’s primary rendering modes using the same set of controls.
Thus I will explore the rasterizer from a unified point of view. Why Use the Rasterizer? With unified sampling, it’s clever error estimation, and it’s fast ray traced motion blur, you may be wondering why care about the rasterizer? Technically speaking, the rasterizer achieves motion blur performance improvements over adaptive ray tracing by separating the shading component of sampling from the antialiasing component of sampling. Fgshooter UI for Maya. WriteToColorBuffer. Maya's render passes are designed to allow you to create the images you need for a composite, without the overhead of using render layers. However, their implementation has raised some concern from artists who like to use mental ray materials, because there is very limited support for these materials from Maya's default passes. While render layers allow you to see in the viewport which objects will contribute to a given pass, you incur the overhead of having to translate the objects in the render layer before mental ray can render them.
Instead, you can set up a single render layer and extract as many render passes as you like, from a single render. Before I tell you about the writeToColorBuffer node, let's take a quick look at how to set up a render pass. In my scene, I have a simple hierarchy of a car and some wheels, rearview mirrors, headlights....a directional light and an IBL node. With a little ambient occlusion, the scene renders in 1 minute 21 seconds at 640 x 480.
Mental ray rendering fur with passes. Flexible shading on Maya Fur and Hair. Maya Fur and Mental ray Rasterizer (here we go again...) Fur. Fur + Ambient Occlusion? Ambient Occlusion with Maya Fur (Grass Preset) Maya User's Guide: Troubleshoot fur shadows flickering.