
Wiimote. This article will go through the basic steps required to have a working Wiimote in Linux for general use.

It will not go into much detail for some steps as there are many guides already written for some parts already. Note: The approach shown on this page is based on software which is no longer developed upstream. There is a new effort on creating a Wii Remote driver based on the new Linux kernel Wii Remote driver. See XWiimote if you want to test the new Wii Remote software stack. Prerequisites Bluetooth cwiid Wiimote The most important piece required is Bluetooth, this must already be configured and running without the help of this guide.
Connect the Wiimote First you need to make sure to load the uinput module: $ sudo modprobe uinput You should have a device in /dev/uinput now. Thanks to cwiid you can scan for your Wiimote now: (press the 1 and 2 buttons on your Wiimote) $ hcitool scan Scanning ... Input Device The Wiimote can act as a regular input device like a mouse using wminput. 1. 2. Raspberry Pi. Update: 14th May, 2013 wiringPi version 2 has been released and now has its own website ( to look after it.

Most of the documentation on the projects site has been copied over to it the new site, but there may still be 1 or 2 pages that are still missing. I’d encourage you to use the new site if possible where there will be a forum and wiki. The following tables give the mapping of the Raspberry Pi GPIO Pins to the GPIO connector in relation to the pin numbers and the physical location on the connector. This is a representation of the GPIO connector as viewed looking at the board from above, with the USB power at the top and the GPIO to the top-right of the board. A GPIO keyboard for OMXplayer. # CMake's configuration # Nome del progettoproject( RpiHw ) # Vincolo sulle versioni minori di CMakecmake_minimum_required( VERSION 2.6 ) # Imposto la versione della libreriaset( RPI_HW_VERSION_MAJOR 0 )set( RPI_HW_VERSION_MINOR 2 )set( RPI_HW_VERSION_PATCH 2 ) # Cerco le dipendenze necessariefind_package( Threads ) # Aggiungo una direttiva al compilatoreadd_definitions( -Wno-psabi ) # Percorso degli headersinclude_directories( ${CMAKE_SOURCE_DIR}/include ${CMAKE_BINARY_DIR}/include) # Ricavo alcune informazioni sul sistema# cat /proc/cpuinfo | grep Revision | awk "{printf $3}"execute_process( COMMAND cat /proc/cpuinfo COMMAND grep Revision COMMAND awk "{printf $3}" OUTPUT_VARIABLE RPI_REVISION )
Using a keypad with Raspberry Pi. Chorded keyboard. A chorded keyboard minus the board, typically designed to be used while held in the hand, is called a keyer.
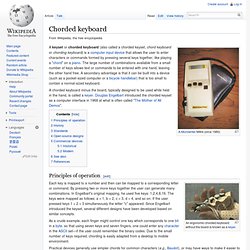
Douglas Engelbart introduced the chorded keyset as a computer interface in 1968 at what is often called "The Mother of All Demos". Principles of operation[edit] An ergonomic chorded keyboard without the board is known as a keyer. Each key is mapped to a number and then can be mapped to a corresponding letter or command.
By pressing two or more keys together the user can generate many combinations. Practical devices generally use simpler chords for common characters (e.g., Baudot), or may have ways to make it easier to remember the chords (e.g., Microwriter[1]), but the same principles apply. Douglas Engelbart filed two new patents for mobile chorded keyset devices[citation needed] and TipTap.mobi released a chording app for the iPhone with Douglas Engelbart in 2010.[2] History[edit] Users in Engelbart's Augmentation Research Center at SRI became proficient with the mouse and keyset. Homework2-ShiryGinosar - CS294-84: Interactive Device Design.
Text entry technique I implemented a chorded keyboard with capacitive sensing keys and one pushbutton used to commit a chord (character).
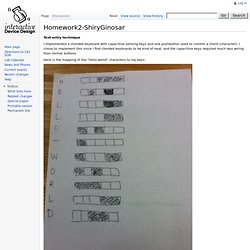
I chose to implement this since I find chorded keyboards to be kind of neat, and the capacitive keys required much less wiring than normal buttons. HW 2 - Text Entry Device - CS294-84: Interactive Device Design. Consider these instructions to be a work in progress until 9/5!
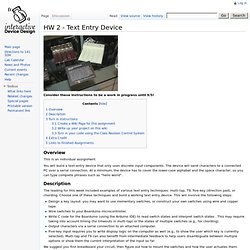
Overview This is an individual assignment. You will build a text-entry device that only uses discrete input components. The device will send characters to a connected PC over a serial connection. At a minimum, the device has to cover the lower-case alphabet and the space character, so you can type complete phrases such as "hello world". Description The reading for this week included examples of various text entry techniques: multi-tap, T9, five-key (direction pad), or chording.
Design a key layout: you may want to use momentary switches, or construct your own switches using wire and copper tape. We suggest you first breadboard your circuit, then figure out how to mount the switches and how the user actuates them. Turn in instructions Create a Wiki Page for this assignment Begin by creating a new wiki page for this assignment. Replace FirstName and LastName with your real first and last names. Write up your project on this wiki.