background preloader

Make your own Laundry Detergent

Make your own Laundry Detergent
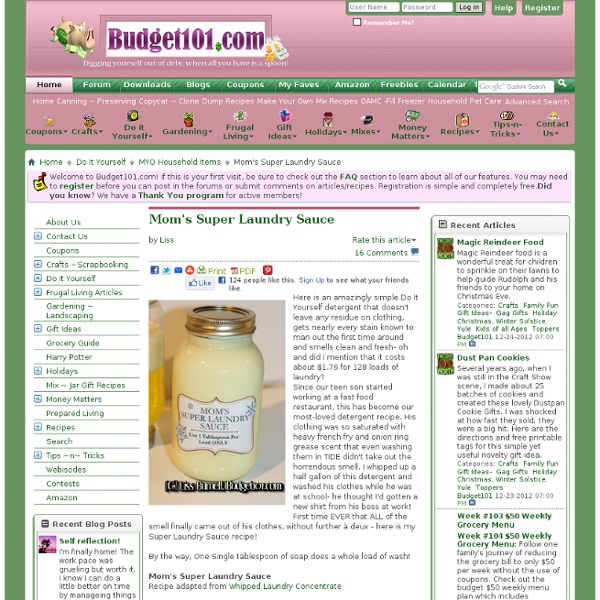
The following Content was Provided by www.Budget101.com "Digging yourself out of debt, when all you have is a spoon" Here is an amazingly simple Do It Yourself detergent that doesn't leave any residue on clothing, gets nearly every stain known to man out the first time around and smells clean and fresh- oh and did I mention that it costs about $1.76 for 128 loads of laundry? Since our teen son started working at a fast food restaurant, this has become our most-loved detergent recipe. His clothing was so saturated with heavy french fry and onion ring grease scent that even washing them in TIDE didn't take out the horrendous smell. I whipped up a half gallon of this detergent and washed his clothes while he was at school- he thought I'd gotten a new shirt from his boss at work! First time EVER that ALL of the smell finally came out of his clothes, without further à deux - here is my Super Laundry Sauce recipe! By the way, One Single tablespoon of soap does a whole load of wash!

Homemade Hair Masks & Conditioning Wraps If hair is dry or damaged, here are a few recipes to try that will both nourish and bring it to a healthy shine. These are made with natural ingredients and most are likely in your pantry already. The hot oil remedies at the bottom of the page work best if a warmed towel is wrapped around the head after treatment is applied, here’s how to prepare them: Preheat oven to 200°F.Lightly spray both sides of a towel with water then fold and arrange them in a large paper bag (or roll in aluminum foil).Place bag (closed) on a baking sheet then put in the oven on the middle rack.Turn off heat and they should be ready to use in about 10 minutes or so.Crockpot Method: Generously mist them with water, roll up then arrange in a pre-heated crockpot (medium temperature). Cover and leave for about 20 mins, reducing to low after 10. Use them only when they’re cool enough to handle. Notes: “EO” is short for Essential Oil“EVOO” is short for Extra Virgin Olive Oil Almond Avocado (to help repair split ends) Banana

A Modern Hippie: Chemical Free Foaming Hand Soap This week has been a crazy week. I have been listening to the online Real Food Summit presented by Underground Wellness. Have you been listening and enjoying the Summit? If you have not signed up for this FREE summit I highly recommend checking it out today! There are three seminars each day from some of the top people in the real food movement. The seminars are only available (for free) during that day, so if you want to check some of them out don't wait around. Antibacterial Agent No Better Than Soap & Water – and It’s ToxicEWG's Guide to TriclosanDangers of Antibacterial SoapScientists Discover That Antimicrobial Wipes and Soaps May Be Making You (and Society) SickEnvironmental Working Group has a Skin Deep Cosmetics Database which rates products on a number scale based on the ingredients that are in products. What you need: ~Container with foaming lid. ~Dr. ~Filtered Water 1.) 2.) 3.) 4.) 5.) 6.) Do you make your own hand soap? Til' next time,

MAGIC Decal Tutorial with Free Printables! Some of you may remember, a little while back I posted a tutorial for DIY waterslide decals. Among other things, I mentioned how awesome they are for creating custom embellishments without the need for any fancy-pants equipment. Yep, waterslide decal paper is a truly fab product, though as great as it is, there is one drawback – although it’s somewhat tough it’s not especially durable. So, whilst it’s perfect for ornamental purposes, it’s not ideal for more practical applications…until now that is! Magic decal coating paper is a product designed to be used in conjunction with standard decal paper to make the finished transfers super durable – yes, even dishwasher resistant! If you’re already familiar with magic decal coating paper then please excuse my tardy excitement, though for everyone else who is just getting to the party now too, feel free to start throwing the streamers! 1 Image to transfer. Use anything you like. 2 Printer. You can use either a laser or an inkjet printer. 6 Scissors.

My Cottage Charm: How to Add Molding to Your Doors- Door Header Tutorial Hey ya’ll! Recently I was blessed to be asked to review some paint brushes by Purdy and of course I said, “yes”! I knew I had some things coming up I could use them on and this project was one of them! Here’s what they sent me! Woo hoo! I’ll tell you up front these are the best brushes I have EVER used! I have been wanting to do some updating to my doors for a while now and wasn’t sure what I wanted to do until I saw what Emily did to her doors. this…. and this…. To this…… this….. and this…… To get started you’ll need pre-primed MDF boards from Lowes…I bought 3 1/2” wide x 8’ long boards for $6.76 each. I then took my board and cut it with my handy dandy miter saw and nailed it above the doorway like this… The next step was crown molding (I had some left over from another project and just bought a little extra to finish up) Crown molding is a little bit tricky to cut…you have to cut while it’s resting at an angle and upside down…like this. Like this…. I just put some glue on the angled side……

How To Use A Sock To Get Beautiful Curly Hair Without Heat If you are a mom on the go with long hair you HAVE TO try this. It will knock your socks off and have you wrapping your hair up in them! This is all about how to make your hair beautiful with no heat and no time. Curl your hair in your sleep with a sock. Yup, you heard me right. I was on Pinterest a while back and spotted this post about the sock bun which links you to her video on YouTube. Why? Because: It literally takes a minute to doNO heat at all – just a soft little sock in your hairNo product (for me anyway)You can sleep in it very comfortablyIt works Marvelously and is simple beautiful This is the sock bun before and after of my hair. Here are the step by step instructions on how to make this work. First steal a sock from your husband’s dress sock collection (that is what I did anyway). Now roll the sock into a ring. Put your dry hair into a high ponytail. Now spritz just the hair in your ponytail with water. Now grab your rolled up sock and put your ponytail through the hole.

Clove and vanilla air freshner recipe..gift pantry idea Hello Girls... Just wanted to touch base with you all today... Such a lovely Fall day and I am feeling so blessed... Here is the recipe.... Now strain this inot a measuring cup Then use a small funnel and fill spray bottles that you can buy at the dollarstore....Be sure to make a label and a tag and print the instructions... I used a brown paper bag , marker and a glue stick... Olde Farmhouse Kitchen Air Freshner... And painted on a couple of pumpkins... If it is for Christmas... Be creative... I think this made about 2 bottles... Well, girls have a great week and may the Lord surround you with the beauty of the Autumn... Hugs.. Faye... Hey, this would make a good item to add to your craft tables, ladies..

Solid Shea Butter Sugar Scrub Cube Recipe Solid Sugar Scrub Cubes have become the new trend and are now taking the place of traditional sugar scrubs. One of the main reasons is that these scrubs are in a solid form so there’s no separation and less mess. It also means it’s less likely that you will transfer water into your sugar scrub during usage since you are simply removing one or two cubes at a time for use and then resealing the container before use. While there are a handful of recipes for solid sugar scrubs floating around, I came up with my own recipe that I’d like to share with you. It’s not greasy when applied and easy to make. It’s also gotten a lot of great feedback from my customers who shop with me online at Rebecca’s Soap Delicatessen. Here’s what some of my customers have had to say about my Solid Shea Butter Sugar Scrub Cubes: Cucumber Solid Shea Butter Sugar Scrub CubesMy mother LOVES this!!! Natural Lavender Solid Shea Butter Sugar Scrub CubesThese are the most amazing bath item I have ever used. Ingredients:

Wax On, Wax Off - Homemade Hair Removal part 1 Unfortunately sisters Rebecca and Maggie come from a very hairy family. So when we saw recipes for homemade waxing we said, "OW!!" and then, "We gotta try this!" If you have ever tried products like Nads, this recipe is just like that. Here's What You Need: 1 cup of sugar1/4 cup of honey1 ounce of lemon juicea drizzle of molasses (optional) You Will Also Need: cotton fabric strips (we used an old bed sheet) 3 in. x 10 in.popsicle stick or butter knife In a microwave safe bowl, mix all the ingredients together. Make sure the area you are going to wax is clean and dry. Now, using your Popsicle stick spread a very thin layer down your leg in the direction of the hair growth. Press your strip of into the sugar. Pull your skin taught. We did find that it took a little practice getting this technique down, but once we did we found it worked really well.

Funeral Pyres An Option In Crestone - The Huffington Post CRESTONE, Colo. — Belinda Ellis' farewell went as she wanted. One by one, her family placed juniper boughs and logs about her body, covered in red cloth atop a rectangular steel grate inside a brick-lined hearth. With a torch, her husband lit the fire that consumed her, sending billows of smoke into the blue-gray sky of dawn. When the smoke subsided, a triangle-shaped flame flickered inside the circle of mourners, heavily-dressed and huddling against zero-degree weather. "Mommy, you mean the world to me and it's hard to live without you," called out Ellis' weeping daughter, Brandi, 18. The outdoor funeral pyre in this southern Colorado mountain town is unique. Ancient Vikings lit funeral pyres to honor their dead, and it is accepted practice among Buddhist and Hindu religions. The pyre harkens to references in the Christian and Hebrew Bibles equating rising smoke with the ascent of the soul, said David Weddle, a religion professor at Colorado College. Online:

Related: