

1- Getting Started. Paint Like a Pro Part One: Getting Started by Mike McVey Welcome to the first installment in our online Dungeons & Dragons Chainmail painting guide!
This monthly series looks at what it takes to get started in the miniature painting hobby. If you’re interested in the D&D Chainmail game (coming in October 2001) and are new to the world of miniature painting, I will take you through all the techniques and methods you’ll need to know to become a miniatures expert. This series isn’t just for beginners, either. Even though I’m going to start with the basics, there still will be plenty here for the experienced miniatures artist. Introduction One of the most common reasons people are put off from miniature painting is that they see beautifully painted models in hobby stores and say, "I’d never be able to do that! " 2 - Be Prepared. Paint Like a Pro Part Two: Be Prepared by Mike McVey Last month we started this column by taking a general overview on miniature painting -- what you'll need to get started and how to set up a painting area.

But before you can put brush to metal and actually begin painting your miniatures, you'll need to do a little preparation. Preparing your miniature before you paint doesn't take too long and ensures that you have a neat and clean surface over which to apply your color. 3 - Applying the Paint. Paint Like a Pro Part Three: Applying the Paint by Mike McVey In last month's column, we looked at the basics of getting started in the miniature painting hobby: what equipment you'll need and how to set yourself up a painting area.
This month we're moving on to the practicalities of actually getting the paint out of the pots and onto your miniatures! Thinking Time For me, the first stage in painting any miniature is thinking time. After I've got the piece I'm working on cleaned, assembled and undercoated, I take a little time to decide just how I'm going to paint it. Color Schemes Color schemes can be as simple or complex as you want, though I recommend that when you first start painting you don't try anything too complex. Using Reference One great thing about D&D Chainmail is that all of the miniatures come with painted examples on the packaging. 4 - Shading and Highlighting Basics. 5 - Enhancing Different Surfaces.
Paint Like a Pro Part Five: Enhancing Different Surfaces By Mike McVey In the previous article of this series, we started to look at highlighting and shading: techniques that add depth and realism to your miniatures.
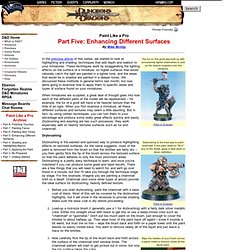
These techniques work by exaggerating the lighting effects on the surface of a miniature, so higher surfaces that would naturally catch the light are painted in a lighter tone, and the areas that would be in shadow are painted in a deeper tones. We discussed these methods in general terms last month, but now we're going to examine how to apply them to specific areas and types of surface found on your miniatures. When miniatures are sculpted, a great deal of thought goes into how each of the different parts of the model will be represented -- for example, the fur of a gnoll will have a far heavier texture than the hide of an ogre.
When you first examine a miniature, all these different surfaces and textures may seem a little daunting. Drybrushing Washing Combining Techniques. 6 - Painting Skin Tones. Paint Like a Pro Part Six: Painting Skin Tones By Mike McVey One of the most useful weapons in the miniature painter's armory is the ability to paint flesh tones convincingly, and in many cases a miniature's appearance will stand or fall on how the skin is portrayed.
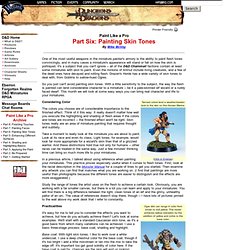
It's a subject that you can't ignore -- all of the D&D Chainmail factions contain at least some miniatures with skin to paint. Even the minions of Ahmut include living creatures, and a few of the dead ones have decayed and rotting flesh. Drazen's Horde has a wide variety of skin tones to deal with, from Goblins to sallow-hued Ogres. So you just can't avoid painting skin tones. Considering Color The colors you choose are of considerable importance to the finished effect. 7 - Painting Faces. Paint Like a Pro Part Seven: Painting Faces by Mike McVey Last month's article looked at the techniques and colors used to paint skin tones.
This month we're going to continue on the same theme and take a look at faces. In painting terms, the face is the single most important part of a miniature -- the focal point. Pick up a miniature and look at it. I guarantee your eyes will be drawn to the face, just as they are when you look at someone in real life. The Basics Painting faces, as with much of miniature painting, can be as simple or complex as you want to make it. 8 - Finishing Touches. Paint Like a Pro Part Eight: Finishing Touches by Mike McVey Over the last few months we've looked at different techniques to prepare and paint your D&D Chainmail miniatures, so by now you should be able to turn bare metal castings into fully painted warbands.

Now it's time to put the finishing touches on your miniatures -- all those last stages that aren't really painting, but are vital to the overall look and finish of a model. Final Assembly When you buy miniatures, much of the time they come in two or more pieces, and assembly is something we looked at in detail in Part 2 of this series. In most cases, the best way to tackle these multi-part models is to assemble them completely before you begin painting. Should you decide to paint your miniature in parts, the best approach is to first clean up all the parts and make sure they fit together snugly. Shields are pretty much always better painted away from the miniature. Basing Standard Basing.