
Free photos. Articulate E-Books. Here’s How to Build an E-Learning Template That Will Rock Your World. Okay, if an elearning template’s going to rock your world you need to get out of your cubicle and go take a walk outside.
Enjoy the life around you. Then come back and finish reading this blog post. I’ll be waiting. Ready? Now that things are in perspective let’s drop the hyperbole and look at what it takes to build the world’s best elearning template. Create a Starter Template Earlier we looked at how to create an elearning template that works. This serves two purposes. A key point here is that there is no graphic design or visual treatment to the screens. What Goes onto the E-Learning Course Screen? Unless you take a constructivist approach where the learner is expected to construct the course content from blank screens, odds are the screens in your course will have content on them. How to Create an E-Learning Template That Works. Templates are great because they provide some structure to the design of your online training.
But many times templates become so rigid that instead of helping the training design, they inhibit it. In today’s post we’ll look at ways to build an elearning template that will guide the course design, but leave enough flexibility to create a course that best meets your needs. How are Books and E-Learning Courses Similar? Go to a bookstore and you’ll find thousands of books. They look different and cover different topics. So while the topics of the books may be different, the structure of the books is very similar. Identify the Core Structure of an E-learning Course Elearning courses may look different and may cover different topics, but most courses have a similar structure. Think of it like a sandwich.
Since the structure of most courses is similar, create an elearning template that defines that common structure. The main point is to identify the major parts of an elearning course. Tidbits. How to create interactive screenshots in Articulate Storyline. Elearning: How to use Video Encoder to create circular Flash videos in Articulate Presenter (pt. 1/3) Storyline Player Colors. How to make it easy for SMEs to help you build drag-and-drop interactions. How to create interactive screenshots in Articulate Storyline. How to make your Articulate Storyline course feel like an app. Storyline: narration overlapping. Storyline Audio. Hi Alison, I think what's happening is that the marker audio is also getting paused (when the Pause layer is shown), since it's technically on the base layer, too.
I was able to get it to work by using Jeanette's Pause layer technique above and also doing the following: Move the markers from the base layer to a new layer. For simplicity, I called the new layer "Markers". Bookmarking in Storyline. Adding True/False Variables. The true/false variable works just like it sounds: values can either be true or false.
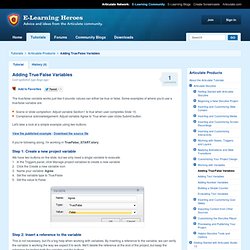
Some examples of where you'd use a true/false variable are: Scene or slide completion: Adjust variable Section1 to true when user completes Slide 10.Compliance acknowledgement: Adjust variable Agree to True when user clicks Submit button. Let's take a look at a simple example using two buttons. View the published example | Download the source file If you're following along, I'm working in TrueFalse_START.story. Step 1: Create a new project variable We have two buttons on the slide, but we only need a single variable to evaluate. In the Triggers panel, click Manage project variables to create a new variableClick the Create a new variable iconName your variable: AgreeSet the variable type to True/FalseSet the value to False Step 2: Insert a reference to the variable This is not necessary, but it's a big help when working with variables. Let's preview our work. Preview your project and test your buttons. Support - How to disable the Next button until users finish interacting with a slide.
You can prevent users from advancing too quickly through a Storyline slide, using either of the following methods: Disable the built-in Next button until they've met certain conditions, such as clicking all the buttons on the slide or listening to all the narration.Remove the built-in Next button and create your own custom button for navigation.
We'll look at each of these options below. (If you need to restrict navigation throughout an entire course, take a look at this article.) Temporarily disable the built-in Next button Create a new True/False variable, and set its initial value to False. Here's a brief video screencast, demonstrating this process: Click here to download the sample Storyline file used in the video screencast above.