
Dynamic Sketching 2 - Peter Han - New Demo. CGMasterAcademy CGMA. Sculpting a Dragon with ZBrush With Maarten Verhoeven. Ceratosaurus. Kilian Eng (1) Selected Works + Interview. OK, as promised, I’m very proud to present an exclusive Sci-Fi-O-Rama feature, this time with Swedish Design and Illustration superstar Kilian Eng.

Here we have a total tour de force of the imagination, gloriously twisted, washed in 80′s technicolor and blending only the very finest Sci-Fi and Fantasy references… I’m quite sure you’ll be familiar with Kilian’s work, he’s built a considerable following since first proliferating through the major design/illustration blogs. Interestingly it was in fact Dan McPharlin that first put me onto Kilian with a post over at But Does it Float, and I’d put these two in the same bracket, pretty much the finest contemporary Science Fiction Illustrators on the planet.
The Egg Thief. Jack Comics How-To 2: Inking with a Brush. Ryan Ottley draws a PIG MONSTER! Inking "The Scourge" By David Finch. Go Media’s Rapid-Fire Illustration Technique. Speedpainting - Creature Head [GIMP] Aaron's Art Tips Season2 E13 - Creating textures with Photoshop Texture Brushes. Understanding Colour and Value. Using Colour In Your Paintings. Color Theory Made Stupid. A Conversation with Tsach Weinberg about his New Digital Comic ‘Needles and Dust’ With the ever-growing prevalence of smart devices as a primary source of all-in-one entertainment, artists are developing new ways to present and publish their work.
We interview the creator of ‘Needles and Dust’, a new digital comic that takes advantage of new media platforms while also trying to stay true to the traditional format of a comic. ‘Needles and Dust’ is by cartoonist and interactive developer Tsach Weinberg and tells the story of Ziv, “enthusiastic forest watchman and nature lover” as he tries to “maintain the peace and quiet of the forest while struggling with his own sanity”.
As Tsach goes on to tell us below, he wanted readers to go through the same experience as they would when reading a printed comic. Although he does incorporate some interactive elements, it is narratively designed in the same way as an illustrator would on paper. We really like that, in some ways, the illustrative style also bears the markings of the new and old. Dragon oil painting technique with Fantasy Artist Jeff Miracola. Winged Lion Fantasy Art Drawing in Sketchbook - Timelapse. The afterlife. Paint an original alien girl. Cel Shading and Mood. 101 Photoshop tips, tricks and fixes to try today. Photoshop is an easy tool to use and a difficult one to master, but help is at hand with our comprehensive list of tips, tricks and fixes for Adobe's showpiece software.
Whether you're looking for tips on using layers, advice on mastering the pen tool, a guide to using RAW, or ways to improve your brush work, it's all here! Most of these tips were originally published in Practical Photoshop magazine – now part of Digital Camera World. If you're a photographer, we recommend making DCW a rest stop on your travels around the web! Here are the best Photoshop tips, whether you are using an older CS version or the very latest Creative Cloud software. Ps1_03.pdf (Obiekt application/pdf) Brush the difficulties away by Rolando Cyril. Warning: That's a tutorial for photoshop 7.

What I call "Set of Brush" (brushes with different values of opacity and flow) is an easy way to caricature the best use of each brush (my use) this doesn't mean this is the unique use. Of course, you have to mix the sets ( b, c, d...) when you draw. Custom Brushes in Photoshop - getting started by Rickard Johansson. If you use Photoshop (version 7 and CS), whether it is to paint textures for your 3D-models or for classical digital art, a really good tool is to build your own custom brushes.

A custom brush can add that special texture or help speed up your workflow. Tutorials. Welcome to the second tutorial about creating custom brushes in Photoshop!
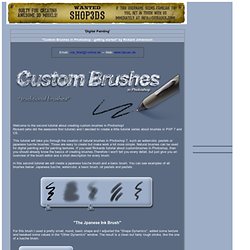
Rickard (who did the awesome first tutorial) and I decided to create a little tutorial series about brushes in PSP 7 and CS. This tutorial will take you through the creation of natural brushes in Photoshop 7, such as watercolor, pastels or japanese tusche brushes. Those are easy to create but make work a lot more simple. Natural brushes can be used for digital painting and for painting textures. Custom Brushes in Photoshop - getting started by Rickard Johansson. Using a brush set 1.

Edit and save. How to change lineart into gradient on Photoshop. Online Watercolor Mixing Palette. This online color mixing palette lets you experiment with mixing primary colors and secondary colors without worrying that you're wasting paint.
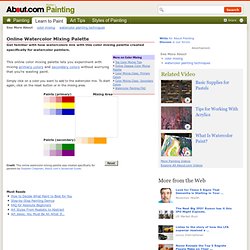
Simply click on a color you want to add to the watercolor mix. To start again, click on the reset button or in the mixing area. Paints (primary) Mixing Area <table align="center" cellpadding="3" width="350" border="1"><tr><td align="left"><div><b>This Quiz requires Javascript</b></div><blockquote> You either have Javascript disabled<br />or the browser you are using does not<br />support Javascript.
How to Develop a Handmade Illustration with Photoshop. This tutorial will give you a general workflow overview of how to create traditional illustrations on paper and then refining it further in Photoshop.

We will use Indian ink, paintbrushes and a brush pen to ink our pencil sketch, and then watercolor to fill in the illustration. Then we will place the illustration into Photoshop to perform some fine-tuning and image corrections. Preview Tutorial Resources Reference image: Lonely Hearts Step 1: Research and Gathering Materials. Unbenannte Seite. Mixing Up Illustration: Combining Analog And Digital Techniques. Advertisement In the digital age, don’t forget to use your digits!

Your hands are the original digital devices— Lynda Barry. Search results for watercolor. One of difficulties that flatbed scanners have compared to drum scanners is the way the original art is illuminated. If the surface texture is rough, as in the case of watercolor paper, the scanner will usually capture the texture as an unwanted pattern. On the left is a scan at 100% and to it's right a small area enlarged to show the watercolor paper texture problem more clearly.
The tool to get rid of the paper texture while preserving the image detail is the "Smart Blur" filter in Adobe Photoshop. Below is its dialog box. You will need to experiment with the settings according to the specific image that you are working with. The final result – the watercolor paper texture is eliminated while the detail of the painting is preserved.
How to scan watercolours. Written on July 17, 2011 If I scan black and white lines, it usually works out fine, but watercolours never come out right; the images always look very bleached loosing all the vibrancy of the original. I asked other illustrators what they do, and here’s the answers I got: Digital Tutors – Creative Development : Dinosaur Reconstruction in ZBrush with Peter Minister. Dinosaur Reconstruction in ZBrush with Peter Minister English| Audio: aac, 44100 Hz, stereo FLV| Video: h264, yuv420p, 1280×720, 15.00 fps(r)| 1.20GBGenre: Video Training. Brush strokes and Linear marks in Watercolor Painting. Envol du projet - Vannara. Angleterre - Vannara. Calendrier 2011 - Vannara. Une illustration pour un calendrier. Le making of ici bas. SECRETS REVEALED! William Stout’s Rackham/Dulac Technique « William Stout's Journal. Copper - Step-by-Step. This part is painful. Mainly because I use a cheap flatbed scanner.
I scan the comic into the computer in about 6 parts at 300dpi. Since the comic is 15 inches square, that brings the final image to 4500x4500 pixels.