
Algorithm - 3d model construction using multiple images from multiple points (kinect) Waiting for my Raspberry Pi. While I was away on holiday, Scott Sheppard announced an Autodesk-internal competition of which the eight lucky winners would receive a currently-still-hard-to-come-by Raspberry Pi Model B (so named in homage to the computer that helped inspire a generation of British programmers, the BBC Micro).
All that contestants had to do was submit an idea for a compelling use of the device (and then submit a video of the completed project, along with instructions to replicate it on Instructables.com). I’d been interested for some time in getting my hands on one of these cool little systems, and had a few ideas gestating for potential projects. This competition helped crystalise one of these, in particular. Here’s the idea, which I’m happy to say resulted in me being one of the lucky eight: I want to to create a social media-enabled, friend-recognising, security webcam. On the motion detection side of things, it seems there’s a pretty good component available for this. Raspberry Pi + OpenCV. OpenCV is a suite of powerful computer vision tools.

Here is a quick overview of how I installed OpenCV on my Raspberry Pi with debian6-19-04-2012. The guide is based on the official OpenCV Installation Guide on Debian and Ubuntu. Before you begin, make sure you have expanded your SD card to allow for the install of OpenCV. Its a big package with lots of dependencies. Face Detection and Face Recognition with Real-time Training from a Camera. To improve the recognition performance, there are MANY things that can be improved here (look at commercial Face Recognition systems such as SPOTR for examples), and some improvements can be fairly easy to implement.
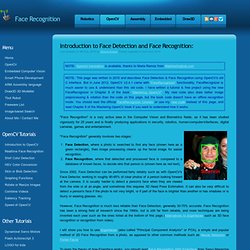
For example, you could add color processing, edge detection, etc. You can usually improve the face recognition accuracy by using more input images, atleast 50 per person, by taking more photos of each person, particularly from different angles and lighting conditions. If you cant take more photos, there are several simple techniques you could use to obtain more training images, by generating new images from your existing ones: You could create mirror copies of your facial images, so that you will have twice as many training images and it wont have a bias towards left or right.
OpenCV. Open-source SDK for 3D sensors - OpenNI. OpenCV. Arduino + Servo + openCV Tutorial [#openFrameworks] by Joshua Noble. One of the my favorite things about creativeapplications.net has always been the small tags one can find beneath the name of an application indicating among other things, the technology used to create it.
![Arduino + Servo + openCV Tutorial [#openFrameworks] by Joshua Noble](http://cdn.pearltrees.com/s/pic/th/tutorial-openframeworks-6616441)
That little nod to the process and to all the work that went into creating the libraries and techniques that an artist or designer uses helps not only contextualize the work but it also helps give recognition to everyone who has contributed their time and expertise to building tools for creative expression in code. Figuring that some of the readers might be interested in learning a little more about these frameworks I’ve put together a quick walk-through of how to connect up two of those tools that one so often sees attached to the names of the projects profiled here: openFrameworks and Arduino.
RaspberryPi and Arduino playing nicely together. After seeing Eric Maundu’s video about his aquaponics setup in Oakland, I was pretty inspired to finally try and put my arduino to good use.
In the past, I had hit walls using the arduino because I failed get it setup to a wifi network, and therefore never got to the point of programming it to do anything useful for me. This summer I grabbed a raspberryPi, which allows me to write all my code in python and has everything that comes with linux, like painless networking. Although the pi is the coolest thing since sliced bread, it has no analog inputs on its GPIO, so there is no easy way to measure inputs like temperature, only digitally (off/on). You can, however, easy communicate between the pi and the arduino serially over usb to use the arduino’s analog inputs. Ultimately, I would like my aquaponics setup to be out in the back garage, which means a wifi connection to my raspberryPi to post data (I dont want the pi to be my SOR).
Once you have the drivers installed for the wifi adapter. Raspberry Pi and Arduino Connected Using I2C. With Raspberry Pi and I2C communication, we can connect the Pi with single or multiple Arduino boards.
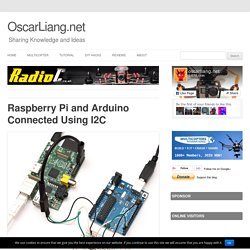
The Raspberry Pi has only 8 GPIO’s, so it would be really useful to have additional Inputs and outputs by combining the Raspberry Pi and Arduino. There are many ways of Linking them such as using USB cable and Serial Connection. Why do we choose to use I2C? One reason could be it does not use your serial, USB on the Pi. Given the fact that there are only 2 USB ports, this is definitely a big advantage. In this article I will describe how to configure the devices and setup Raspberry Pi as master and Arduino as slave for I2C communication.
In the next article I will be doing some Voice Recognition, if you are interested see here Raspberry Pi Voice Recognition Works Like Siri The Raspberry Pi is running at 3.3 Volts while the Arduino is running at 5 Volts.