Animator/Storyteller. Here's the current facial setup...
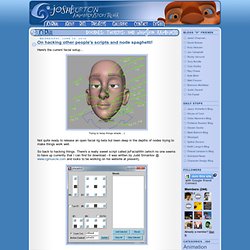
Trying to keep things simple...:) Not quite ready to release an open facial rig beta but been deep in the depths of nodes trying to make things work well. So back to hacking things. There's a really sweet script called jsFacialWin (which no one seems to have up currently that I can find for download - it was written by Judd Simantov @ www.cgmuscle.com and looks to be working on his website at present). It's a great way to quickly created joystick controls and connect them to blendShapes or attributes driving poses via pretty elegant nodal trees rather than by expressions (which I frankly find to be a pain to edit and deal with) Well, what does one do when you want to use this handy dandy connector but don't want to use the joysticks it makes?
Easy enough, all my controls had already been set up that way so by looking at the code and errors it threw when trying to load my control as a driver it became clear how things were working. Transform (group) Adios! Jiggle Bones - 3. Asset Creation Guide - Crysis 2 Mod SDK. Skip to end of metadataGo to start of metadata Go to Create Panel -> Systems -> Bones and create a bone chain.
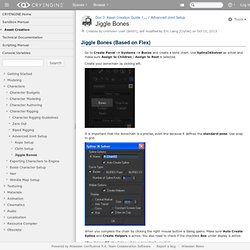
Use SplineIKSolver as solver and make sure Assign to Children / Assign to Root is selected. Create your bonechain by clicking left. It is important that the bonechain is a precise, even line because it defines the standard-pose. Use snap to grid. When you complete the chain by clicking the right mouse button a dialog opens. After clicking OK, the Spline will be automatically created. Create a sphere or something you want to have as the base for the system. Apply a Flex-Modifier to the Spline and adjust the values. Good settings to start with are: Flex: 2Strength: 1Sway: 7Use Weights: ONSolver: Runge-Kutta4Samples: 2 Go to Create Panel -> Space Warps -> Forces and create a Gravity Node. WebGL "Ginger" manipulation demo: Blend shapes, morph targets with Three.js / Stickman Ventures.
Master of Rigging. AbAutorig Part II and III, Pyro tutorial :Animation with a moustache. Tutorials. Fig. 19 Introduction About 6 months ago, some guys in the company starting arguing over of a beer that it's impossible that a civilization that can travel 1,000 light years from a star, would come to earth and crash in Roswell.
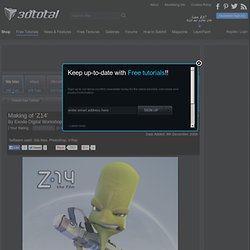
From this conversation we decided to produce, in our free time, a short film which will tackle the adventures of this event in the desert. This little critter here is the first of 5 characters that will be in the 4 minute long film. The first step after defining the story of the film was to develop the different characters. Modelling The main application used for the whole development of the character was 3ds Max. Having a cartoon character with a very dynamic personality presents several challenges when modeling because of the wide range and unexpected movements that it will require.
Texturing All the textures were hand painted in Photoshop, separating the diffuse, bump, glossiness and specular maps. Lighting next page > About. About us Thinkbox Software has provided creative tools and pipeline technology for both small and large scale projects including the worlds largest feature films.
Transformers: Dark of the Moon, Thor, Green Lantern, Harry Potter, Avatar, Tron, GI-Joe the Rise of Cobra and hundreds of other films have utlized our software in front of and behind the screen. Our tools have been at the core of award winning projects, music videos, commercials and hundreds of hours of creative content spanning film, broadcast, commercial, marketing, games and web content. In addition, our technology is being used in the CAD/CAM, Engineering and non-clinical Medical visualization industries around the world to create, visualize and modify datasets as large as city streets and as small as microscopic cells.
Our Mission is to provide our clients with intuitive solutions for creative and complex tasks in high-performance computing while consistently providing remarkable support. Cesar Saez. Keith Lango Animation. Category Archive. RMS @ DGP. VR Boboland 2.0. Quick shatter tutorial. 1.
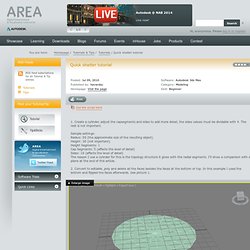
Create a cylinder, adjust the capsegments and sides to add more detail, the sides values must be dividable with 4. The rest is not important. Sample settings:Radius: 50 (the approximate size of the resulting object)Height: 30 (not important)Height Segments: 1Cap Segments: 5 (affects the level of detail)Sides: 16 (affects the level of detail)The reason I use a cylinder for this is the topology structure it gives with the radial segments. I'll show a comparison with a plane at the end of this article. 2. 3. 4. 5. 6. 7. Just experiment with these settings. 8. What to do next is up to you. . - If you want a window, add a shell modifier, see picture 8, and pass it on to your favorite physics solver, i.e BOX#2, reactor of physX or what not. Animation Buffet. Brad Noble - Limber Rig.