
Turn Color Photos into Duotones in Photoshop. Photographs are great for print projects and Web sites, but sometimes you want something a little different. Changing a photo into a duotone makes it look more like an illustration, and a duotone's simple color scheme can be easier to coordinate with an overall design. Step 1 Click on Figure 1 below to open a larger version in another browser window. Save that image to your computer and name it "before.jpg". Figure 1. Click on this image to open a larger version you can save to your desktop. This file is in the public domain because it’s from the United States Army’s image database. Add Dramatic Rain to a Photo in Photoshop. In this tutorial, we will demonstrate how to add a dramatic rain effect to a photo in Photoshop.
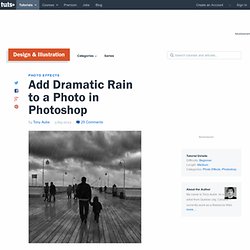
While rain effects are not new to Photoshop, we will go a step further and show how to make the image more photorealistic by adding reflections and small puddles. Let's get started! Tutorial Assets The following assets were used during the production of this tutorial. High quality Photoshop Tutorials and Graphic Design Inspiration. Aug272013 Get inspired when you browse TutorialStorage’s Top 10 selection of Best Photoshop Tutorials.
We present an amazing collection of high quality and well documented photoshop tutorials from great artists all around the world. Enjoy and Live Inspired! If you want to share with us your photoshop or illustrator tutorial, your work, design or photography send us a mail or via Twitter using #tutorialstorage in the end of the tweet. Currently, there are two main ways to create 3D typographic illustrations with extruded letters, textures and lighting.
Create a Fancy Rope Brush In Illustrator. In this tutorial we’ll create a custom pattern brush that can be used to draw cool, comic style ropes in Illustrator.
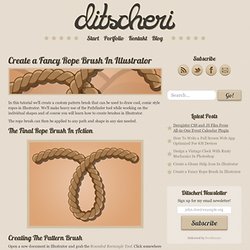
We’ll make heavy use of the Pathfinder tool while working on the individual shapes and of course you will learn how to create brushes in Illustrator. The rope brush can then be applied to any path and shape in any size needed. Adobe Photoshop Tutorials from Beginner to Advanced. La ley de oro de Photoshop y la gestión del color. Photoshop3d.org – Photoshop, 3D, tutoriales, recursos, tendencias en diseño gráfico. Create a Cartoon Bear Scene Using Repeating Shapes in Illustrator. In this tutorial, I will be discussing various points in making a cartoon bear scene with simple shapes and with a limiter color palette in Adobe Illustrator.
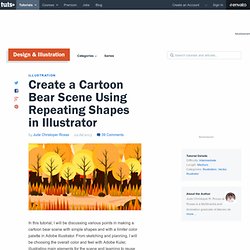
From sketching and planning, I will be choosing the overall color and feel with Adobe Kuler, illustrating main elements for the scene and learning to reuse existing illustrations to save time but will still be able to present a unique look in the elements to avoid redundancy in the design. Now let's get started! 1. Prepare the Sketch This will already serve as reminder for everyone: sketching is a very important part of the design process. 2. In order for us to have an efficient way of illustrating things for the artwork, it is also important to plan ahead on what are the shapes that we will be using. 3.
There are a lot of color palette creation extensions and websites that I know on the web, but I really prefer using Kuler from Adobe among anything else.
25+ Illustrator Tutorials: Vintage Graphics & Retro Illustration. Beginner Tutorial: Create Dexter on illustrator. Hi everyone, I decided to insert some nostalgia on today's tutorial.
Since I'm a guy born in the early 90s, I thought sharing how to draw Dexter would be really interesting and fun. If you've ever watched Cartoon Network you'll probably recognize this little fella at first sight. Let me repeat a simple nugget of information: It's a beginner tutorial, that's right, not too many difficult tricks on today's lesson, but if you want something more wicked, you should definitely check out some other illustrator tutorials on the site HERE, thanks. Step 1 So let's open Adobe Illustrator and make a blank canvas (command + N / ctrl + N), let's not stick with a specific size, use the one you feel more comfortable with. Here are the colors used on the character, you don't need to screengrab it, it's already in the downloadable file at the bottom of the Tut. So, let's begin by making its body. Go to the Brushes panel and choose the one called 5 pt. Do the same thing with the ear.
Step 2 Step 3. Colorful Light Effect in Photoshop. Last week I was waiting hours in airports, as usual, I was wandering and checking out banners and signs when I found a beautiful Sony ad of a cel phone called Xperia.
The thing that really caught my attention was the wallpaper of the phone. It was a colorful light bean crossing the screen . I really like the effect and thought to myself, that is a good idea for a tutorial. So in this tutorial I will show you how to create a super easy but at the same time beautiful light effect. Step 1 Open Photoshop and create a new document, for the size I used 1920x1200 pixels.
Step 2 With the Rectangle Tool (U) create a rectangle in the middle and crossing the canvas, use white for the color. Cool Typography with the Blend Tool in Illustrator. I have written some Illustrator tutorials in which I've used the Blend Tool to create swirls and other shapes, but I have never used it to create a text effect.
Then we received this email suggestion from one of our readers quite a few months ago asking us how to create that effect. I really like the text effect and decided to give it a try. So in this tutorial I will show you how to create a text effect using the Blend Tool in Illustrator and then we will use Photoshop for some final retouches to make the effect more subtle. The technique is very simple and it won't take more than 30 minutes to achieve the same effect. Create a Customizable Aluminum and Glass Styled Vector Emblem. Whenever the need arises to create realistic effects or textures for a design, Photoshop is the tool that most people immediately turn to.
However, Adobe has brought Illustrator a long way since its early days, and with each new version it comes closer to matching (and in some ways surpasses) its raster-based cousin. In this tutorial, we'll create an aluminum and glass emblem that can be customized with any logo or shape. And since all the effects will be done entirely in Illustrator, the whole graphic will be fully scalable. So, let's get started! Final Image Preview Below is the final design we will be working towards.
Note: This tutorial is presented using the recently released Adobe Illustrator CS4, and therefore uses some of the new features and tools as shortcuts. Create a Raw Horror Movie Poster Design in Photoshop. Each year Halloween gives us a great excuse to hack at our designs with the most grungy brushes and textures in our collection to create the most raw and gory artwork we can.
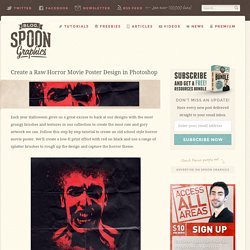
Follow this step by step tutorial to create an old school style horror movie poster. We’ll create a low-fi print effect with red on black and use a range of splatter brushes to rough up the design and capture the horror theme. The horror movie poster design we’ll be creating as part of this tutorial features a scary looking infected zombie fellow. For maximum impact the design is created with red on black and has a grainy quality to relate to the low-fi printing techniques used on old school B movie posters. View the final horror movie poster design. Create a Zee Vintage Label on Illustrator. It seems that the past 3 years had a boom of retro design, starting with the "cosmic neon lightning" 80's aesthetic that I think most of you are already bored about.
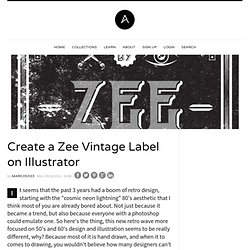
Not just because it became a trend, but also because everyone with a photoshop could emulate one. So here's the thing, this new retro wave more focused on 50's and 60's design and illustration seems to be really different, why? Because most of it is hand drawn, and when it to comes to drawing, you wouldn't believe how many designers can't do it. Let's assume, the last 20 years were pretty revolutionary to design since the computer took a big role on productivity and creation. But he also created patterns and made things more similar, some designers can't even work "old school", since they rely too much on the computer and that's not good. Step 1 First of all, let's open Adobe Illustrator and create a new canvas with 21 x 21 cm (8,27 x 8,27 inches). Using the rectangle tool (M) make this big square that fits over the canvas. Create an Adventure Time Scene in Illustrator.
Adventure Time has become one of most interesting and captivating animated series in the last 5 years. Double Exposure Style in Photoshop. We've featured quite a few posts and images with the effect most call double exposure. This technique consists of 2 images superimposed. There are some really nice examples with very intricate overlaying, usually with faces of people mixed with photos of nature. Easy way to create a 90's design in Photoshop. A few days ago I've made a post about the Emigre magazine, one of the most important publications for the design community.
Along with that magazine, another great publication was the Ray Gun magazine founded by David Carson. So, inspired by that, I've decided to create an art work using some of the photos I took this last summer. Flashing Design in Photoshop by Mike Speero. The tutorial of this week is very special, it's from Mike Speero, a graphic designer from Gothenburg, Sweden. Mike has been featured in several books, magazines, done interviews, had a poster up on a fancy Italian galleria and soon he will be selling skateboards as well.
So in this tutorial he will show you how he created one the "Flashing" design, one of his works from his portfolio which in he mixes a photo of girl with splashes of milk and light effects to create a beautiful artowork.. We also highly recommend that you visit Mike's website and check out his portfolio, it's really cool. Step 1 Mask out the girl. Step 2 Make the model grey by going to Image>Adjustments>Hue/saturation. Money Style Illustration in Photoshop. Last Saturday I went to the movies to watch Wall Street Money Never Sleeps. Photoshop: cosas que nunca supiste hacer. Piel de Porcelana en 6 Sencillos Pasos con Photoshop. Reader Tutorial: Mixing Brushes and Layers in Photoshop by Josh Overton.
Retro Moderinist Artwork in Illustrator and Photoshop. Simple Roy Lichtenstein Style in Illustrator and Photoshop. I have been playing with the Halftone filter in Photoshop for the past few weeks and trying different things we can do with it. Super Cool Retro Poster in 10 Steps in Photoshop. Using Gradients to Make Light and Shadow – and a Coffee Cup! Vídeo tutorial. Aspecto duro de la piel. Vídeo tutorial. Efecto Nashville.