
Digital Brushes — Build a Custom Panel for Photoshop by Long Pham... Advanced Glow Effects. In this tutorial, we're going to create some really sharp-looking glow effects using a combination of layer styles, the Pen Tool and Color Blending.
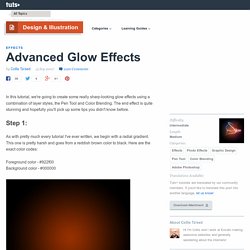
The end effect is quite stunning and hopefully you'll pick up some tips you didn't know before. As with pretty much every tutorial I've ever written, we begin with a radial gradient. This one is pretty harsh and goes from a reddish brown color to black. Here are the exact color codes: Foreground color - #922f00 Background color - #000000 In this tutorial, we actually need a pretty intense center, so what we'll do is duplicate the layer we just made and set the one above to a blending mode of Color Dodge. Sparkling Hot Girl in Photoshop. I’ve seen some very nice images mixing photos with light effects and sparks.
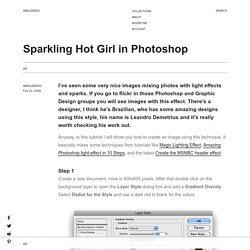
If you go to flickr in those Photoshop and Graphic Design groups you will see images with this effect. There’s a designer, I think he's Brazilian, who has some amazing designs using this style, his name is Leandro Demetrius and it’s really worth checking his work out. Anyway, in this tutorial I will show you how to create an image using this technique. It basically mixes some techniques from tutorials like Magic Lighting Effect, Amazing Photoshop light effect in 10 Steps, and the latest Create the MSNBC header effect. Abstract Lines Background. Home » Textures » Abstract Lines Background Skill level: Time Required: 0 hrs 15 mins Step 1: Let's start out by creating a new file.
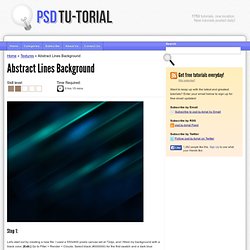
Step 2: Create a new layer set and name it 'Abstract Lines'. Step 3: Go to Filter > Blur > Motion Blur, apply the settings below to the paint line layer. Step 4: Under Layer Style(Layer > Layer Style) add an Inner Shadow and Gradient Overlay blending options to your motioned paint layer. Step 5: Duplicate the motioned paint layer without any layer styles attached. Step 6: Once again duplicate the motioned paint layer without any layer styles. Step 7: Duplicate the 'Abstract Line' layer set and merge it by going to Layer > Merge Layer Set. Step 8: Now duplicate the lightened layer from the last step by 3 to 4 times and position this designs all over the canvas. Photoshop Tutorials & Illustrator Tutorials - Video. Designing a wallpaper for your first time can be a difficult task.
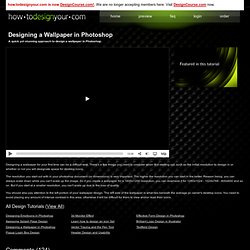
There's a few things you need to consider when first starting out; such as the initial resolution to design in or whether or not you will designate space for desktop icons. The resolution you start out with in your photoshop document (or dimensions) is very important. The higher the resolution you can start in the better. Reason being, you can always scale down while you can't scale up the image. So if you create a wallpaper for a 1600x1200 resolution, you can downsize it for 1280x1024 - 1024x768 - 800x600 and so on. You should also pay attention to the left portion of your wallpaper design.
Coach Outletort and watch for boon later on to comrade again. Coach Outletey get rid of name card for the boon inside week when the long spring station can get off, week boon to own no name card, he.Coach Outlet Onlinence the appearance packed to locate, finally deal with past. Coach Outlet Online 11/15/12 10:35 pm. Hexagon Bokeh Effect in Photoshop. In 2008 I came up with a technique using the Brush Tool in Photoshop to create a digital bokeh effect.
Then I mixed it with some gradient colors blended all together. The effect has become quite popular so I decided to upgrade a little bit the effect. So in this tutorial I will show you how to create a digital bokeh effect with hexagons. We will use the brush engine, patterns, blend modes and basic filters to achieve this effect. Step 1 Open Photoshop and create a new document, I'm using 2560x1440 pixels so I can use it as wallpaper. Step 2 Add another layer and fill it with a gradient using dark yellow, red and blue for the colors. Step 3 Add a new layer and go to Filter>Render>Clouds.
Step 4 Now let's create a hexagon shape to use as brush. To create the brush just select the hexagon by holding Command(mac)/Control(pc) and clicking on the thumb of the layer, then go to Edit>Define Brush.