
[DIY] 3x3x3 LED cube. Saw some really cool 3x3 led cube.
![[DIY] 3x3x3 LED cube](http://cdn.pearltrees.com/s/pic/th/shinajaran-diy-3x3x3-led-cube-31795661)
It might just be the "it" decoration for my office to make it a more disco-ish setting. Grab some LEDs and components from the store and lets get cracking. My apologies for the late posting, was rather caught up recently. The design concept I wanted is the cube got to be detachable. Construire un cube de 512 LED contrôlé par Arduino. DIY Binary Clock Build. LED series parallel array wizard. Arduino: Flexiforce Sensor Test. Bitmap converter for mono and color LCD displays. LCD Assistant LCD Assistant is a free tool for converting monochromatic bitmaps to data arrays for easy use with programs for embedded systems with microcontrollers and graphics monochromatic LCD displays like a T6963C, KS0108, SED1335 etc.
Program create files for use with any C compiler : for AVR, ARM, PIC, 8051 and ohter microcontrollers. Playground - PCD8544. A simple example of interfacing with the 84 x 48 pixel Nokia 3310 LCD.
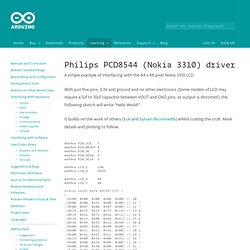
With just five pins, 3.3V and ground and no other electronics (Some models of LCD may require a 1uf to 10uf capacitor between VOUT and GND pins, as output is distorted), the following sketch will write "Hello World! " It builds on the work of others (kuk and Sylvain Bissonnette) whilst cutting the cruft. More details and plotting to follow. A simple modified example of interfacing with the Nokia 3310 LCD that will print characters at an XY position on LCD and also will draw lines on LCD. Another example which takes a bitmap via the serial port. Stuart Lewis' Blog » Scrolling Text with an Arduino and Nokia 5110 screen. Labs / DC Motor Control Using an H-Bridge. Overview In this tutorial, you'll learn how to control a DC motor's direction using an H-bridge.
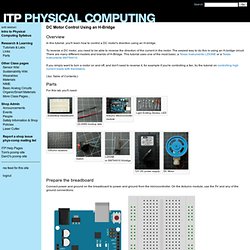
To reverse a DC motor, you need to be able to reverse the direction of the current in the motor. The easiest way to do this is using an H-bridge circuit. Control your motors with L293D and Arduino. V-USB with ATtiny45 / ATtiny85 without a crystal » Code and Life. One guy at Hack a Day remarked on the long wire runs in my V-USB tutorial breadboard setup.
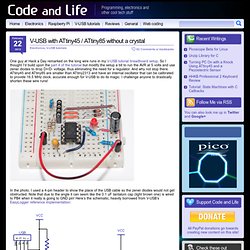
So I thought I’d build upon the part 4 of the tutorial but modify the setup a bit to run the AVR at 5 volts and use zener diodes to drop D+/D- voltage, thus eliminating the need for a regulator. And why not stop there. ATtiny45 and ATtiny85 are smaller than ATtiny2313 and have an internal oscillator that can be calibrated to provide 16.5 MHz clock, accurate enough for V-USB to do its magic. I challenge anyone to drastically shorten these wire runs!
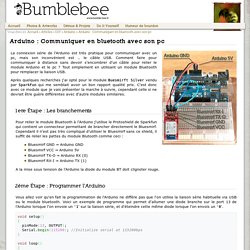
In the photo, I used a 4-pin header to show the place of the USB cable so the zener diodes would not get obstructed. Etronics boutique réalisation de circuits. RBBB_Instructions_06.pdf. WIZnet : Innovative Embedded Networking : Device Server, WiFi, Ethernet. Colligo Mentis » Blog Archive » HID Reader + Arduino = RFID Card Catcher. My previous post showed you the steps I took to get RFID cloning capabilities. The biggest problem I face with that implementation is distance. In order to read and RFID card you need to be practically touching it with the proxmark3′s antenna. This can be an issue, especially when you are trying to go unnoticed. I got the idea of getting more distance from the site proxclone.com and this article. Kasey.fr. TrashTimer. As you can see Fritzing supports placing logos on the silkscreen, and as you'll see below the end result is very professional looking (well, in my opinion).
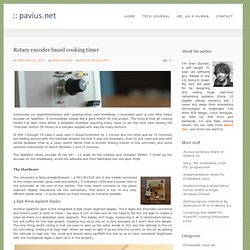
The schematic doesn't show it but there are 2 buttons used in the circuit. The first, connected to pin 6 is used to reset the timer (ie the timer will expire 7 days after the button is pressed). The second button is connected to pin 5 and is used to acknowledge that the timer has gone off, and thereby turning off the LED. Bumblebee - Arduino : Communiquer en bluetooth avec son pc. La connexion série de l'Arduino est très pratique pour communiquer avec un pc, mais son inconvénient est .. le câble USB.
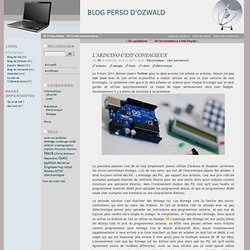
Comment faire pour communiquer à distance sans devoir s’encombrer d'un câble pour relier le module Arduino et le pc ? Tout simplement en utilisant un module Bluetooth pour remplacer la liaison USB. Rotary encoder based cooking timer @ pavius.net: no refunds. Continuing my experimentations with cooking timer user interfaces, I stumbled upon a cute little rotary encoder on Sparkfun.
It immediately looked like a good match for the project. The thing is that all cooking timers I’ve seen have either a simplistic interface requiring many clicks to set the time (like clicking the “minutes” button 50 times) or a complex keypad with way too many buttons. At first I thought I’d need 2 axes (axis 1 would increment by 1 minute and the other axis by 15 minutes) but fiddling around with the trackball showed me that it was not necessary; that I’d just need one axis with tactile feedback (that is, a clicky switch rather than a smooth flowing motion of the controller) and some selection mechanism to switch between 1 and 15 minutes. The Sparkfun rotary encoder fit the bill – 12 steps for full rotation and clickable! Perfect. The Hardware. Arduino Countdown Timer. Micrologio-rtc.png (1477×1102) L'arduino c'est contagieux - Blog perso d'Ozwald. Le 9 mars 2011 dernier (merci Twitter pour la date exacte) j'ai acheté un arduino.
Depuis j'ai pas mal joué avec et j'en arrive aujourd'hui à vouloir utiliser au jour le jour certains de mes bricolages. Le problème c'est que si je dois acheter un arduino pour chaque bricolage que je veux garder et utiliser quotidiennement ça risque de taper sérieusement dans mon budget. Heureusement il y a pleins de solutions à ce problème. La première solution c'est de ne tout simplement jamais utiliser d'arduino et d'oublier carrément les micro-controlleurs Atmega.
L'un de mes amis, qui fait de l'électronique depuis des années, a ainsi toujours utilisé des PIC. La seconde solution c'est d'utiliser des Atmega nu. Www.repulsor.net/minipov/text/
ATTINY. Arduino breadboard. BlinkM.