
Michael ann made.: woven friendship bracelet tutorial. I love the summer friendship bracelet trend that i keep seeing in blog land, so i thought it would be fun to share with you another way to weave a friendship bracelet. one of the parents at work showed me this technique of using a circular cardboard loom and i love how quick it goes, you can easily finish a bracelet in one sitting. - cardboard - something small and circular (like a teacup or ramekin) - scissors, ruler, pen - embroidery thread in pretty colors , thin yarn, or ribbon trace a circle onto your cardboard, and use a ruler to draw 8 lines.

#5252. Tubular Friendship Bracelets. My line-up of DIY projects was put on hold last week when a friend’s grandfather passed away.

She asked if I could make her and her family a series of red, tubular embroidery thread bracelets to wear during the mourning period. And so back into the friendship-making mindset I went! Given that this woman not only threw me a whale of a baby shower, sewed the cover for the girls’ loveseat, knit Sunny the most adorable sock monkey stuffed animal, and hemmed fabric for a project I will unveil in the coming weeks, I dove right in.
Since I spend up to four hours a day breastfeeding Courtland, I was fortunate to have a pattern in mind that was easy to do with baby strapped to boob. I used only red thread, but you could easily mix it up with an array of multi-colored strands for an interesting effect. #6345. There is a tutorial on how to make this bracelet called "Bracelet Pattern #6345 ". To go to the tutorial. Info. #5458. Tutorial. This is a new bracelet that I came up with.
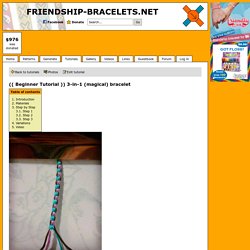
I wanted something I could literally just whip together. This is such an easy bracelet and I hope you guys like it. -ElleMay Here we go! Start off with 3 colors - 2 in the center, and 1 for the sides. Set Up: A|B|C|A Colors Used: A-brown, B-purple, C-blue And now we can start! Step 1 With string B(purple), make a forward-backward over both C and A. Step 2 Now repeat with string C, in the opposite direction. Step 3 Repeat steps 1-2 until you have reached your desired length. :)***This bracelet has more to offer! If you pull the outer A strings tightly, your bracelet will warp, creating a double-sided bracelet to be worn 2 different ways!
Hold the bottom of the bracelet, and pull the outer strings gently and slowly. Once even, pull both outer strings at the same time, pushing gently upward with the colored knots. Now the knots you made are to the outside of the bracelet. Click here to upload photos of your work! How to Make a Cross Knot Friendship Bracelet. The DIY: FASTEST FRIENDSHIP BRACELET EVER. We were super excited to share the Fishtail Friendship bracelet tutorial with you and we are even more excited to share that we've found an easier way to do it.

Don't get me wrong, I will still use the original technique to create more intricate designs but, this new tutorial is so quick you will end up wanting to make one in every color combination possible (like we did!) This tutorial is very similar to the other one so I will just share with you the differences. 1. You will only need to choose three colors of embroidery/friendship thread. Cut two pieces of each color at around 3 feet each. 2. 3. 4. 5. 6. 7. 8. To see more detailed instructions of the end steps please refer to this tutorial. Quiet Lion Creations: Simple Square Knot Bracelet. The first installment in my friendship bracelet-inspired tutorial section.
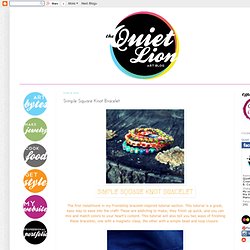
This tutorial is a great, easy way to ease into the craft! These are addicting to make; they finish up quick, and you can mix and match colors to your heart's content. This tutorial will also tell you two ways of finishing these bracelets; one with a magnetic clasp, the other with a simple bead and loop closure. Wear a stack of these bright beauties! Quick and easy to make! Let's get started. Step 1: Gather materials. Step 2: String on your beads.