
Crochet Pattern Octopus Bracelet (free) Why octopus?
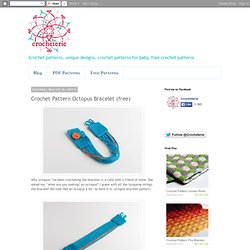
I've been crocheting the bracelet in a cafe with a friend of mine. She asked me, "what are you making? An octopus? " I guess with all the turquoise strings the bracelet did look like an octopus a bit. So here it is, octopus bracelet pattern: Skill level: Advanced beginner. Supplies: Crochet thread #10, crochet hook US 10 (1.30 mm). Yarn ideas: Aunt Lidia’s cotton thread #10, Aunt Lidia’s Bamboo crochet thread #10, Royale Classic crochet thread, DMC Traditions cotton thread #10. Gauge: 9 stitches & 9 rows equal 1x1” square is single crochet stitches. Finished size: Length of the bracelet can be adjusted to your own measures. Approximate time to complete this project: 1 hour. Abbreviations and stitches used: Ch – chain, (chs – chains), Sc - single crochet, Sl st - slip stitch, st – stitch, (sts - stitches). YARN BRACELET DIY! See the updated version of this project here!
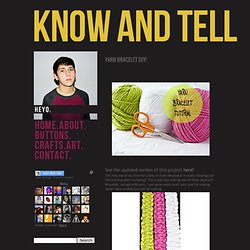
This was one of my favorite crafts to make because it is really relaxing just like knitting and crocheting! This is just like making one of those paracord bracelets, except with yarn. I got some neato small yarn just for making these! Here is what you will be making: These are straight, but you don't need an expert to tell you that making them into a bracelet is as easy as knotting the two ends together (which is what you do..). Ok so now take your 3ft., 2ft., and other 2ft. strand and lay them out. Put your knotted strand under the 3ft. strand. After about 5 or 6 repeats you can start to see the pattern! Once you start to repeat you should start to see the "V" that is created every two repeats. Martenitsa Bracelet – the KUMIHIMO Technique. We sent our baba Marta to Japan – we made a bracelet martenitsa with the kumihimo technique.
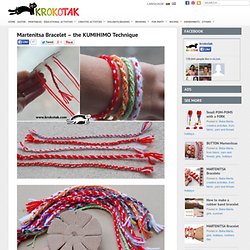
As we didn’t have the original kumihimo disk, we made our own and the result was quite impressive. It’s pretty, it’s easy enough for kids – and you only have to show them how to move the strings along the circle (count 1, 2, 3 and move to the empty slot). My daughter immediately made a bracelet for her friend… it’s easy, and it’s fun! Macrame bracelet with beads. Macrame - friendship-bracelets.net/macrame. By Stefan.
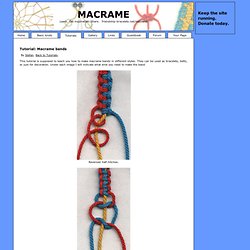
Back to Tutorials. This tutorial is supposed to teach you how to make macrame bands in different styles. They can be used as bracelets, belts, or just for decoration. DIY Heart Friendship Bracelet. As the month of love approaches, we thought we’d combine friendship and hearts into one Valentine’s Day themed tutorial: a heart patterned friendship bracelet!

Using some candy-colored embroidery floss and your familiarity with the chevron friendship bracelet, you’ll be able to whip up one of these tokens of love in a heartbeat. You’ll need:2 colors of embroidery flossscissorstape or clipboard Creating a heart pattern involves just a simple modification to the chevron patterned friendship bracelet. Start by cutting 4 strands of each color, at about 24 inches each, for a total of 8 strands. Alternate the thread colors before tying them together in a knot. Michael ann made.: woven friendship bracelet tutorial.
I love the summer friendship bracelet trend that i keep seeing in blog land, so i thought it would be fun to share with you another way to weave a friendship bracelet. one of the parents at work showed me this technique of using a circular cardboard loom and i love how quick it goes, you can easily finish a bracelet in one sitting. - cardboard - something small and circular (like a teacup or ramekin) - scissors, ruler, pen - embroidery thread in pretty colors , thin yarn, or ribbon trace a circle onto your cardboard, and use a ruler to draw 8 lines cut a small ways into each line, between 1/2 an inch to an inch and make a hole in the middle of the circle where all the lines intersect. cut 7 strands of embroidery floss, about 24 inches long and tie them together with a slip knot. pull your thread bundle through the hole in your cardboard with the knot right up next to the hole and use a little piece of tape to hold it in place while you start. now for the fun part!

DIY Macrame Bracelet - Honestly WTF. Growing up by the beach in Southern California, the ability to knot a macrame bracelet was practically a right of passage.

Although those days are long behind us, we’ve never forgotten the ever-so-simple square knot technique. This time, however, we’re replacing hemp and wooden beads for more updated elements like colorful nylon cord and glossy metal charms. Happy knotting! You’ll need: Start by cutting the knotting cord into two 30 inch, two 20 inch and one 10 inch lengths. Center the 30 inch cord under the two middle strands. Pull tightly and slide the knot up to the top. Finish the 2nd half of the square knot by folding the left cord over the middle strands and under the right cord.
Pull tightly and repeat the steps – left, right, left, right . . . To finish the knots, thread one of the cords onto a needle and sew up the center of 3-4 knots along the backside.