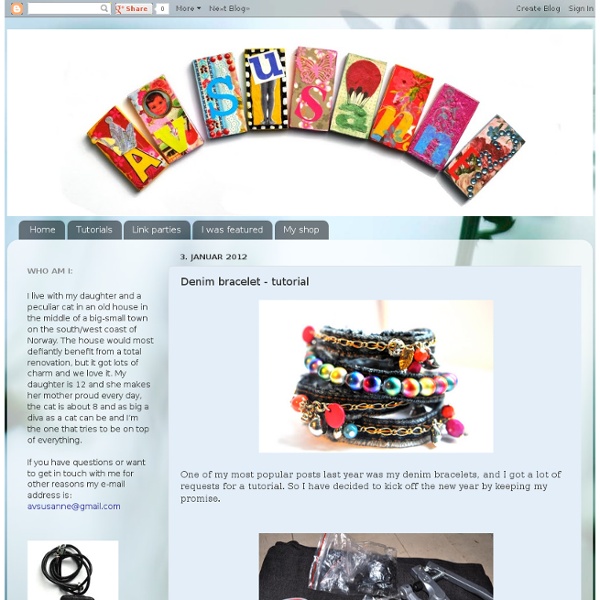
Denim bracelet - tutorial
One of my most popular posts last year was my denim bracelets, and I got a lot of requests for a tutorial. So I have decided to kick off the new year by keeping my promise. What you need to make these bracelets are as follows: A worn out pair of jeansScissorsStrong thread (I used fishing line for my first one)NeedleBeadsPush buttons (I’m using a KAM press with buttons that I god from E-bay.) 1. 2. 3. 4. 5. 6. 7. 8.Push the needle trough the bracelet from the front. 9. 10. The second one that I’ll show you is a little more time-consuming, but just as easy to make. 1 You will need a longer thread for this, but because it’s very easy to get I tangled up I would recommend changing when you’re half way finished. 2 I’m using some tube shaped beads for this and thread one to the string before I push the needle trough the bracelet to secure it. 3 Move the needle a little to the side before pushing it back up, attaching a new bead and pushing it back down.
make a crocheted necklace - wise craft
After a busy week of deadlines, topped off with replacing a laptop after mine died (the night before one of those big deadlines), I had a nice relaxing morning yesterday, crocheting these sweet little necklaces. Trust me when I say, these are quick and easy if you have crochet experience. And fun! Materials: Size 8 pearle cotton thread Crochet hook, Size O/1.75mm (This size gave me a loose chain, which I wanted. Craft glue Seed Beads- For the light blue necklace, I used size 8 opaque butter cream luster round Japanese seed beads. Scissors 1. 2. My necklaces are both about 30" long, and through trial and error I estimated my initial crochet chain to equal about 8 chains per inch. So, to create a necklace approximately 30" long, I rounded off the number of chain stitches I would need to 250. I wanted to add 1 bead to every 10th chain stitch. 250 divided by 10 = 25 beads. 3. 4. 5. 6. 7. 8. That's it! Let me know if you have questions.
Jewelry Making and Beading For Dummies Cheat Sheet
Cheat Sheet Before you begin making jewelry or beading projects, gather some basic tools and supplies and become familiar with recommended lengths for necklaces, bracelets, and more. Consider how to personalize your bead work by using birthstones (precious or semiprecious) or their crystal equivalents. And when you need help — with design inspiration, supply sources, or technique — take advantage of the rich online resources created by other jewelry-making fans. Basic Supplies for Making Jewelry and Beading Projects With just a few basic tools for making jewelry and beading projects, you can create items that are wildly artistic, classically elegant, or something in-between. Wire cutters Round-nose pliers Flat-nose pliers Crimping tool (crimp pliers) Bead organizer with a variety of glass beads Beading cord or thread Memory wire Big-eye beading needle Assorted earwires Assorted clasps Assorted headpins and eyepins Crimp beads Ruler or tape measure Strong adhesive, like E-6000
How to Make Paper Beads | It's Organised
Quick, pretty and surprisingly relaxing — making your own paper beads is easy. These colourful beads were made from origami paper, rolled and varnished in a couple of hours. I chose the paper because I love the colours, but most paper will work. My sheets were only 15cm (6″), so I joined them before cutting out the template. If you have magazines and newspapers waiting for recycling, these make great beads too. You will need: Paper strips measuring 27.5cm (11″) by 2.5cm (1″) (each strip will make 2 beads).Paper bead rollers (or a bamboo skewer or knitting needle, etc).Glue for rolling.Varnish and a soft paint brush for finishing.Toothpicks for drying. These strips make two different beads. The length of the paper strip will determine the thickness of the bead. Instructions: Insert the widest end of your paper strip into the slit in the roller. When rolling bead 2, roll one side at a time.
Fairy Tale summer Anklet sky blue gemstone par AkashasCreations
Related:
Related: