
Add WiFi to Arduino UNO. I noticed a lot of people are getting interested with this tutorial.
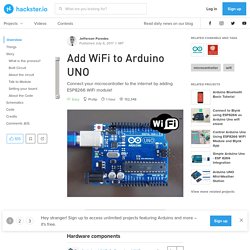
And I also noticed that this is terribly written. So I've added more info and notes a bit. Connect your Arduino to the internet by adding ESP8266 WiFi Module! The ESP8266 Wifi module is a complete WiFi network where you can easily connect as a serving Wi- Fi adapter, wireless internet access interface to any microcontroller based design on its simple connectivity through Serial Communication or UART interface. Adding this module to your Arduino UNO will open you to more and exciting projects. What is the process? There are a lot of ways to use ESP866 for communication. Our ESP8266 will serve as Access Point (AP Mode), meaning it will provide access to Wi-Fi network to other devices (stations) and connects them further to a wired network The process it pretty simple. Built Circuit Connect the pins more described on this Pin table Follow these steps.
About the circuit. RN-XV WiFly Module - Wire Antenna - WRL-10822. The Mental Munition Factory: Step-by-step guide to programming the RN-XV WiFi module for Arduino. The Arduino prototyping standard has been around for about 6 years now, and has proven to be immensely useful for sensing devices.
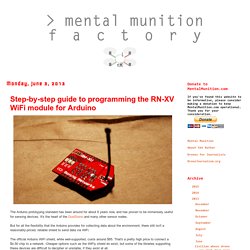
It's the heart of the DustDuino and many other sensor nodes. But for all the flexibility that the Arduino provides for collecting data about the environment, there still isn't a reasonably-priced, reliable shield to send data via WiFi. The official Arduino WiFi shield, while well-supported, costs around $85. That's a pretty high price to connect a $4.50 chip to a network. Cheaper options such as the WiFly shield do exist, but some of the libraries supporting these devices are difficult to decipher or unstable, if they exist at all. I spent a long time myself looking for a cheap, effective WiFi solution for the Arduino platform, and I've been very pleased with the $35 RN-XV module.
WiFly RN-XV Module - Wireless Arduino Board Tutorial - Intro. Steps: 1.
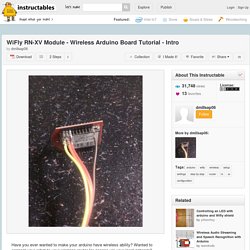
Lay all the parts out and download all the items I listed above. 2. The WiFly module will only be using the 3.3V and Ground pins from the arduino for now. 3. View the Datasheet to see where to connect the power and ground to the module using your dupont cables. 4. To start off, we need to put the module in ADHOC mode so we can connect to the module and edit the settings in the module. Neurogami - Setting up a WiFly RN-XV board. Setting up a WiFly RN-XV board June 2014 So the WiFly arrived in the mail and the hunt began for a guide on getting it up and running.
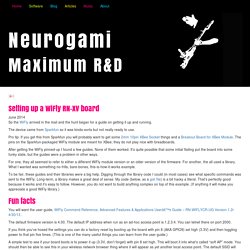
Rn wiflycr ug v1.2r. Tinker, Failure, Solder, Why? What follows is a guide to setting up the RN-XV in the way I have – so it operates autonomously, connects to a wifi network periodically, posts it’s sensor data, and then disconnects.
A few people have shown an interest in how I got it working, so I thought I’d share it here. When I was considering buying a WiFly, I did a lot of searching for information on the web, and for details of other people’s experiences with the device. The main thing I noticed was that there seemed to be a large number of people who were struggling just to get the device connected in the first place, in order to then set it up properly. Most folks seemed to be either using some kind of serial breakout board or cable, or connecting to it using an Arduino or similar prototyping platform. I wasn’t sure how I was going to go about it, but I ordered one anyway. This page was last updated on Monday 28th January 2013. I’m pretty weird in that I like reading instruction manuals.
Channel: 1. The Mental Munition Factory: Step-by-step guide to programming the RN-XV WiFi module for Arduino. WiFly RN-XV Module - Wireless Arduino Board Tutorial - Intro. HOW TO – Using XBees to create a wireless bi-directional MIDI link. April 12, 2009 AT 11:56 pm Overview video on using 2 Xbee modules, Adafruit adapter kits and FTDI cable to transmit MIDI wirelessly.
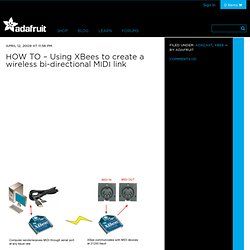
If you have a modern musical instrument, theres a good chance it has a MIDI port. MIDI is an ancient serial protocol that runs at 31.25Kbs, often they come in pairs an Input and Output. Setting up MIDI gear usually requires lots of cabling, tying inputs to outputs across a studio or stage. In this XBee tutorial we’ll show how to configure the XBee to talk at the MIDI baud rate, and then how to create a bi-directional wireless MIDI link… (m4v). Related Sorry, the comment form is closed at this time. XBee Basics - Lesson 1 - General Information and Initial Setup. Arduino fio. Tutorial 9 for Arduino: Wireless Communication. This tutorial was featured on the official Arduino blog on 3/9/2011 This week, we go wireless!
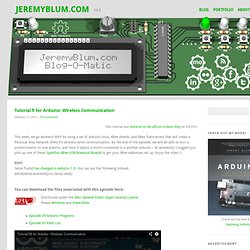
We’ll be using a set of arduino Unos, XBee shields, and XBee Transceivers that will create a Personal Area Network (PAN) for wireless serial communication. By the end of the episode, we will be able to turn a potentiometer on one arduino, and have it adjust a motor connected to a another arduino – all wirelessly! I suggest you pick up one of these Sparkfun XBee USB Breakout Boards to get your XBee addresses set up. Enjoy the video :) EDIT: Serial.flush() has changed in Arduino 1.0. You can download the files associated with this episode here: Café - First steps - JeeLabs. Getting started can be tricky at times.
It depends on where you come from and on your expectations. This section covers hooking up a JeeNode, uploading sketches, getting wireless communication going, setting up sensor nodes, and interfacing with JeeMon. Soldering¶ Soldering is not hard, it just takes patience and a bit of trial-and-error at first. There are many soldering tutorials on the web. JN build instructions¶ Detailed step-by-step [build instructions]( for the JeeNode kit. The USB-BUB from Modern Device has detailed info on their web site as [PDF]( Other build instructions¶ See these build instructions for the [Flash Board]( Does it work?