
OnShape [Wiki ClubElek] Arduino projects. Smart Lock. There are many products available as Smart Lock on the market, few of them looks great and affordable but none of them are compatible with the European BS EN 1303: 2005 cylinder locks.
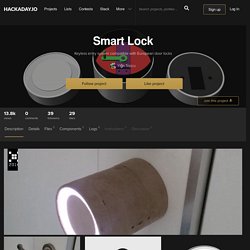
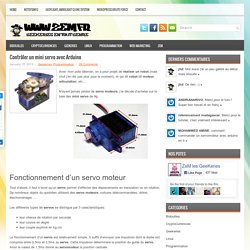
Europe door lock standards are different compared to the door lock standard of North America. Basically there is no door handle outside of the door. From the outside, the door can only be opened by using the key. Therefore, European doors have a single lock cylinder that is used to lock and open the door. Because of that, the mechanism I've built has to be completing three full turns from side to side. Objectives Device must be cheap. Hackster. Projets DIY : Domotique, Objets Connectés, Arduino, Mini PC, Impression 3D - Domotique - Arduino - PI - IoT - Impression 3D. Contrôler un mini servo avec Arduino. Contrôler un mini servo avec Arduino Avec mon pote Idleman, on a pour projet de réaliser un robot (mais chut j’en dis pas plus pour le moment), et qui dit robot dit moteur, articulation, etc… N’ayant jamais piloter de servo moteurs, j’ai décidé d’acheter sur la baie des mini servo de 9g.
Arduino (@arduino) JeeLabs. ESP8266 Witty. Sans titre. I’ve been working some more on my 8×8 LED matrix clock.
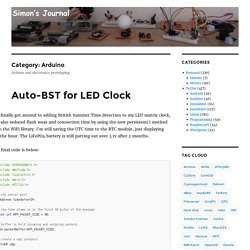
I’ve added a DS1307 RTC chip, which has to run from the 5v pin on the NodeMCU and use 10k pullup resistors between 3.3v and the SCL/SDA pins on the NodeMCU and DS1307. I’m using the Adafruit fork of RTCLib as it has better ESP8266 support and uses unixtime. I’m using this chip as I’ve got a load of them and already have a veroboard setup with the coincell and crystal. I’ve also added a button, which when pressed reads the time from the RTC and displays it, then it fetches the NTP time over the internet and updates the display (and RTC). Rants, raves, rhymes, reviews. All lists. Xavier Carl's Blog - Informatique et Domotique. SmartCampus2014/Tutoriels.
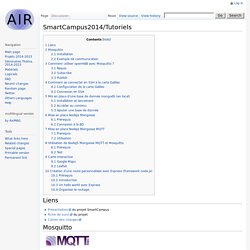
Mosquitto est une implémentation de MQTT, un protocole de M2M de type publish-subscribe.
Fabriquer son propre panneau solaire - La taverne d'Idle. Aujourd'hui je me suis amusé avec des cellules solaires que j'ai commander sur ebay (du chinois toujours du chinois).
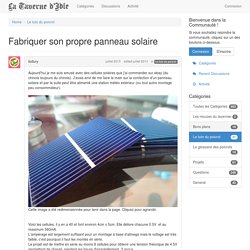
J'avais envi de me faire la main sur la confection d'un panneau solaire et par la suite peut être alimenté une station météo exterieur (ou tout autre montage peu consommateur). Cette image a été redimensionnée pour tenir dans la page. Cliquez pour agrandir. Voici les cellules, il y en a 40 et font environ 4cm x 5cm. Elle délivre chacune 0.5V et au maximum 560mA.L'ampérage est largement suffisant pour un montage à base d'atmega mais le voltage est très faible, c'est pourquoi il faut les montés en série.Le projet est de mettre en serie au moins 9 cellules pour obtenir une tension théorique de 4.5V permettant de chargé, pendant les heure d'ensoleillement, 3 accus.Avec les cellules solaires nous avons : La première chose que l'on remarque, c'est que les cellule solaire sont très fine et surtout très très fragile. Learn on the fly. Getting Started With the ESP8266 Chip - Open Home Automation.
The ESP866 is a tiny WiFi chip that has the huge advantage to come at a ridiculous price point: $5.
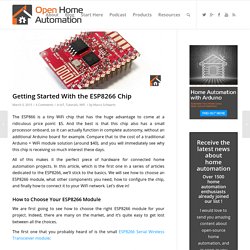
And the best is that this chip also has a small processor onboard, so it can actually function in complete autonomy, without an additional Arduino board for example. Compare that to the cost of a traditional Arduino + WiFi module solution (around $40), and you will immediately see why this chip is receiving so much interest these days. All of this makes it the perfect piece of hardware for connected home automation projects. In this article, which is the first one in a series of articles dedicated to the ESP8266, we’ll stick to the basics. WiFi MQTT Display with the ESP8266. Like many people I have been playing with the Espressif ESP8266 WiFi modules over the last few months.
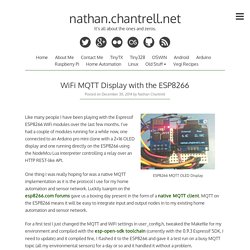
I’ve had a couple of modules running for a while now, one connected to an Arduino pro mini clone with a 2×16 OLED display and one running directly on the ESP8266 using the NodeMcu Lua interpreter controlling a relay over an HTTP REST-like API. One thing I was really hoping for was a native MQTT implementation as it is the protocol I use for my home automation and sensor network.
Luckily tuanpm on the esp8266.com forums gave us a boxing day present in the form of a native MQTT client. MQTT on the ESP8266 means it will be easy to integrate input and output nodes in to my existing home automation and sensor network. Digitalhack's blog: Olimex MOD-WIFI-ESP8266-DEV - Hardware Setup. Over the past couple of days I have taken a break from my home server upgrade and have been working with the Olimex MOD-WIFI-ESP8266-DEV board.

Inductive Charging Set - 5V @ 500mA max ID: 1407 - $9.95. The squarish board with two chips on it is the transmitter (power with 9V).
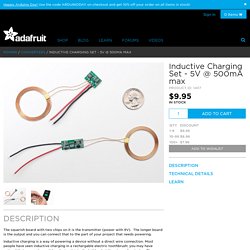
The longer board is the output and you can connect that to the part of your project that needs powering. Inductive charging is a way of powering a device without a direct wire connection. Most people have seen inductive charging in a rechargable electric toothbrush: you may have noticed that you recharge it by placing it into the holder, but there's no direct plug.
These chargers work by taking a power transformer and splitting it in half, an AC waveform is generated into one, and couples into the second coil. This is a basic charger set, and it does work, providing 5V DC output from the output half when the input half is powered with 9V to 12VDC. My name is David Littell.
I'm an embedded systems engineer with about 35 years experience with microprocessors, computer hardware, software, and systems of all sizes. Compte membre. Cube 3D led 8x8x8 avec Arduino - Collaud brothersCollaud brothers. Imprimer du chocolat. ATtiny programmer using Arduino ISP -Use Arduino for Projects. Thanks to: For relatively small (less number of pins than ATmega328) projects, ATtiny series, ATtiny45 or Attiny85 are good choice in terms of its physical size (8-DIP or 8-SOIC) and low power consumption. There are many ways to program it. One of the popular device is USBtinyISP and DASA. Piccolo, the tiny CNC-bot. Coding Fun. TV Volume Loudness Guard using Arduino. UPDATES Mar 05, 2013 Featured on WonderHowTo Feb 14, 2013 Featured on LifeHacker Feb 13, 2013 I have updated the Arduino program in step 4 to support additional remote controls. Feb 13, 2013 Featured on Dangerous Prototypes Feb 12, 2013 Featured on Semageek Feb 12, 2013 Featured on Embedds Feb 12, 2013 Featured on Hackaday.
TeenLogger, a Teensy GPS Logger. The goal In the past two years, i have released two version of GPS logger, with a lot of default like, poor autonomy, need to take off the sdcard to get the log, no function to upgrade the code easily, by the way, i have redesigned a new version with a lot of news feature, see bellow. – Better autonomy. – Be lightweight and portable. – Be rechargeable easily. – Got log directly from USB. – Upgrade code via IDE Arduino through USB. – Future options implemented for improvement. – Many more … Hardware – µC Section The hardware run around a Teensy 2 this very small board run with a ATMEGA32U4 8bit AVR 16 MHz Processor, 25 I/O. – GPS Section The GPS NMEA sentences comes from a PA6B module, i choose this because he is very sensitive and small, better than EM406.
The MTK Command Packet can be found here. RPP - Raspberry Pi Programmeur PIC utilisant GPIO. Posts. In the past I’ve written several blog posts about how to use Arduino to interface with remote power sockets. Arduino. Arduino Shield for CAT M1 and NB-IoT modems. Open Source Projects. Projets. OpenElectronics - Projets open source. Travaux Pratiques Arduino. Introduction. Projects. What is a good way to break this long page into shorter pieces? Discuss: Talk:Projects#too_big_to_edit. Open Circuits These should be projects or links to projects that are open, at a minimum in the sense that there is enough information so that others can reproduce the project.
Lets stay away from sites that are just show cases without the details.