
Secrets of Arduino PWM. Pulse-width modulation (PWM) can be implemented on the Arduino in several ways.
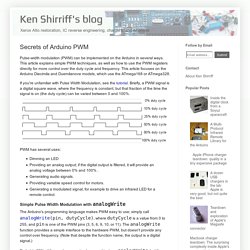
This article explains simple PWM techniques, as well as how to use the PWM registers directly for more control over the duty cycle and frequency. This article focuses on the Arduino Diecimila and Duemilanove models, which use the ATmega168 or ATmega328. If you're unfamiliar with Pulse Width Modulation, see the tutorial. Briefly, a PWM signal is a digital square wave, where the frequency is constant, but that fraction of the time the signal is on (the duty cycle) can be varied between 0 and 100%.
PWM has several uses: Dimming an LED Providing an analog output; if the digital output is filtered, it will provide an analog voltage between 0% and 100% . Simple Pulse Width Modulation with analogWrite The Arduino's programming language makes PWM easy to use; simply call analogWrite(pin, dutyCycle), where dutyCycle is a value from 0 to 255, and pin is one of the PWM pins (3, 5, 6, 9, 10, or 11). Timer Registers Fast PWM. Arduino Projects: Telescope Control with GOTO. Why make your own Arduino control system?
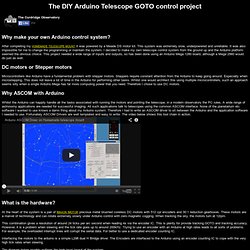
After completing my homemade telescope mount it was powered by a Meade DS motor kit. This system was extremely slow, underpowered and unreliable. It was also impossible for me to change the programming or maintain the system. I decided to make my own telescope control system from the ground up and the Arduino platform seemed the obvious choice. This project needed a wide range of inputs and outputs, so has been done using an Arduino Mega 1280 board, although a Mega 2560 would do just as well. DC motors or Stepper motors Microcontrollers like Arduino have a fundamental problem with stepper motors. Why ASCOM with Arduino Whilst the Arduino can happily handle all the tasks associated with running the motors and pointing the telescope, in a modern observatory the PC rules. What is the hardware? At the heart of the system is a pair of Maxon Motor precious metal brushed coreless DC motors with 512 cpr encoders and 30:1 reduction gearboxes. In short, no. Smooth Head Rotation.
Did you ever tried to rotate the robot head and found the movement nervous?
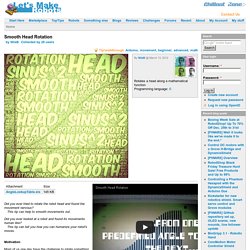
This tip can help to smooth movements out. Did you ever looked at a robot and found its movements human like? This tip can tell you how you can humanize your robot's moves. Motivation Most of us one day have the challenge to rotate something from one angle to another. In this tip we want to go one step further and use a non-linear movement to make the move smooth. Introduction The movement must start from zero velocity and go to zero velocity. One function that has this nature is the Sinus Square velocity over time function. Using this Sinus Square function makes sense in almost every move your robot makes. Improving the Beginner’s PID – Introduction « Project Blog. In conjunction with the release of the new Arduino PID Library I’ve decided to release this series of posts.
The last library, while solid, didn’t really come with any code explanation. This time around the plan is to explain in great detail why the code is the way it is. I’m hoping this will be of use to two groups of people: People directly interested in what’s going on inside the Arduino PID library will get a detailed explanation. Anyone writing their own PID algorithm can take a look at how I did things and borrow whatever they like. It’s going to be a tough slog, but I think I found a not-too-painful way to explain my code.
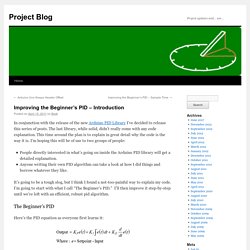
The Beginner’s PID Here’s the PID equation as everyone first learns it: This leads pretty much everyone to write the following PID controller: Compute() is called either regularly or irregularly, and it works pretty well. Sample Time – The PID algorithm functions best if it is evaluated at a regular interval. UPDATE: In all the code examples I’m using doubles. Playground - PIDLibrary. Arduino PID Library by Brett Beauregard contact: br3ttb@gmail.com PID Library Latest version (now hosted on GitHub): v1.0.1 PID Front-End using Processing.org Latest version: v0.3 Older Versions can be viewed / downloaded here What Is PID?
From Wikipedia: "A PID controller calculates an 'error' value as the difference between a measured [Input] and a desired setpoint. So, you tell the PID what to measure (the "Input",) Where you want that measurement to be (the "Setpoint",) and the variable to adjust that can make that happen (the "Output".) For reference, in a car, the Input, Setpoint, and Output would be the speed, desired speed, and gas pedal angle respectively. Tuning Parameters The black magic of PID comes in when we talk about HOW it adjusts the Output to drive the Input towards Setpoint. So what are the "right" tuning values to use? Note: there is also now a PID Autotune Library that can help you determine tuning parameters.