
A tiny Arduino laser cutter. The MicroSlice uses Grbl v0.8 for motion control.
Grbl converts G-Code into commands that the EasyDriver stepper motor controllers understand. We need another program to send the G-Code to Grbl, for this I'll be using Zapmaker's Grbl Controller v3.0. Before you can begin you will need the Arduino IDE, available from the Arduino website. POV Christmas Tree.
The Saltwater etch process. This is a one-off process to produce one printed circuit board by removing unwanted copper by electrolysis in a saltwater solution.
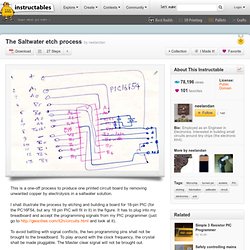
I shall illustrate the process by etching and building a board for 18-pin PIC (for the PC16F54, but any 18 pin PIC will fit in it) in the figure. It has to plug into my breadboard and accept the programming signals from my PIC programmer (just go to and look at it). To avoid battling with signal conflicts, the two programming pins shall not be brought to the breadboard. To play around with the clock frequency, the crystal shall be made pluggable.
The Master clear signal will not be brought out. These decisions mean a board with two .1" pitch connectors, one with 13 connections and the other with five connections, one pin spaced apart from the rest. This is a tutorial intended for the absolute beginner, and almost every step shall be illustrated. Etching a PCB. Dry Film Solder Mask. This Instructable is about dry film solder mask, in other words, is the green stuff that is on top of the circuit board. Dry Film Photopolymer for making circuit boards. How to make a printed circuit board (PCB) using the UV light LED method. This instructable shows how to create well done PCB's using Ultraviolet light.
It took us about 40 boards before we perfected our PCB, so we will share what worked and what didn't work. All the supplies can be bought from Fry's Electronics, Ace Hardware, Goodwill, Radio Shack, and Ebay . Our PCB tested the Atmel 208 pin PQFP Integrated Circuit (it may not look like it from the poor image quality but there were no shorts between all 208 pins! ). The materials needed are as follows.
Creating Printed Circuit Boards with a INKJET Printer. When I first started looking into how to etch my own printed circuit boards, every Instructable and tutorial I found used a laser printer and ironed on the pattern in some sort of fashion.
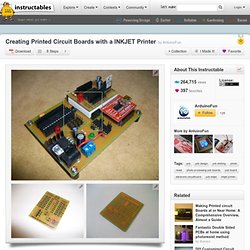
I don't own a laser printer but I do have an inexpensive inkjet printer. This Instructable will show you how to use your inkjet printer to etch your own printed circuit boards, as well as be able to display a printed component footprint on the top side of the board giving you a professional looking design. For this instructable you will be working with chemicals and power tools. Please wear appropriate protective wear. i.e. goggles, latex gloves, etc. SMT Prototype Stencil Printing- Soldertools.net. Prototype Printing of PCBs.
Beginner's Guide to Solder Paste. SMT 'Solder Paste Stencil' Production Jig using a Laser Cutter. Custom PCB Prototyping using a Laser Cutter. Most laser cutters use vector files to print.
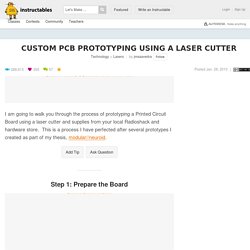
Ours (an Epilog Legend 36 EXT) can print PDF or Adobe Illustrator files. To build a correct schematic, export the footprint of your components (in this case female mini-USB ports) as vector files from Eagle or Fring. Import this to Illustrator, and build your own traces. Keep in mind a few things: • we want the laser cutter to burn away everything that is NOT a trace, therefore the background is black and our circuit is white. Double-sided PCBs with a laser cutter.
With a little practice, you can make excellent double-sided PCBs by combining a laser cutter with chemical etching.
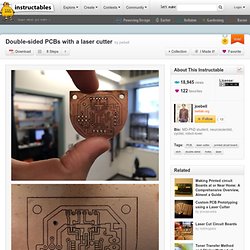
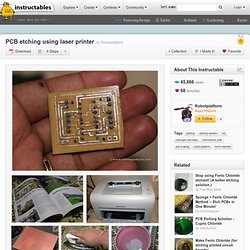
The basic idea is: the laser cutter blasts away spray painted etch resist, then chemicals eat away the exposed copper. Once the copper is gone, the underlying board can be cut again with the laser to make through-holes. No drilling required! After some setup and practice, you should get reliable boards with 8-mil trace/space and hundreds of holes in about 2 hours. You can even cut internal routing and odd board-shapes! PCB etching using laser printer. The goal of this instructable is to share my experience in making PCBs using a Laser Printer If you are really into electronics and robotics, then you must MUST make your own PCB's.
Introduction to PCB etching using toner transfer method In the following technique, I use a solution of hydrochloric acid (Muriatic acid) and Hydrogen peroxide and drop my copper board into it. Toner Transfer Method and Sticker Method of PCB fabrication along with EAGLE tutorial. How to Etch a PCB. Home Brew PCBs. This ible' is for those electronics enthusiasts who want to start making their own PCBs.
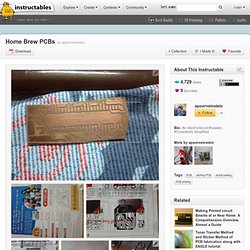
A PCB or Printed Circuit Board is an essential part of electronic gadgets and devices that we use in our day to day lives. It is the board on which all the electronic components of a gadget are soldered together to create a mechanical joint adhering to any particular electronic circuit, called schematic of the circuit which defines various connection between different components present in that circuit. Step#1 : You need to find the perfect/almost perfect materials required for the PCB. List of materials required : Copper board, laser printer, photo paper or glossy paper(i.e. the one you find in those cheap advertisements that come bundled with your newspaper), cellotape, a plastic or glass bowl/box, an old used toothbrush, sandpaper, clothes iron, water, etching solution.
Step#2 : Firstly, take the printout of the circuit(PCB) on the glossy paper using your laser-jet. Killer PCBs. After experimenting with home PCB fabbing for a while, I've finally worked out a process that produces reasonably consistent results that actually look pretty good.
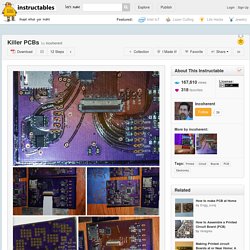
I spent lots of time trying to use the toner transfer method with varying degrees of success (OK, varying degrees of failure might be more accurate). I also tried Philmore/Datak negative photo resist spray with consistently horrible results (the stuff eventually melted the spray nozzle that came with it and leaked all over the place).
Not Green & not recommended. Now I could have purchased presensitized boards and saved a lot of trouble, but I find the material to be too costly for the volume of boards I'm producing. I eventually tried dry film photo resist and I won't be going back! If you haven't tried the toner transfer method, do so. Thus far, I've used three types of dry film resist, all of which performed well:--MG Chemicals 416DFR Dry Film Resist About $20.00 for 12" by 5 feet at Frys, Altex and online.