
Reflow Skillet. Skill Level: Beginner by Nate | July 01, 2006 | 47 comments I've been reflowing SMD parts on PCBs for around a year now.
Spark Fun has barely had the capitol to invest in a hot-air rework station, let alone pick and place machines and industrial reflow ovens. Luckily, as business has increased, revenue has allowed us to purchase a few bottom-dollar machines to help with manufacturing. I'm here to tell you, it was all a waste of money... Don't get me wrong, there is the correct way to manufacture 10,000 units of a caller-ID controller board, and then there is the Spark Fun way. Here is a tutorial that will break down the different approaches to SMD reflow soldering, what we've learned, and what to steer clear of. As always, this stuff can kill you, burn your house down, or make your basement smell pretty foul. PCB Etching Mega Redux « Blondihacks.
Revisiting my PCB Etching.

I’ve had a number of requests to revisit my old PCB etching technique and update it with things I’ve learned since then. This is as much for my benefit as anything. It should be constructive to gather and synthesize my thoughts on this subject. Let’s start with some pictures, because reading is hard. The first board I ever etched. You've come a long way, baby! As you can see, my precision and quality have improved considerably. I’m going to go through my entire process, from Eagle schematic to finished board. Once you get the hang of it, this entire process can be done in a couple of hours and costs a couple of bucks. Part I: Layout I’m not going to give a full tutorial on using Eagle’s PCB layout tool. Start with SparkFun’s Eagle PCB tutorial. Hopefully, you now have something that looks a bit like this. Part II: Mask Now we need to make a mask from that layout. You should now have an acetate that looks something like these.
Part III: Expose Burn, baby, burn. Kruse // Special products for graphic arts. This product is made up of a mixture of solvents and other special products which, when in contact with the toner of laser printers, improves its photographic density.
Simply by spraying Density Toner on a polyester mat sheet printed with a laser printer, you get a photomechanic film suitable for transferring onto an offset plate, a silk screen, etc. With Density Toner the transfer onto photomechanic film can be voided. Bgamari.github.com - Toner transfer PCB etching in a (bio)physics laboratory. While with the recent advent of batch PCB services one-off PCB etching has become remarkable inexpensive.
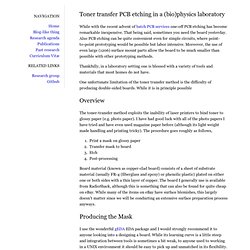
That being said, sometimes you need the board yesterday. Also PCB etching can be quite convenient even for simple circuits, where point-to-point prototyping would be possible but labor intensive. Moreover, the use of even large (1206) surface mount parts allow the board to be much smaller than possible with other prototyping methods. T1559 Product Family. UltraKeet Australia - PCB Superfuser using a Lowell 280 laminator. PCB Superfuser using a Lowell 280 laminator By 'PodeCoet' (Ahmad Tabbouch) - Created Saturday, October 2nd 2011 @ 03:08:57 ADST (GMT+11) *** Updated Sunday, October 28th 2014 @ 18:30:02 AEST (GMT+10)*** Warning: Potentially outdated information!
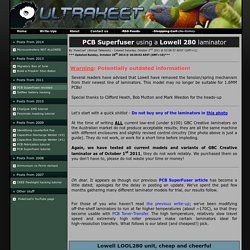
Several readers have advised that Lowell have removed the tension/spring mechanism from their newest line of laminators. This model may no longer be suitable for 1.6MM PCBs! Special thanks to Clifford Heath, Bob Mutton and Mark Weedon for the heads-up. PC to PCB in under 30 minutes - Quick 'n Easy PCB Fabrication. (Now on Hack a Day - I’m chuffed!
:) ) With the explosion of the hobbyist microcontroller scene the past few years, PCB fab houses have sprung up left right and centre. At these wonderous places, you can get professional quality PCBs fabricated for your every desires for reasonable costs. They can range from very low cost and looooong lead times, to acceptable prices (~$50-$100) for low volume runs (‘protoype’ services).
At the larger end of the scale, you can panelise your design and get even better value per PCB Whilst these services are great - and put pro-quality PCBs in the everymans hands - they have besides the cost and lead times one other annoying problem - how do you know your design even works ? Given the above, and because I’m notoriously impatient and hate waste - I often fab my own boards still.
This technique is some amalgamations of various how-tos and guides I’ve read on the internet over the years - so many aspects are probably famliar to some of you. Quick Overview. Quick Printed Circuit Boards. New Tack - I decided to try the "etch like a milling maching" approach Turn an inexpensive hobby paper cutter into a very low-cost, no mess, quick PCB fabrication machine through mechanical mill-etching Here's proof After trying to produce a usable PCB by cutting Copper with the swivel knife (see below), I have come to the conclusion this is a harder problem than I had originally thought (aren't most problems in life this way?).
I did produce and make usable several PCBs that I soldered parts to but a problem remaining was the copper swarf on the edges of the cut and how to remove to not cause subsequent shorts. Also, the swivel-knife-compensation wasn't good enough to produce the detail I wanted.