
HSC768 High-speed camera. The HSC80 was a fun project, but suffered from speed limitations, as well as a limitation facing almost all high-speed cameras: it requires a PC to fully operate and save videos.
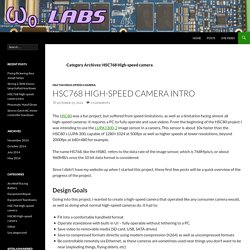
From the beginning of the HSC80 project I was intending to use the LUPA1300-2 image sensor in a camera. This sensor is about 10x faster than the HSC80′s LUPA 300, capable of 1280×1024 at 500fps as well as higher speeds at lower resolutions, beyond 2000fps at 640×480 for example. The name HS768, like the HS80, refers to the data rate of the image sensor, which is 768Mpix/s, or about 960MB/s once the 10 bit data format is considered. Since I didn’t have my website up when I started this project, these first few posts will be a quick overview of the progress of the project.
Design Goals Going into this project, I wanted to create a high-speed camera that operated like any consumer camera would, as well as doing what normal high-speed cameras do. Design. OpenKnit. Tutorial: Use an Old Inkjet Printer to Learn Servo Motor Control With EMC2 – Part 2. Printer Carcass Ready For Use Continued from Part 1 So you’d like to play with servo motor control would you?
Well hopefully you’ve come to the right place and we’ll actually be able to learn you a thing or two. In this next segment we’re going to learn about some of the internals of an old inkjet printer and how to recycle it to serve our purposes. The focus of this series is around setting up a small servo control lab or test bench so you can play with a DC servo motor on a relatively safe and inexpensive mechanism before you move on to more risky setups. So far I’ve torn apart several inkjet printers and they’ve all shared the same type of print-head mechanism based on a small brushed DC motor and linear encoder, so just about any should do the trick. 507 Mechanical Movements. Build Log - Daniel Taylor's Web Presence. Two images today, the sum of which doesn't seem like it should have taken an entire day to complete.

First up, there's the bearing clamp all set to be screwed down to the stepper mount plate. The new progress on this front is the indent seen in the middle of the stepper mount pattern. This allows the bearing clamp (round chunk of aluminum with the bearing in it) to be properly centered, which is especially helpful when doing something like aligning leadscrews and stepper shafts for coupling.
The indent itself is CNC milled, hence it being nice and round. (You can also see lines where the end mill went around- my spindle isn't quite perpendicular to the work surface) The clamp itself (top) was done by hand. Next up is the little rail to trigger the limit switches on the new axis. In in interest of full disclosure, I didn't do this today/this week.
So if that's all that I did today, why did it take so long? MIT Media Lab. The Media Computing Group : Back to Tools The original FabScan was developed by Francis Engelmann in his Bachelor's thesis (cost of materials: 150 Euros).
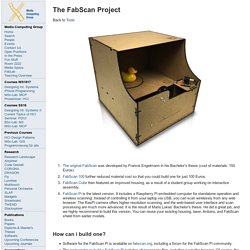
FabScan 100 further reduced material cost so that you could build one for just 100 Euros. FabScan Cube then featured an improved housing, as a result of a student group working on interactive assembly. FabScan Pi is the latest version. It includes a Raspberry Pi embedded computer for standalone operation and wireless scanning: Instead of controlling it from your laptop via USB, you can scan wirelessly from any web browser. mUVe 1 Parts. LaserExposer – LaborWiki - Aurora. „Stable“ gehört nicht zu den möglichen Werten dieses Attributs (experimental, beta, stable, obsolete, unknown).
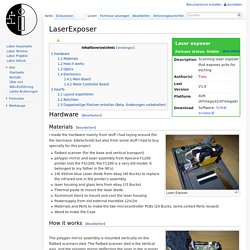
Materials[Bearbeiten] Laser Exposer I made the hardware mainly from stuff I had laying around (for the Germans: Edelschrott) but also from some stuff I had to buy specially for this project. flatbed scanner (for the base and vertical transport) polygon mirror and laser assembly from Kyocera F1200 printer (not the FS1200, the F1200 is a very old model.
It belonged to my father in the 90's). 1W 450nm blue Laser diode from ebay (40 Bucks) to replace the infrared one in the printer's assembly. How it works[Bearbeiten] Sled. TR2003-35.pdf (Objet application/pdf) Low Budget Manual Pick & Place - Aurora. (#gr_crisis friendly) If you are dealing with tiny SMD parts (e.g. 0402 resistors and capacitors), a manual pick and place machine is a helpful piece of equipment for prototyping and small-batch manufacturing.
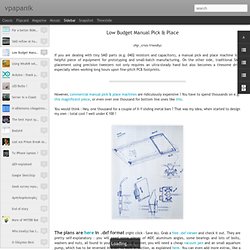
On the other side, traditional SMD placement using precision tweezers not only requires an ultra-steady hand but also becomes a tiresome drill, especially when working long hours upon fine-pitch PCB footprints. You would think : Hey, one thousand for a couple of X-Y sliding metal bars ? That was my idea, when started to design my own : total cost ? Well under € 100 !