
Cardboard Boxes Into Wall Storage Folders. The whole idea of Wall Storage Folders was originally inspired by a little book purse Diane created and shared on Craftypod several years ago.
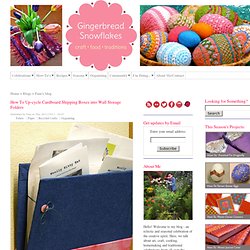
Diane's friend, Michele, who shares her crafty brilliance on Michele Made Me, inspired me to take this idea one step further and recreate these absolutely useful Wall Storage Folders from common ole everyday ubiquitous cardboard! The folder I am making in this tutorial happens to be the perfect place to store knitting and crochet patterns I have ordered and am planning to make this year! It hangs right next to the shelves that house boxes and baskets filled with the yarn assembled for these projects. All very organized and pretty and inspiring! Two of the original folders that still hang on the wall near my computer and printer have been wonderfully useful for temporary storage of recipes, craft ideas and patterns that I have downloaded and printed. And if you prefer, use paper - old paper sacks will even work - instead of fabric. 1.
Trendy Fabric Basket. Collapsible Holiday Storage Container. This sewing project shows you how to sew a collapsible storage container for your holidays.
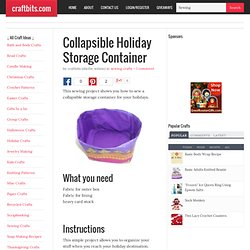
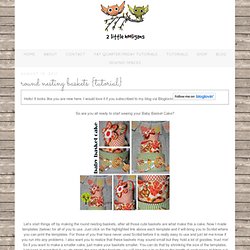
What you need Fabric for outer box Fabric for lining heavy card stock Instructions This simple project allows you to organize your stuff when you reach your holiday destination. Sewn Stash Baskets. Materials To make one basket: Cutting The bottom of this bag is a 12-inch circle.
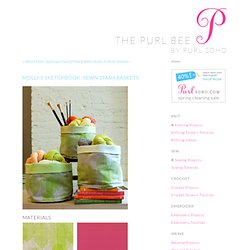
If you have a large compass or circular template feel free to cut your circles using them but if you don't here is a simple way to cut a 12-inch circle: Using a pencil draw a center dot where the circle's center will be. Комодик из картона. - вот такую штучку высмотрела своими глазёнками соседская девчуха и начала выпрашивать сделать такой же.
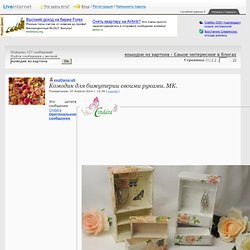
Ну и вспомнила я розовое советское детство, вполне замечательное, незаслуженно охаянное поклонниками уродцев из китайской пластмассы. Правда, редкость была необычайная в заштатных районных цен... городишках, но помнятся прекрасно кукольные домики из раскрашенной фанеры, всякие - столы-стульчики-кроватки. Деревянные, между прочим. Качество отменное, вещи неубиваемые. » Fabric Scrap Basket Tutorial. I thought I’d share with you how to make my fabric scrap “basket”.
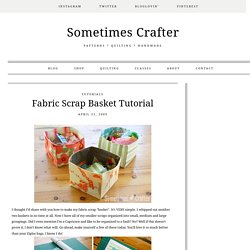
It’s VERY simple. I whipped out another two baskets in no time at all. Now I have all of my smaller scraps organized into small, medium and large groupings. Round Nesting Baskets {Tutorial} Hello!
Tutorial: fabric bins featuring fort firefly by christina mckinney {a Pellon® & Birch Fabrics partnered project} Bringing you guys a super quick and super useful tutorial today.
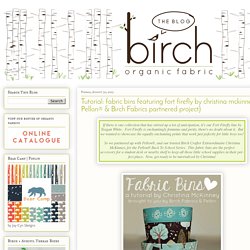
Made from the dreamy new collection by Teagan White, Fort Firefly, these nesting bins are equally cute & functional! Round bottomed fabric storage buckets – a tutorial. I love seeing fabric around the house, and I love making useful things out of fabric.
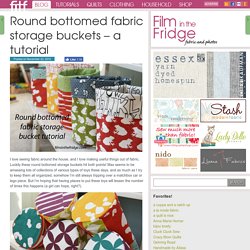
Luckily these round bottomed storage buckets hit both points! Max seems to be amassing lots of collections of various types of toys these days, and as much as I try to keep them all organized, somehow I’m still always tripping over a matchbox car or lego piece. But I’m hoping that having places to put these toys will lessen the number of times this happens (a girl can hope, right?). Of course, toys aren’t the only thing you could store here – they’d also be good for knitting supplies, fabric scraps, hats & mittens, um… a pretty covering for a potted plant? Tutorial: Patchwork Bucket. First of all, thank you for encouraging me to write up this tutorial!
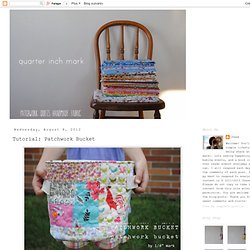
I don't think I am the best writer, but I will try my best to explain each step and share with you. I'd love to see you make some of these fun {patchwork buckets}. You can make one bucket within 2 hours and enjoy this tutorial. It has 71 images, so you'll need a cup of good tea to go with it! I am leaving out all the measurement of each item, since everyone's {patchwork bucket} size would varies. Collapsible Storage Bins Tutorial. When we arrived in Oregon for the summer I quickly realized that the few toys we brought were already everywhere and we had no where to put them away- hate that!
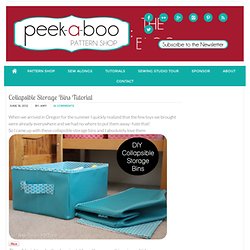
So I came up with these collapsible storage bins and I absolutely love them They slide right under the changing table and keep everything nice and tidy and this girly has a lot of things that need a home And they collapse down so they’ll be easy to move (and we move often) or store when not in use. Life with Lucie & Ella: How to Make Custom Storage Boxes. Yesterday, I posted about the stylish storage box tutorial that I shared over at DIY Your Way this week. Man, I just love these boxes! But, it got me to thinking that shoeboxes are not always the size of box that we need for a specific purpose.
The Wool Food Mama: Ticky Tacky Little Boxes. Instructions for a fast little project for one yard of medium to lightweight canvas. One yard, six little fabric boxes. Supplies. 1 yard (45 inches wide) mid weight canvas or similar woven48 random or mismatched buttons1 hank of cotton floss Instructions. Cut twelve (12) 11x11 squares. Take one square and fold diagonally. Cut off each corner, as shown, measuring 3 inches from the points. Hanging Storage Baskets by The Mother Huddle. Fabric Cuts: From your fabric cut six 18½ x 28 inch pieces, and three 4 x 10 ½ inch pieces. You will then iron them onto you interfacing per it's instructions, and then cut out.
Trust me, it's easier than cutting out the pellon and then ironing! Diy – Boxes & Bags. 1. For this diy you need a ruler, a pair of scissors, a pencil, glue and 2 sheets of carton. A3 size. 2. Start with one of the sheets. Lay the paper so you have the shorter sides of the paper on your left and right. Draw a line 4.9 cm from the upper edge. /// 1. 3. /// 3. 5. /// 5. (I) (L)ove (D)oing (A)ll Things Crafty!: DIY Desk Organizer.
I love quick and easy projects! For today's post I want to share the with you all the coolest stationary desktop organizer! Rrrrrrrrrrrrrrrrrrrrr, isn't it WILD! DIY: Storage Boxes ‹ Bungalow5. DIY: Storage Boxes Posted by: Hulda Tags: boxes, DIY, Hulda, kasser, Leather, læder, opbevaring, storage Posted date: October 2, 2013 | 6 Comments. Tutoriel: Comment fabriquer un meuble en carton - Céline Kart'on. ETAPE 1 : Découpe du carton Choisissez un carton solide n’ayant pas pris l’eau, sans trou, ni pliure. Le sens de la cannelure est important, positionnez la cannelure verticalement, il est beaucoup plus solide. Alors que la cannelure positionnée horizontalement, le carton se plie.Les Profils : Pour réaliser un meuble en carton, il vous faut 3 plaques de carton suffisamment grandes, pour découper les profils du meuble.
Qu’est-ce qu’un profil me direz-vous ? Ma boîte à fils... - Le Blog de Cathy73.