
0to255. Design.tutsplus. In this tutorial I'm going to show you the inspiring process of drawing a Vampiress and her Voodoo-pet in a vintage portrait illustration with grungy elements in Adobe Illustrator.
We will move step-by-step from sketch to the final vector colored image using custom brushes, gradients and the Pen Tool. Ready? Adobe Illustrator & Photoshop tutorial: Create a realistic 3D character without 3D software. It's Guy Fawkes Night! Create a Bonfire With Blends in Adobe Illustrator. Remember, remember the fifth of November - gunpowder, treason and plot!
It's Guy Fawkes Night in the UK, which is also known as Bonfire Night. It's the anniversary of the day Guy Fawkes was caught trying to blow up the House of Lords using gunpowder. It's observed by lighting bonfires, traditionally with a stuffed "Guy" on top, as well as several firework displays (to signify the gunpowder element of the plot). In this tutorial, you will learn a new technique for creating fire in Adobe Illustrator, with the Blend Tool, which is much easier than with the Mesh Tool. Design.tutsplus. As the fall approaches in many parts of the world, designers and illustrators might already be thinking about the upcoming Halloween holiday, especially those that are based in the U.S.
In this tutorial, we will show you how to illustrate a cute and scary children's illustration using techniques that you could easily incorporate into your own Halloween artwork. Let's get started! Before we begin, I would like to discuss some things about the process that I will use. For this illustration I will only use a basic Round Brush, using the settings below. 1-In Brush Tip Shape you can choose between the brushes you have loaded, change the size, hardness or spacing (this last one will leave it to 0). 2-In Shape Dynamics, select Control: Pen Pressure to activate the pen pressure. 3-In transfer, select Control: Pen Pressure to control the flow of paint from the pen pressure. 4-You can combine all of these features along with brush Opacity to get the stroke you want.
Adobe Illustrator tutorial: Create a Death Goddess inspired by Mexico’s Day of the Dead. Create a Painted Portrait Effect in Illustrator Using the Bristle Brush. In the past, when I wanted to create a paint-like effect, I always opened Photoshop and relied on the trusty old bitmap graphic.

That is, until I discovered the Bristle Brush in Illustrator. The Bristle Brush (which is actually a set of brushes) allows you to paint with layers of vector strokes that apply different shades and transparencies to the stroke. The result is a beautiful and realistic looking paint stroke that is 100% vector. How to Create an Incredible Typographic Illustration - Part 1. List of colors - Wikipedia, the free encyclopedia. The following is a list of colors.
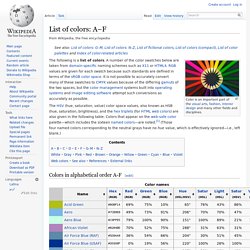
A number of the color swatches below are taken from domain-specific naming schemes such as X11 or HTML4. RGB values are given for each swatch because such standards are defined in terms of the sRGB color space. It is not possible to accurately convert many of these swatches to CMYK values because of the differing gamuts of the two spaces, but the color management systems built into operating systems and image editing software attempt such conversions as accurately as possible. The HSV (hue, saturation, value) color space values, also known as HSB (hue, saturation, brightness), and the hex triplets (for HTML web colors) are also given in the following table.
Twenty-Six Types of Animals by Jeremy Pettis. Creative Curio » The Color Wheel and Color Theory. Color is such a vast and variable element that it can be difficult to cover it fully in any one post.
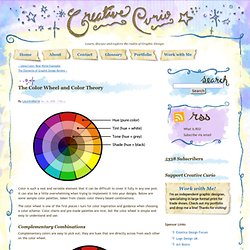
It can also be a little overwhelming when trying to implement it into your designs. Below are some sample color palettes, taken from classic color theory based combinations. The color wheel is one of the first places I turn for color inspiration and guidance when choosing a color scheme. Color charts and pre-made palettes are nice, but the color wheel is simple and easy to understand and use. Launchlist - Your one stop website checklist! Design.tutsplus. Learn how to create a simple three-dimensional icon of a paint bucket, complete with paint splotches, with this colorful tutorial.
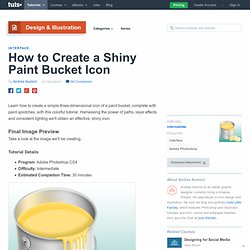
Harnessing the power of paths, layer effects and consistent lighting we'll obtain an effective, shiny icon. Take a look at the image we'll be creating. Design.tutsplus. This tutorial takes a brief look at the quintessential aspects of 1950's automotive advertising, the aesthetics of the cars and the portrayal of their owners.

Then taking what we've learned to create an image that embodies the spirit of the bold 50's auto ads. You can find the source files in the directory labeled 'source' that came in the files that you downloaded. You may wish to look through them briefly before we begin. The 1950's have always greatly inspired my work, from its children's book illustrations, to cartoons, and advertising, all have a very pleasing aesthetic.
How to Create the Discreet Charm in Illustrator - Illustrator Tutorial. Adobe Illustrator TutorialFinal Image Preview You can download the source vector file for this tutorial Our guest is the professional illustrator Catherine Dedova.
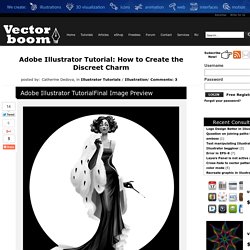
Today she will share with you the steps of creation of the vector illustration. The Preparatory Phase. Explore new-folk illustration styles - Tutorials - Digital Arts. From Sketch to Vector Illustration. Hey everyone!
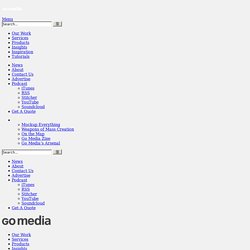
Welcome back to the GoMediaZine. There has been such a wonderful response on my vector art tutorial “Beautiful Vector Illustration” that I thought I better write another one. If you recall in that tutorial I discussed how to create vector illustrations using photographs as your starting point. A technique of vector illustrating that takes a little bit more skill that I did not cover is starting with a hand drawn sketches. Comment faire un motif répétitif dans le par SweetBonnieChristine.
Design.tutsplus. In this tutorial we're going to illustrate a not so scary vampire in a geometric style. We'll be using basic shape tools and the Pathfinder panel as well as a great method of creating a unique color palette. Let's get started... mwahahaha! Design.tutsplus. This tutorial looks at the way in which self promotional images can be used flexibly and powerfully to talk to your clients and with any luck get you some work. Step by step I’ll guide you through an iterative promotional design, and show you some top tricks with texture along the way.
You can find the Source files in the directory labeled 'source' that came in the files that you downloaded. Design.tutsplus. Pucker up, let's create a sweet pair of super glossy vector lips. Start with a sketch, scan it in, Live Trace it, then proceed to color your illustration with layer upon glossy layer until your vector lips are complete.
The workflow uses the Eraser Tool to reveal the shadows below, which is a useful approach to review. Let's get to it! Below is the final design we will be working towards. First, draw the lips on paper. Design.tutsplus. Take your skills to the next level with this tutorial on creating a shiny voluminous object. We'll cover how to use a variety of tools like Gradient Mesh and 3D effects to create a more realistic illustration. Let's great started! Below is the final image we will be working towards. Want access to the full Vector Source files and downloadable copies of every tutorial, including this one? Join Vector Plus for just 9$ a month. Design.tutsplus. In a today's tutorial we are going to draw a creepy zombie! It is a good character for beginners in Adobe Illustrator.
The reason being is that zombies have lumps, bumps and body parts out of proportion, so you don't need to worry about it. One more reason to draw a zombie is it's Halloween. Let's get to it and stick with us as there is a cheeky surprise at the end! GTA V Logo in Illustrator and Photoshop. How to Create a Vintage Ocean Liner Poster. Pin by Denise Dee on Graphic Design. How to Create a Gothic Window Using ColliderScribe and Adobe Illustrator. Design.tutsplus. Adobe Illustrator Tutorial: Create a Semi-Realistic Oil Barrel. How to use brushes in Adobe illustrator to create an angry octopus. Adobe Illustrator tutorial: Master composition in vector art. How to create a bloody Halloween ornament using Adobe Illustrator. Halloween is getting closer people! So I’ve decided to make few tutorials dedicated to this wonderful holiday. Today I’ll lead you through not so hard 20 steps so finally I could create a bloody Halloween ornament yourselves.
You might be wondering what so psychedelic about this ornament? Well, I tried to add some trippy Aztec to it and the coloring is more intense than traditional Halloween palette. Step 1 Use Pen Tool (P) to draw a face silhouette. Step 2 Use Ellipse Tool (L) to add eye-hole, nose-hole and a dropped out eye. Step 3 Copy (Cmd+V) and Paste in Front (Cmd+F) the eye-hole. Step 4 Copy (Cmd+V) and Paste in Front (Cmd+F) the eye-hole 2 times. Step 5 Add 2 more circles inside the eye – one for the iris and another for the pupil. Step 6 Color the head with solid colors. Step 7 Use Ellipse Tool (L) to create the base for the tooth. Copy both blood and base and narrow them a bit.
Select all tooth parts and Group ‘em (Cmd+G). How to create psychedelic Halloween pumpkin face using Adobe Illustrator. How to use Blending Tool in Adobe Illustrator to create psychedelic designs. Hey guys! Some time ago I was asked a question how am I doing the lined artwork. Today I’d like to share with you some basic tips on Adobe Illustrator’s Blending Tool. I’m sure some know how to use it. Still I hope others will find this short 12-steps tutorial useful. Step 1 Make new document (Cmd+N) 1000px wide and 1000px tall. Step 2 Draw 3 lines with Pen Tool (P).
Step 3 Select Blend Tool (W) and click the first line, then click the second and then click the third. Step 4. Using complementary colors to create vibrant images. How to draw mushrooms in Adobe Illustrator. Create a Painterly Landscape with the Blob Brush Tool. How to create a trippy psychedelic poster.