background preloader

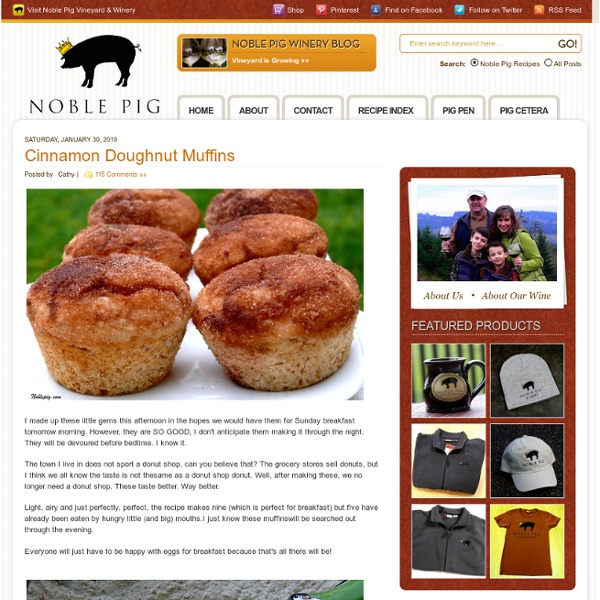
Cinnamon Doughnut Muffins

Cinnamon Doughnut Muffins
I made up these little gems this afternoon in the hopes we would have them for Sunday breakfast tomorrow morning. However, they are SO GOOD, I don’t anticipate them making it through the night. They will be devoured before bedtime. I know it. The town I live in does not sport a donut shop, can you believe that? Light, airy and just perfectly, perfect, the recipe makes nine (which is perfect for breakfast) but five have already been eaten by hungry little (and big) mouths.I just know these muffinswill be searched out through the evening. Everyone will just have to be happy with eggs for breakfast because that’s all there will be! In a large bowl,sift flour, baking powder, salt, nutmeg and cinnamon; whisk to combine. In another bowl, combine sugar, oil, egg, and milk. Stir wet ingredients into dry ingredients just until moistened. Fill greased or paper-lined muffin cups half-full; place one teaspoon jam on top. Place melted butter in a small bowl; combine sugar and cinnamon in another bowl.

Rainbow Jello Recipe June 22, 2010 When I was young, rainbow Jello would always be one of the offerings on the dessert table. I used to peel the layers of Jello apart and eat them one by one, my favourite being cherry. I don’t eat Jello much, but when I do, I prefer eating rainbows. It’s funny because people are still impressed by rainbow Jello! Rainbow Jello Recipe adapted from The Food Librarian5 small packages of Jello (I used cherry, grape, blueberry, lime and lemon) 4 1/2 tablespoons of unflavoured gelatin 1 can sweetened condensed milkMix the cherry Jello with 1/2 tablespoon of gelatin.

Your First Loaf - A Primer for the New Baker The Fresh Loaf Pocket Book of Bread Baking Now available for Kindle When I tell people I am into bread baking, people often respond by telling me that they wish they could bake bread but it just seems too complicated. I find this discouraging, because baking a basic loaf of bread is about the easiest thing you can do in the kitchen. Once you understand what is going on in a simple loaf of bread you should be able to look at 90% of more difficult bread recipes and have a sense of what that loaf will taste and feel like. Bread, at its core, is just four things: Flour Water Yeast Salt That's it. Each ingredient and step in the process of making bread serves a distinct purpose. Understanding the Ingredients Flour. These are the fundamental ingredients for making a decent loaf of bread. Once you understand the way these four principle ingredients function, you can look at any recipe and realize that the basic rules of how bread works don't change. Understanding The Process Kneading Rising Baking Eat!

Pie Pops Alber Elbaz speaks about “lightness” during interviews before his collections. I think his summation of what women need seems pretty accurate. Yes, we need lightness/ease/mobility. I love the way Elbaz makes clothes. His Lanvin spring 2008 collection made me cry. I like lightness. The different flavors. Cinnamon, Sugar, cornstarch, these three were the main ingredients used to hype the filling. I made blackberry filling with just sugar and cornstarch. I label all my homemade jams and fillings. With the same lolipop stick, I’ve sealed the pie, making indents all around the pop. Very crucial to slather egg whites on pie exterior. Blackberry Apple. Pumpkin Pies to go. In case you’re into saving desserts, this is fridge friendly too. <a onclick="javascript:pageTracker.

Roasted Garlic Soup with Parmesan Cheese Recipe at Epicurious Preparation Preheat oven to 350°F. Place 26 garlic cloves in small glass baking dish. Add 2 tablespoons olive oil and sprinkle with salt and pepper; toss to coat. Cover baking dish tightly with foil and bake until garlic is golden brown and tender, about 45 minutes. Cool. Melt butter in heavy large saucepan over medium-high heat. Divide grated cheese among 4 bowls and ladle soup over.

My Favorite Cake. Period. I use the word “favorite” too often. But this time I think I mean it. This cake is the cake I make for myself. I don’t share it. I don’t bring it to work. Of course even as I type this I am thinking of other favorite cakes, which I will eventually get around to sharing— but this is the most important. GREEN CITY MARKET REMINDER: If you’re in Chicago, don’t forget that the Green City Market is still up and running all winter long! Caramel Cake (Gourmet, January 2008) Cake: 2 cups plus 2 tablespoons sifted cake flour (not self-rising; sift before measuring)1 teaspoon baking powder3/4 teaspoon baking soda1/2 teaspoon salt1 stick (4 oz) unsalted butter, softened1 cup granulated sugar1 teaspoon pure vanilla extract2 large eggs, at room temperature 30 minutes1 cup well-shaken buttermilk Caramel Glaze: 1 cup heavy cream1/2 cup packed light brown sugar1 tablespoon light corn syrup1 teaspoon pure vanilla extract Make cake: Preheat oven to 350°F with rack in middle.

Basic Flour Tortilla Recipe at Epicurious yield Makes 8 large tortillas Preparation In a large mixing bowl, combine all of the ingredients and 1/2 of the water. Heat a griddle or cast iron pan to medium heat. The cooked tortillas will keep for two weeks in the refrigerator or up to six months in the freezer. Zebra Cheesecake recipe @Not Quite Nigella You know the story - girl meets recipe and falls in love after seeing recipe across the crowded internet. The recipe looks a bit different from what she is used to so girl is instantly intrigued. After the first tempting glimpse, girl can't get recipe out of her mind. Recipe even features in girl's dream that evening. Girl wakes up, thanks the gods of culinary fate that she has the ingredients to make that recipe and so begins the love story of the girl who met a Zebra cake. Tuty's lovely blog Scent of Spice was the blog that first introduced me to this amazing Zebra cake. The original recipe was for a regular buttercake which I had all of the ingredients for but I wanted to make it as a cheesecake. For those of you unfamiliar with Japanese cheesecakes, they're nothing like regular baked or unbaked cheesecakes. I made the batter according to the instructions and clutched my hands together anxiously in front of the oven. The End. Preparation time: 30-40 minutes Baking time: 1 hour Serves 12

Dizzy Girl Bakes How to Microwave Gourmet Popcorn in a Brown Paper Bag Peeeeee-yew! I’m done with the stinky stench of microwave popcorn. Actually, I haven’t popped a single bag of that toxic smelling stuff in years since I hate the thought of being swindled by a stank bag of greasy kernels. That’s right people, I’m calling foul on microwave popcorn since it’s a reeking wallet rip off. Doing the mathy math, microwave popcorn costs around $22.65 for 12 boxes with 3 packets per box (source Amazon) — that’s an eye-popping $3.53 per pound! Sure, you may think you’re paying all that delicious cash for a magic metal-lined bag that pops better kernels and cooks your corn more evenly. Now let me pop the big question: have you ever recycled your leftover microwave popcorn bags? Speaking of waist, do you know how many calories are contained in those popcorn flavor packets? Act II Popcorn Ingredients: Popcorn, Partially Hydrogenated Soybean Oil, Salt, Natural and Artificial Flavors, Annatto Color. Fish? Step One: Get a brown paper bag Step Two: Bag your popcorn

Hi Hat Cupcakes I did it. I finally made them. Hi Hat Cupcakes have consumed my cupcake thoughts since I first saw their tall chocolate dipped tops online after I started blogging. But, I have to tell you, I’ve been nervous to make them. But this weekend, I tried them. So I decided to use the only recipe I remembered seeing. > Update: I just realized this recipe is also from the book, Cupcakes! Chopped chocolate. But even better with the frosting. If I had paid attention to the directions beforehand I don’t know if I would have been as eager to get started. 12 minutes later and a candy thermometer in check to make sure the frosting formed stiff peaks at the right temperature. Actually, it never made it to just the right temp, but after 12 minutes… I was over holding the hand mixer. So I took a leap of faith it would work and piped it on the cupcakes… as tall as I could get it. The cupcakes went in the freezer while I prepared for the scary part. One bag of semi-sweet chocolate. Tasty. Okay, here goes…

Killer Peanut Butter Mousse Brownie Pie I can think of worse ways to die... We’re eating a chilled “pie” made of layers of fudgy coffee brownies, rich airy peanut butter mousse, crumbled Reese’s peanut butter cups and finished with a drizzle of ganache. It’s a well-known fact that sweets are not really my cuppa beer. (I don’t really do “joe” either!) That being said, T-dog loves him some sweets so from time to time I give in and make him something decadent. Going into the this dish with the concept in my head, I had no idea how wildly popular it was going to turn out to be! Killer Peanut Butter Chocolate Pie For the Brownies: 4 oz dark chocolate, chopped 1 stick butter, cut in cubes 1 tbsp instant espresso or coffee (optional) 2 eggs 1 1/2 tsp vanilla 3 fingered pinch of salt 1/2 cup brown sugar (packed) 1/2 cup granulated sugar 1/2 cup all purpose flour For the Peanut Butter Mousse: 3/4 cup creamy peanut butter, (do NOT use natural or crunchy!) For the Ganache: 1/3 cup heavy cream 1/4 cup semisweet chocolate chips

How to Make Marshmallow Fondant This time I decided to make it with those mini fruit flavored marshmallows. I had to sort them by colour first. I figured they would add a little bit of flavor to the fondant so I wouldn't have to add much flavoring oil. I use gel colours to dye my fondant but regular food colouring will work too. You won't be able to get really dark colours without making your fondant sticky, but for lighter colours you can just even it out with more icing sugar. I also had lemon oil and coconut flavoring on hand.. oh la la the value brand (which still works fine). Step One: Take a couple of handfuls of marshmallows and put them in a microwave safe bowl. I like to make smaller batches because its easier to add the colour to the melted marshmallow than it is to work the colour into the fondant later. Step Two: Stick the marshmallows in the microwave for ten seconds at a time until the are puffed up and easily stir into a goo with a wooden spoon. Step Three: Step Four: Fondant with the icing sugar kneaded in.

Million $$$ Brownies « ~ Katy ~ Ah, the Million Dollar Brownies. As a kid, I couldn’t get enough sugar, and sugar in chocolate form was (and still usually is) my sugar-high of choice. This recipe was in one of Mom’s favorite cookbooks, so I gave it a go and never stopped making them. This reminds me of Mary going to the Dairy Queen with Mom to get Buster Bars for everyone. Once, I made the frosting and was rudely interrupted while attempting to consume it. I haven’t had these in a long time. Million $$$$ Brownies makes a 9′x13″ cake pan In medium saucepan over low heat melt while stirring: 1 Cup Butter 3/4 Cup Cocoa Powder - Dutch Process makes a darker chocolatier brownie Add and mix well 2 Cups Sugar add one at a time whisking vigorously between each addition: 4 Eggs Add and mix well: 1 Cup Flour 1/2 tsp Salt 1 tsp Vanilla Spray a 9″x13″ pan with cooking spray then pour in batter and bake at 350° for about 30 minutes or just until it starts to pull away from the edge of the pan. Million $$$ Frosting 1/2 Cup Butter 1 egg

Thai-Style Beef with Noodles Recipe at Epicurious photo by Romulo Yanes yield Makes 4 servings active time 40 min total time 40 min Don't be intimidated. Preparation Mix together soy, honey, 1 tablespoon fish sauce, and 1/4 teaspoon salt in a shallow baking dish, then add steak and turn to coat. While steak marinates, heat 2 tablespoons oil in a small heavy saucepan over medium-high heat until it shimmers, then cook shallots, stirring occasionally, until browned well, about 8 minutes. Heat grill pan over medium-high heat until hot, then lightly oil. Meanwhile, toss bell pepper and scallions with remaining tablespoon oil, then grill, turning frequently, until softened, about 5 minutes. While steak stands, cook noodles in a pasta pot of boiling unsalted water until al dente, 4 to 7 minutes.

Related: